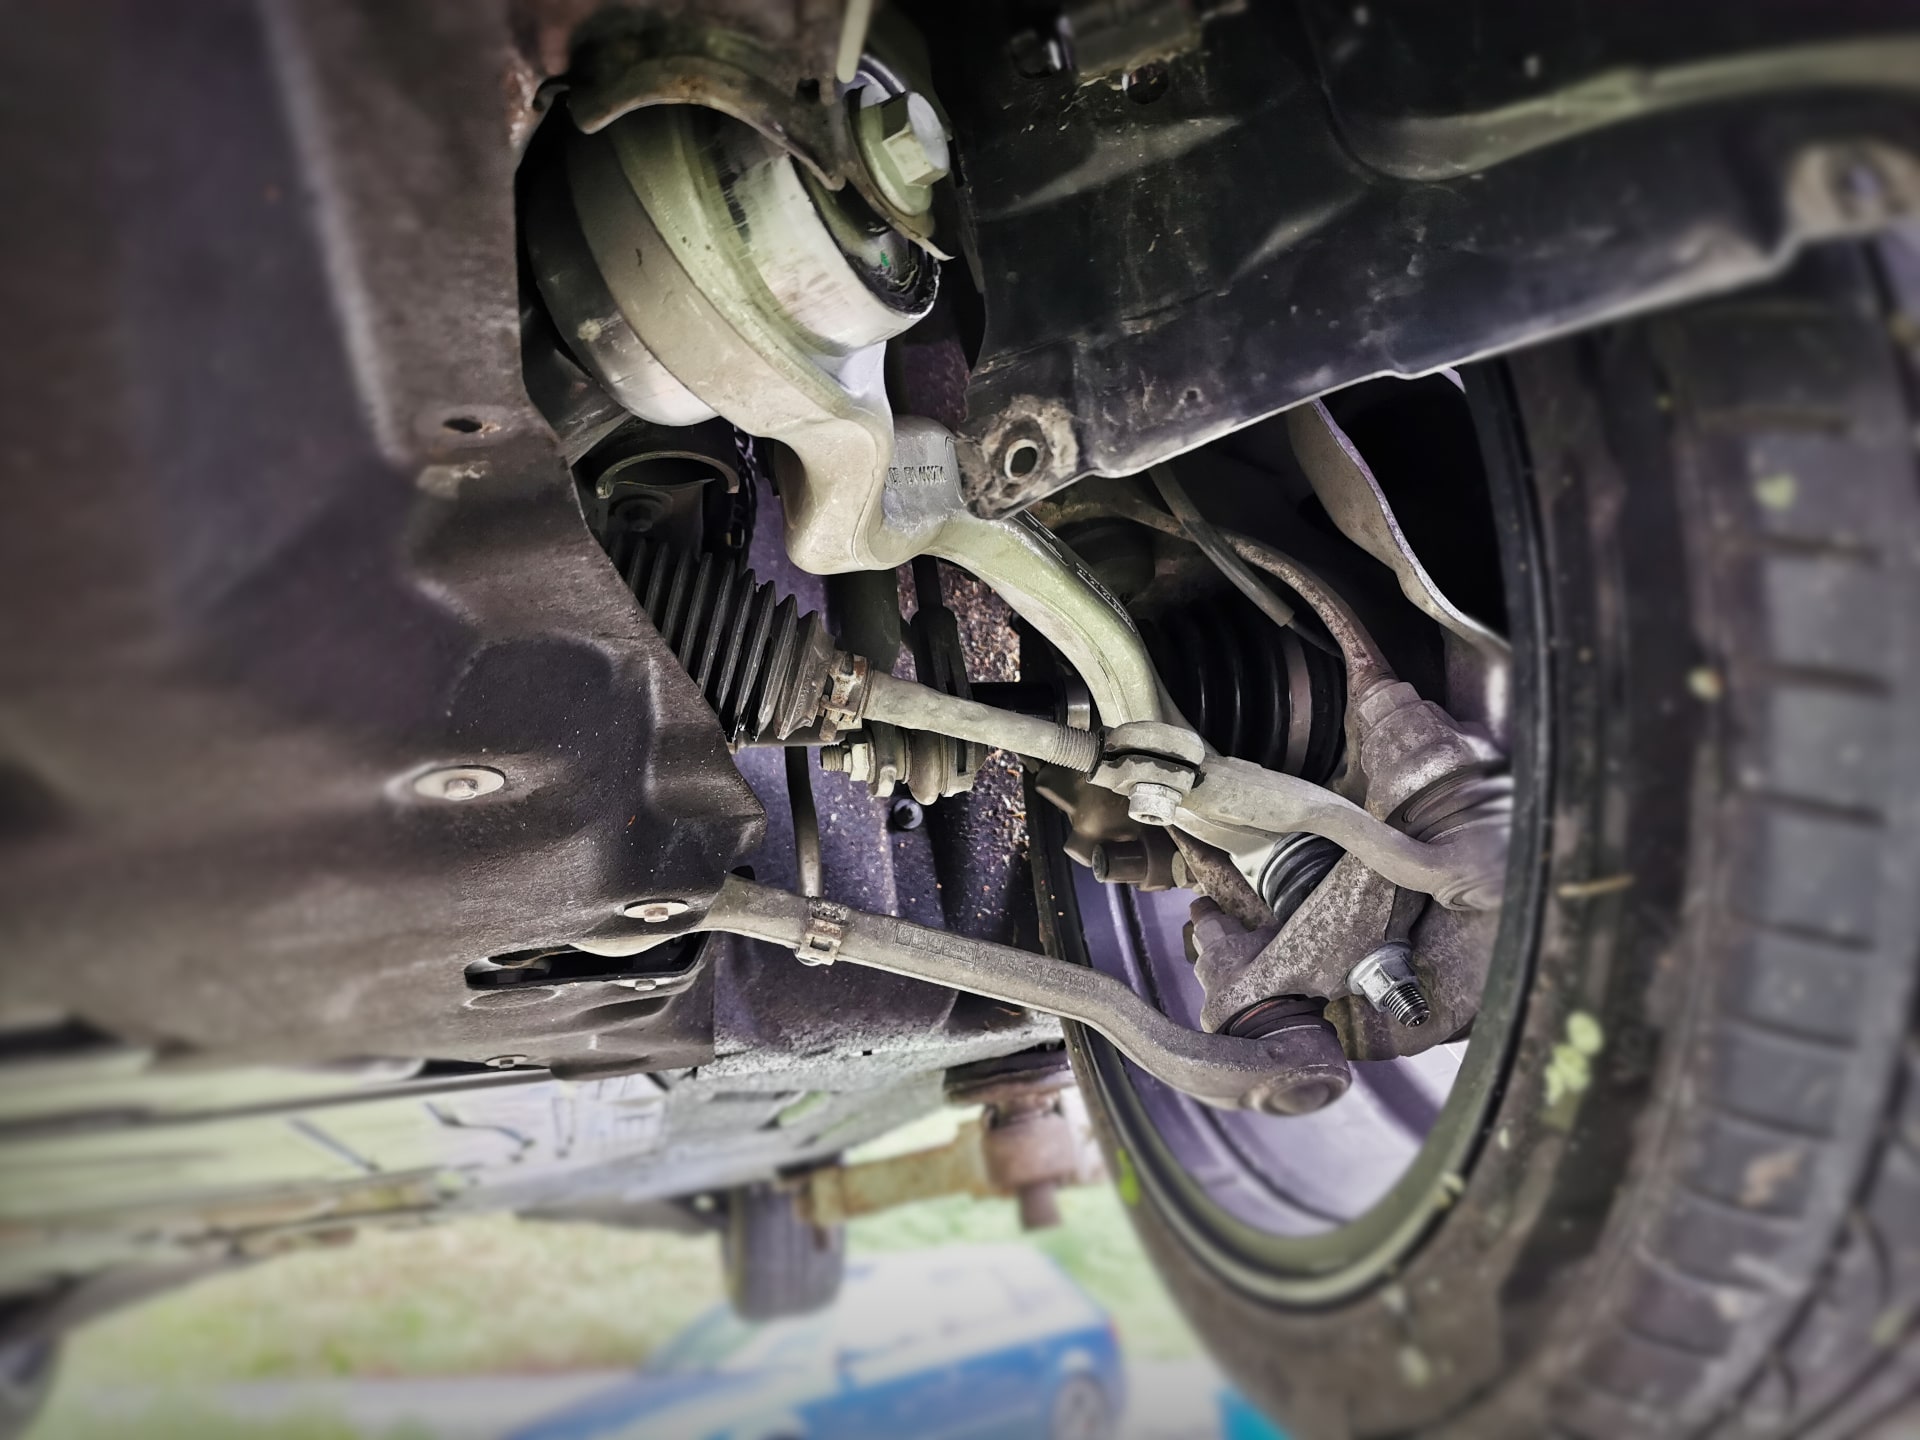
Replacing the Hydrobearings incl. Tension Strut
Guide for BMW F models
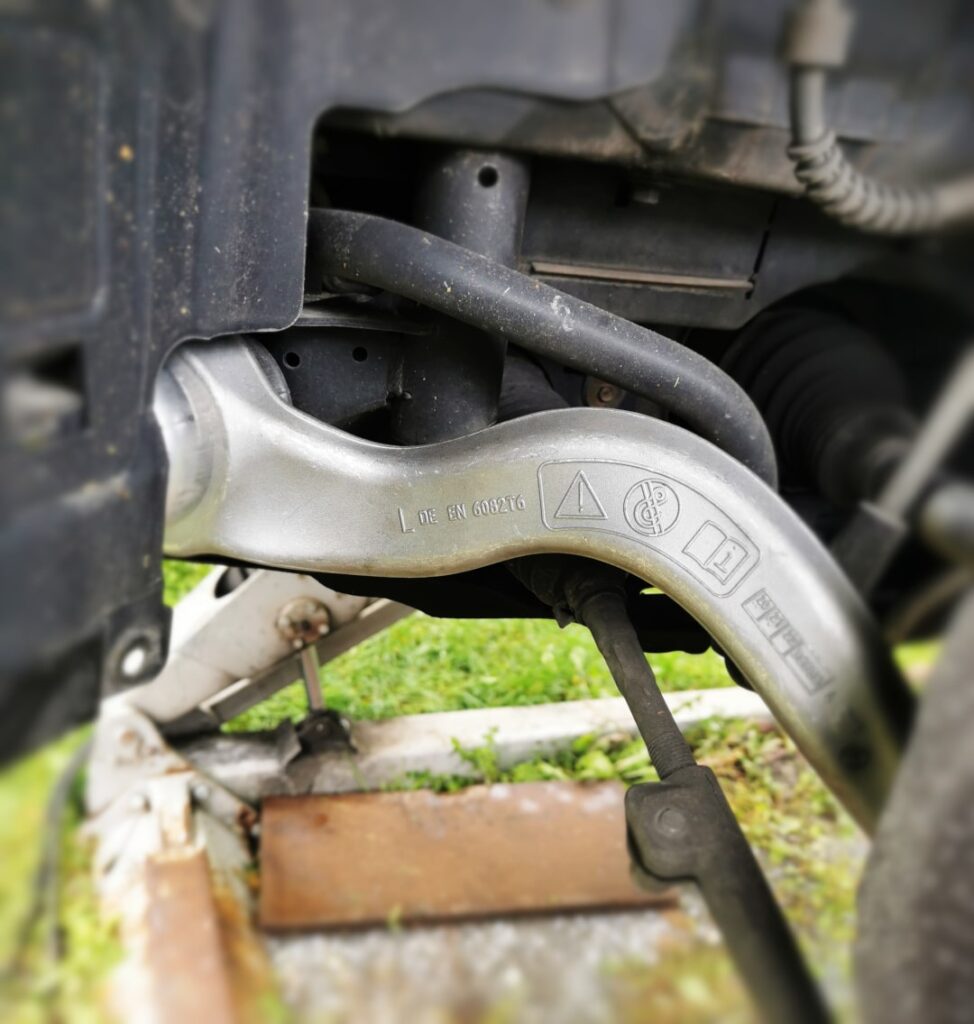
Here, we guide you step-by-step with instructions on how to replace the tension strut, including the hydrobearings. This DIY guide can be applied to all BMW F models (including xDrive). To learn more about how damage can occur and the symptoms of a defective hydrobearing, click here: Causes & Symptoms of a Defective Hydrobearings.
- Video instructions:
- Required Parts & Tools
- Step 1: (Only for xDrive) Lose the collar screw
- Step 2: Jack up or lift the Car correctly
- Step 3: Unscrew the Plastic Cover
- Step 4: Remove the old Hydrobearings incl. Tension Struts
- Step 5: Install new Tension Strut (do not tighten)
- Step 6: (Only for xDrive) Install new Collar Screw
- Step 7: Move the car to the normal position and tighten the screws
- Step 8: Screw the Plastic Cover back on
- More Articles:
Video instructions:
Required Parts & Tools
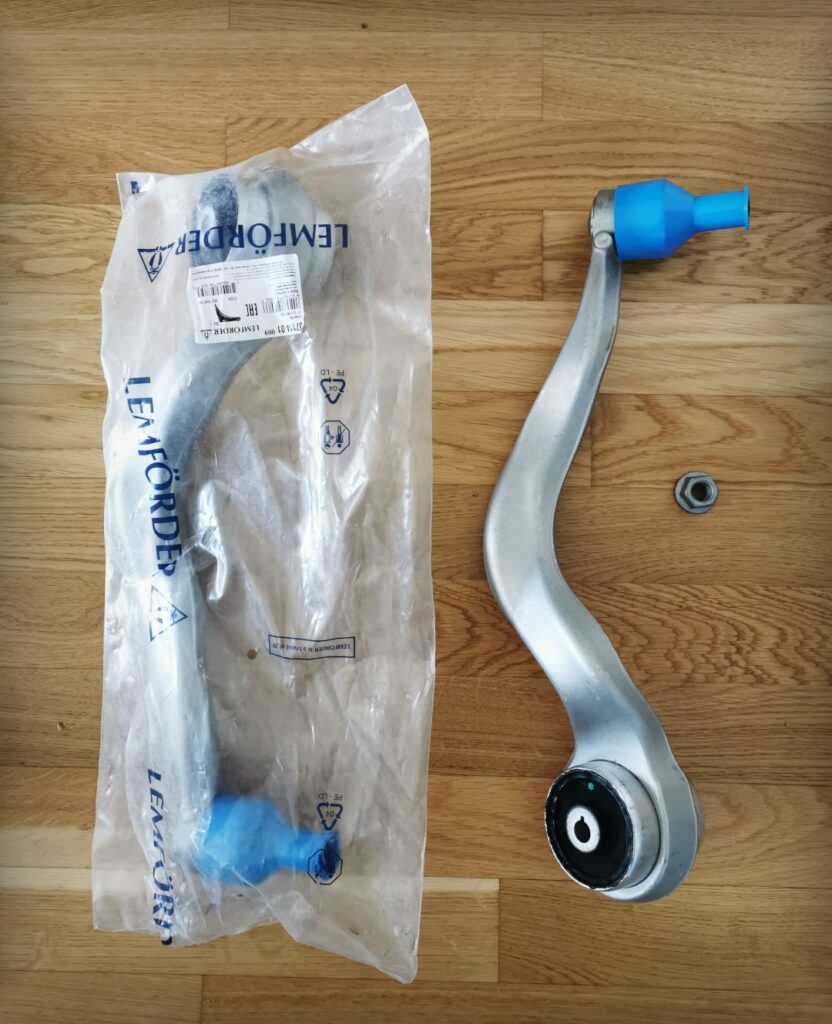
We generally recommend replacing the entire tension strut if the hydrobearing is defective. The cost difference between the hydraulic mount and the complete arm is negligible, and the repair is significantly easier as a result.
The purchase of parts and the repair process depend on whether or not you have an xDrive. However, both situations will be covered in this guide.
Spare parts:
* Affiliate links are marked with a *. When you purchase one of these products, we receive a small commission. Nothing changes for you and the offer/price remains the same. You can find more information about affiliate links here.
Tools required:
Step 1: (Only for xDrive) Lose the collar screw
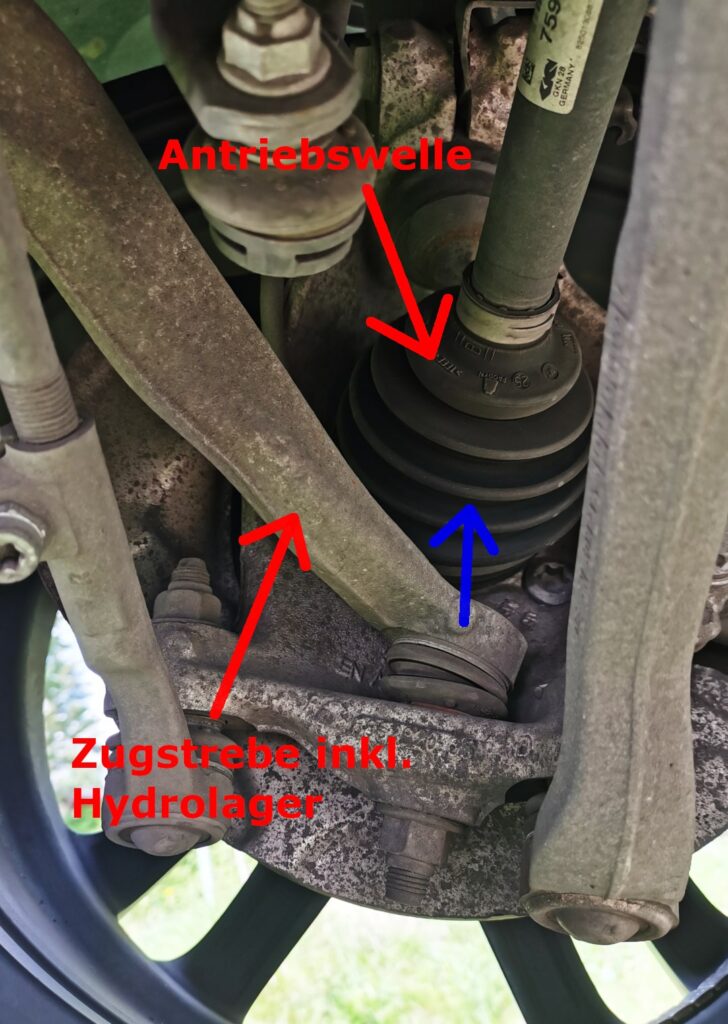
When removing the tension strut on an xDrive, you will quickly notice that the drive shaft is in the way.
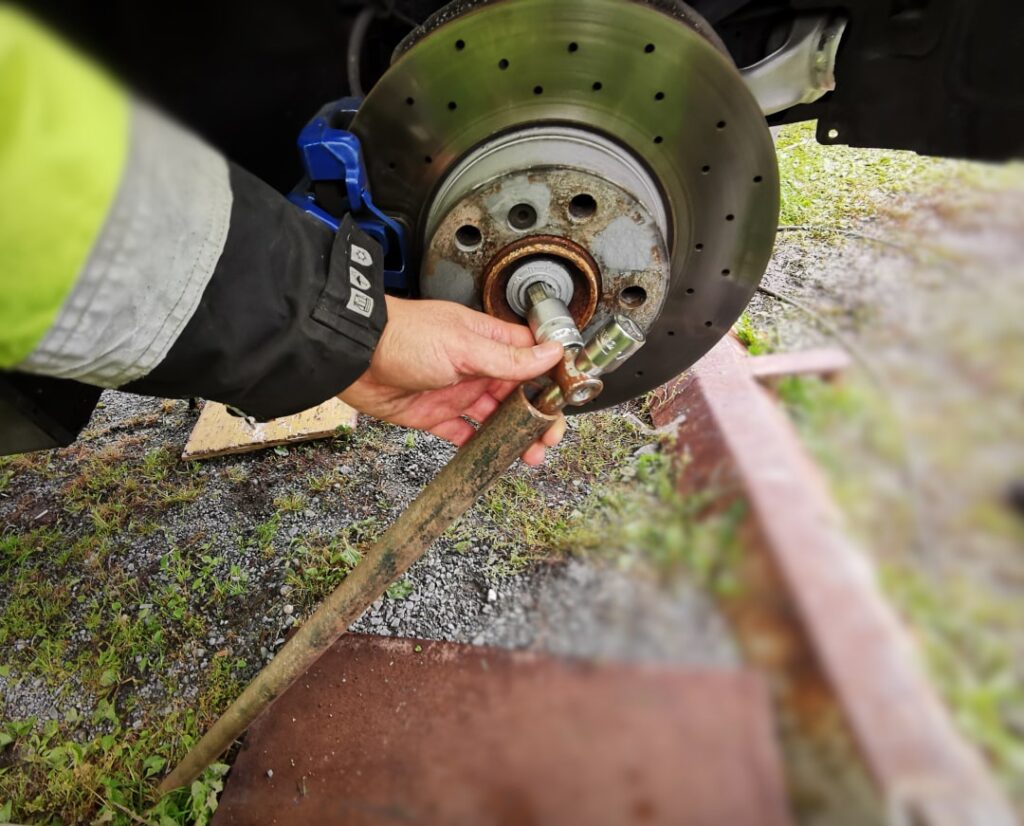
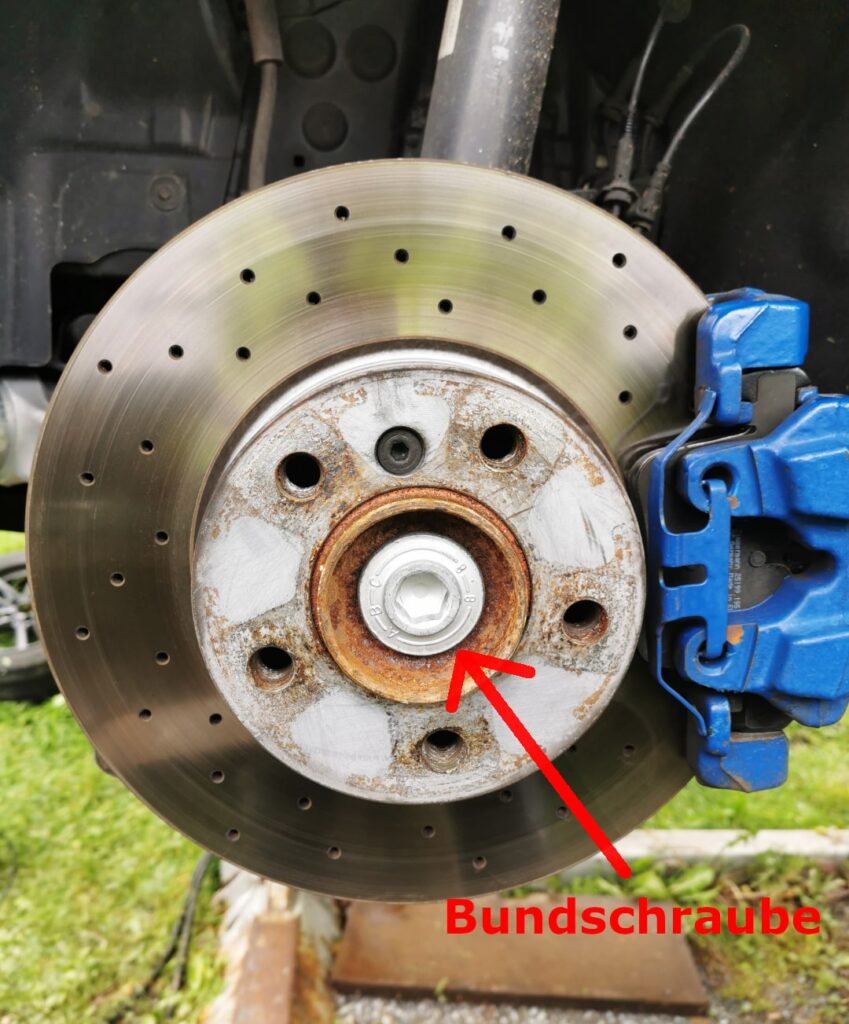
To still remove the tension strut, including the hydrobearings, you can slightly move the drive shaft to the side in Step 4. To do this, you only need to loosen the collar screw with a HEX 17mm wrench.
It is recommended to loosen the flange bolt while the vehicle is still on the ground.
If the car is already on a lift, a second person can apply the brakes while you loosen the flange bolt. If it doesn't work with the impact wrench, you can use a hollow metal rod. This will extend the ratchet and create a lever effect. This should do the trick.
Step 2: Jack up or lift the Car correctly
If you have a lift, it is clearly the best choice. However, a lift is not a must. You should be able to lift the car high enough so that you can work underneath it while lying down. Theoretically, you wouldn’t even need to remove the wheels. However, it is still recommended, as it makes it easier to reach the trailing arm bolts.
Options for lifting a vehicle without a lift:
Step 3: Unscrew the Plastic Cover
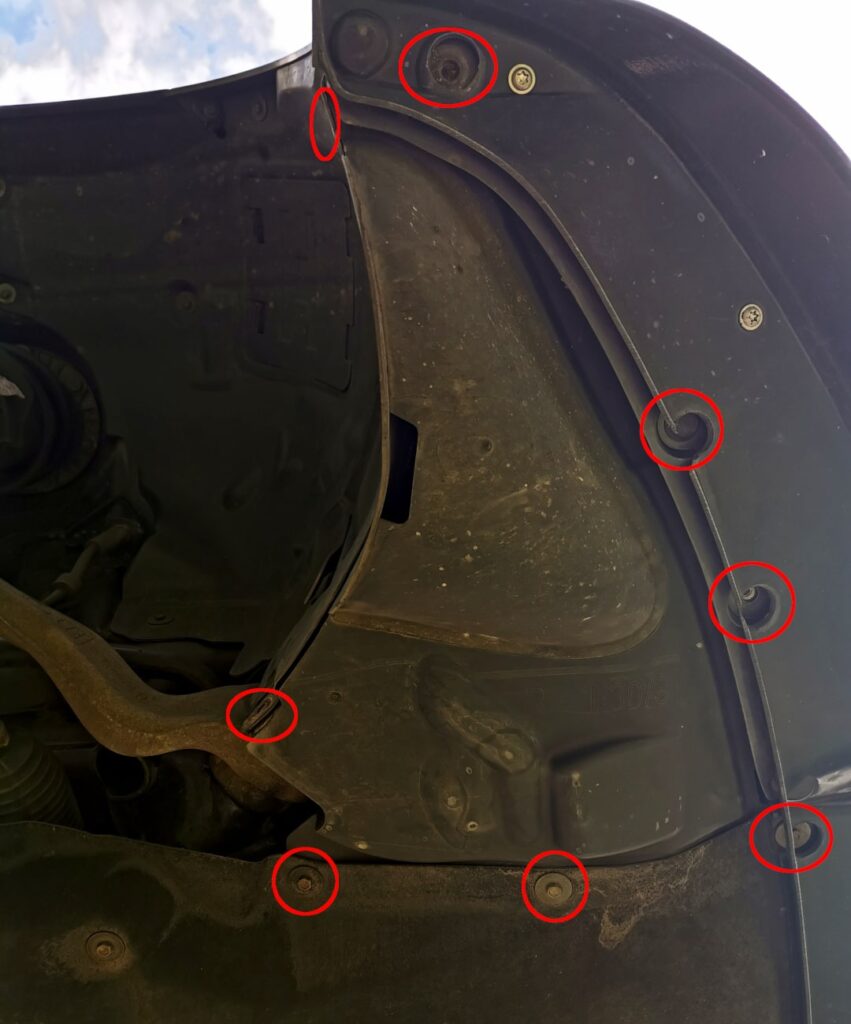
The plastic cover on the underbody (directly in front of the wheels) is covered with 8 mm screws attached. You can easily unscrew these and put them aside. Now you have free access to the hydromount and the hexagon head screw.
On the left side, you will find the sensor for the outside temperature on the plastic cover. When removing it, be sure to pay attention to the sensor and temporarily disconnect it from its socket.
Step 4: Remove the old Hydrobearings incl. Tension Struts
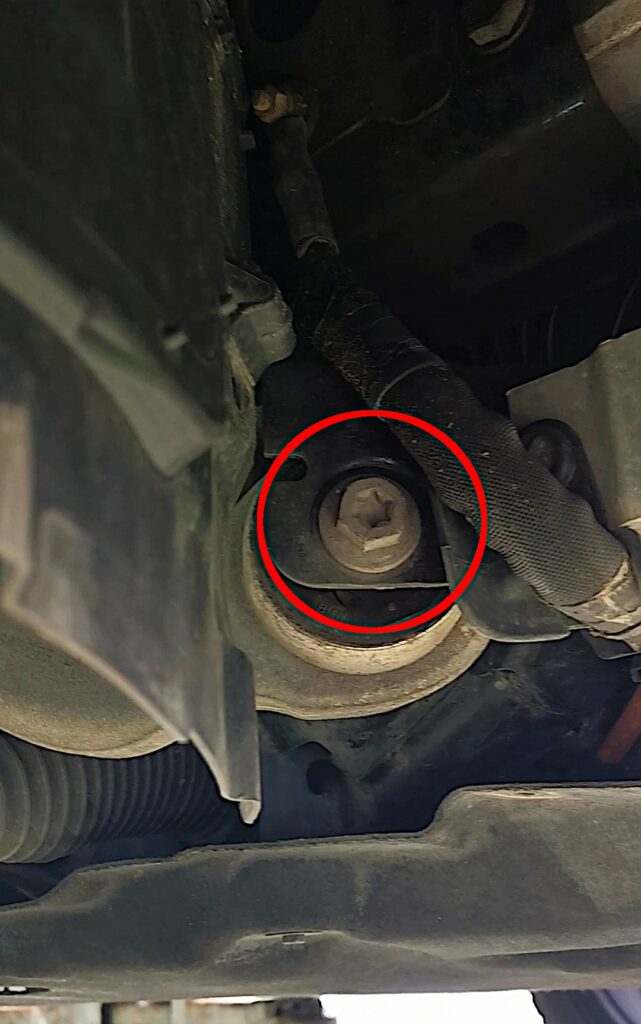
First, remove the hexagon bolt on the hydrobearing using the impact wrench or ratchet. You will need a 18mm wrench size for this.
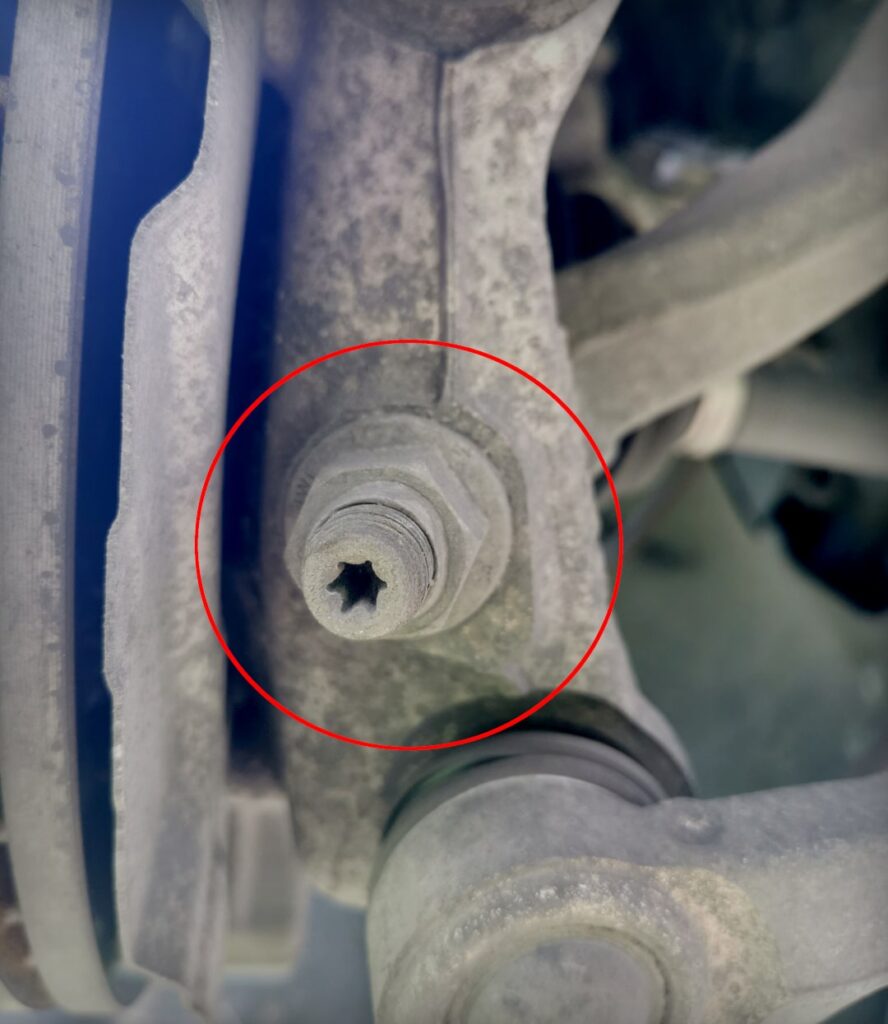
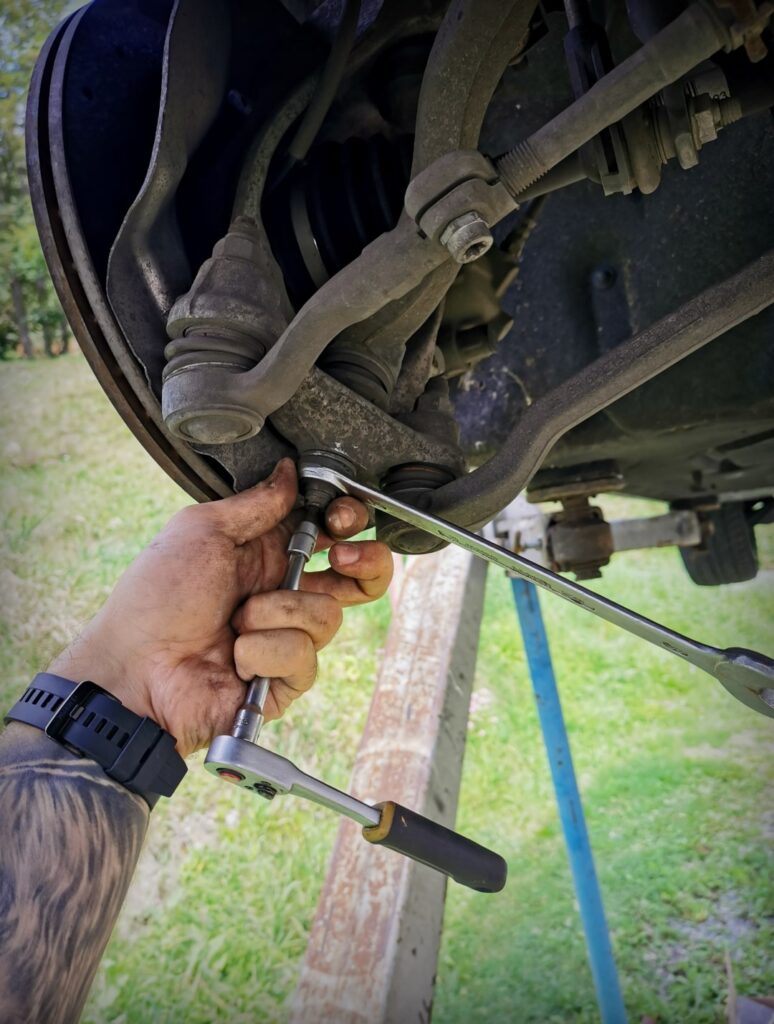
Second, remove the nut at the other end of the trailing arm (on the wheel suspension). You will need a 21mm wrench size to loosen the nut, while using a Torx screwdriver to counter the screw inside. In the beginning, you can try it with just the impact wrench. However, for the last few turns, you will need to hold the screw in place with a Torx tool.
If you don't have an xDrive, you can now loosen the trailing arm and easily pull it out.
Only for xDrive:
With an xDrive, the drive shaft is in the way and prevents the tension strut from being pulled out. This is why you loosened the flange bolt in Step 1. As a result, you can now pull the drive shaft slightly out (towards the interior of the car) and push it upward. This will give you just enough space to pull out the tension strut. This method saves you from having to remove the drive shaft, which would be much more complicated.
Step 5: Install new Tension Strut (do not tighten)
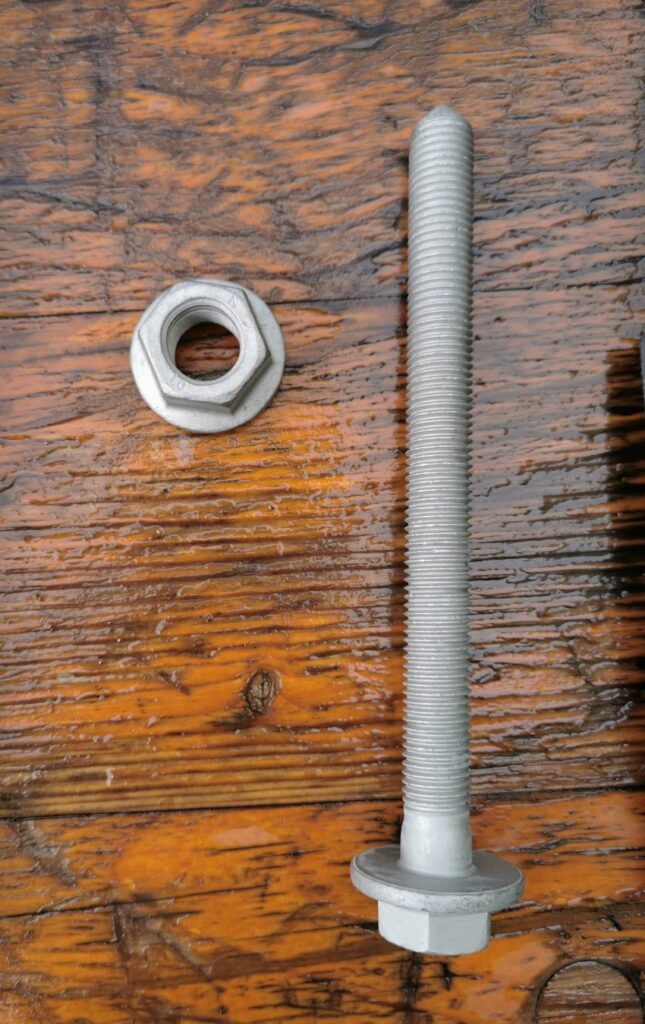
Now, reassemble the tension strut arm in the reverse order of disassembly. Be sure to use the new hexagon bolts and the new nut.
Attention: The bolt and nut must not be tightened to the required torque yet. It is perfectly fine to only tighten the bolt slightly to keep the tension strut in place. Tightening to the correct torque will be done in Step 7, once you have set the car to its normal position.
Step 6: (Only for xDrive) Install new Collar Screw
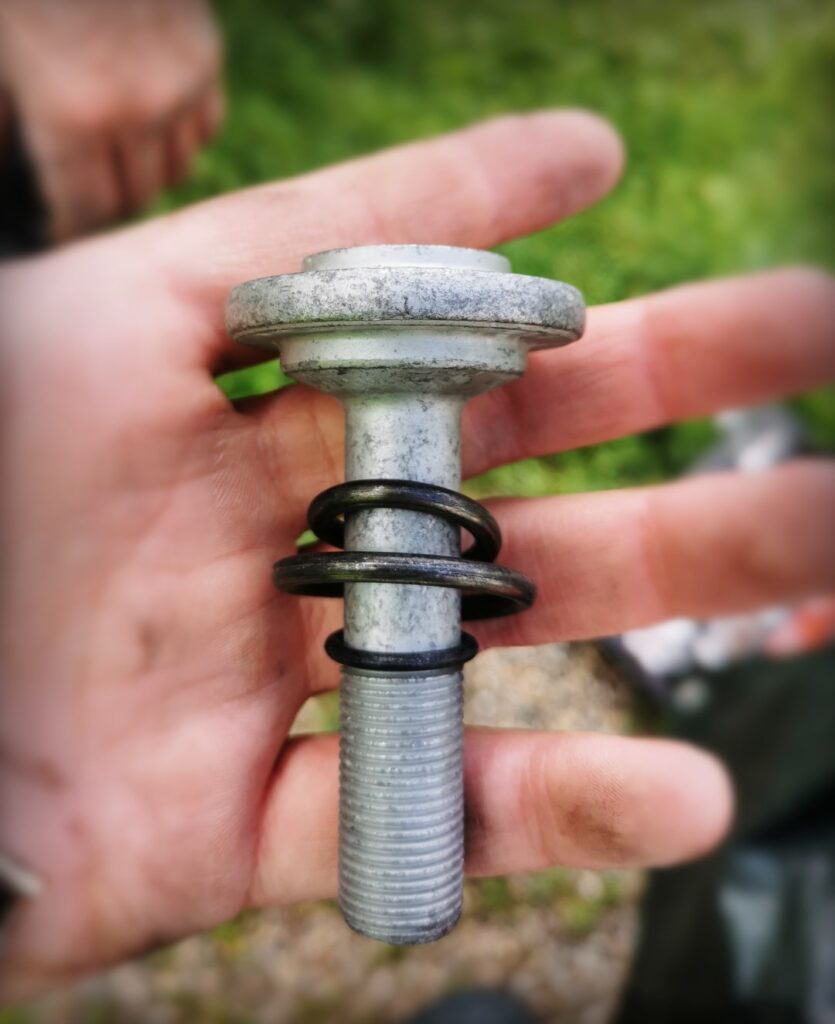
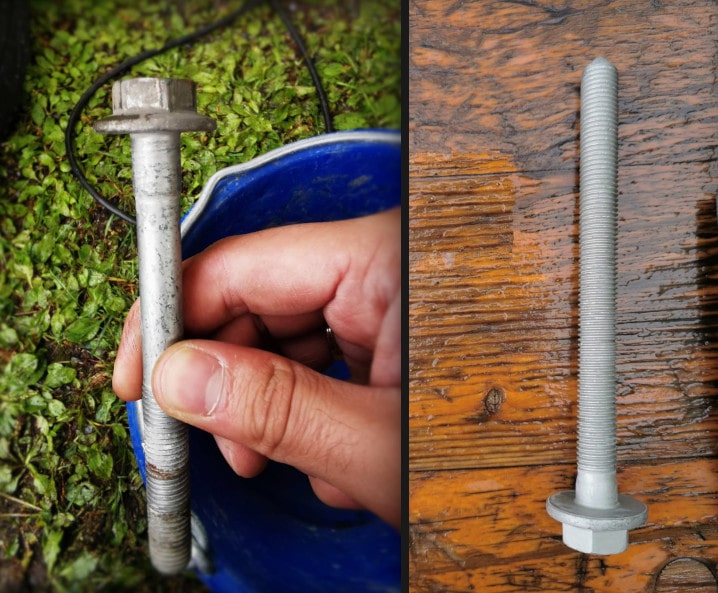
With a xDrive you can now use the Replace the drive shaft and screw back the collar screw. BMW recommends the Purchase of a new collar screw with spring. In the chapter Required Parts & Tools you will find a suitable collar screw for the BMW.
The flange bolt must be tightened to 210 Nm plus 90° angle of rotation.
Step 7: Move the car to the normal position and tighten the screws
The normal position of a car is reached when the axle joints are no longer under load. In other words, the suspension is neither hanging down nor being pushed up, such as when driving over a pothole. The normal position is reached when the vehicle is standing normally on a flat surface on its wheels.
tighten the tension strut bolts to the required torque. There are several ways to position your vehicle in the normal position while still being able to access the bolts of the trailing arm.
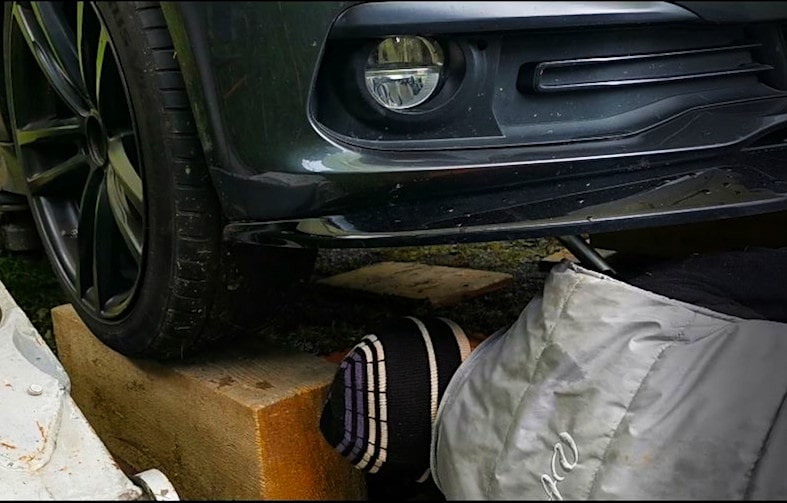
Once the vehicle is in the normal position, tighten the bolts with the following torque and angle specifications:
Step 8: Screw the Plastic Cover back on
In the final step, reinstall the plastic cover. On the left side, reconnect the temperature sensor, and the vehicle is ready to drive again. One small tip: Don’t forget to re-torque the wheel nuts to the required torque after approximately 100 km.
Have fun screwing!
* Affiliate links are marked with a *. When you purchase one of these products, we receive a small commission. Nothing changes for you and the offer/price remains the same. You can find more information about affiliate links here.
More Articles:
BMW Android Auto & Carplay retrofit | Plug & Play | CARLUEX
BMW Android Auto & Carplay retrofitCARLUEX Experience Are you driving a BMW built before 2020 and want to finally use Android Auto?...
BMW Sport Plus coding: Unlocking driving mode - instructions
BMW Sport & Comfort Plus codingUnlocking driving mode - BMW coding made easy - In this guide you will learn step by step how to...
BMW coding software comparison 2025 | ESys, BimmerCode & Co
BMW Coding Software ComparisonESys, BimmerCode & Co. There are now countless tools for coding a BMW. Different software providers offer...
