How to Replace Front Grille Audi A4
Retrofitting the RS Grille
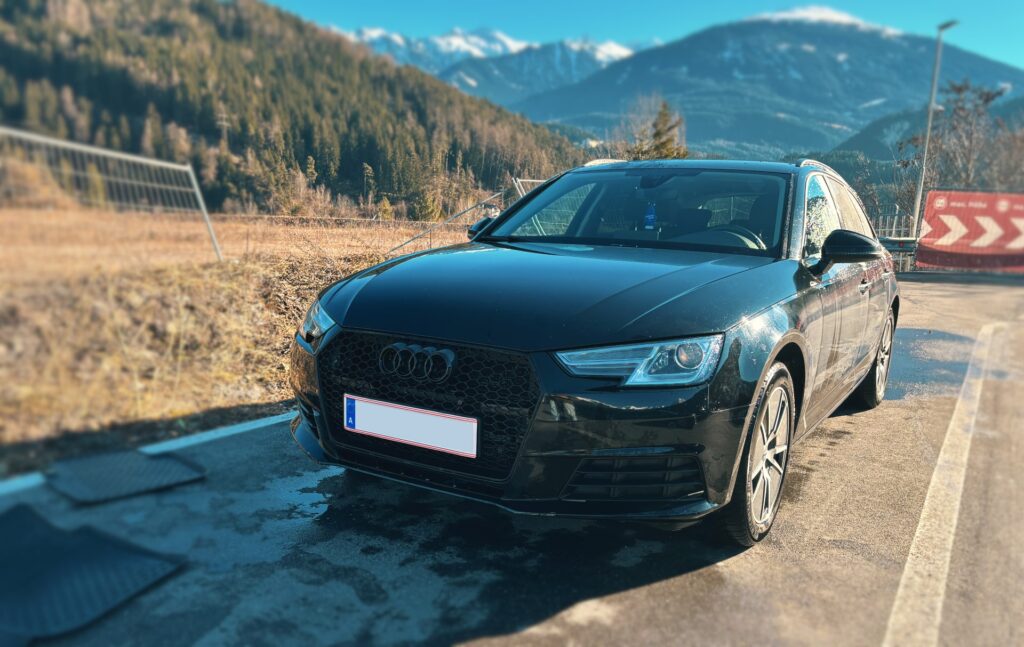
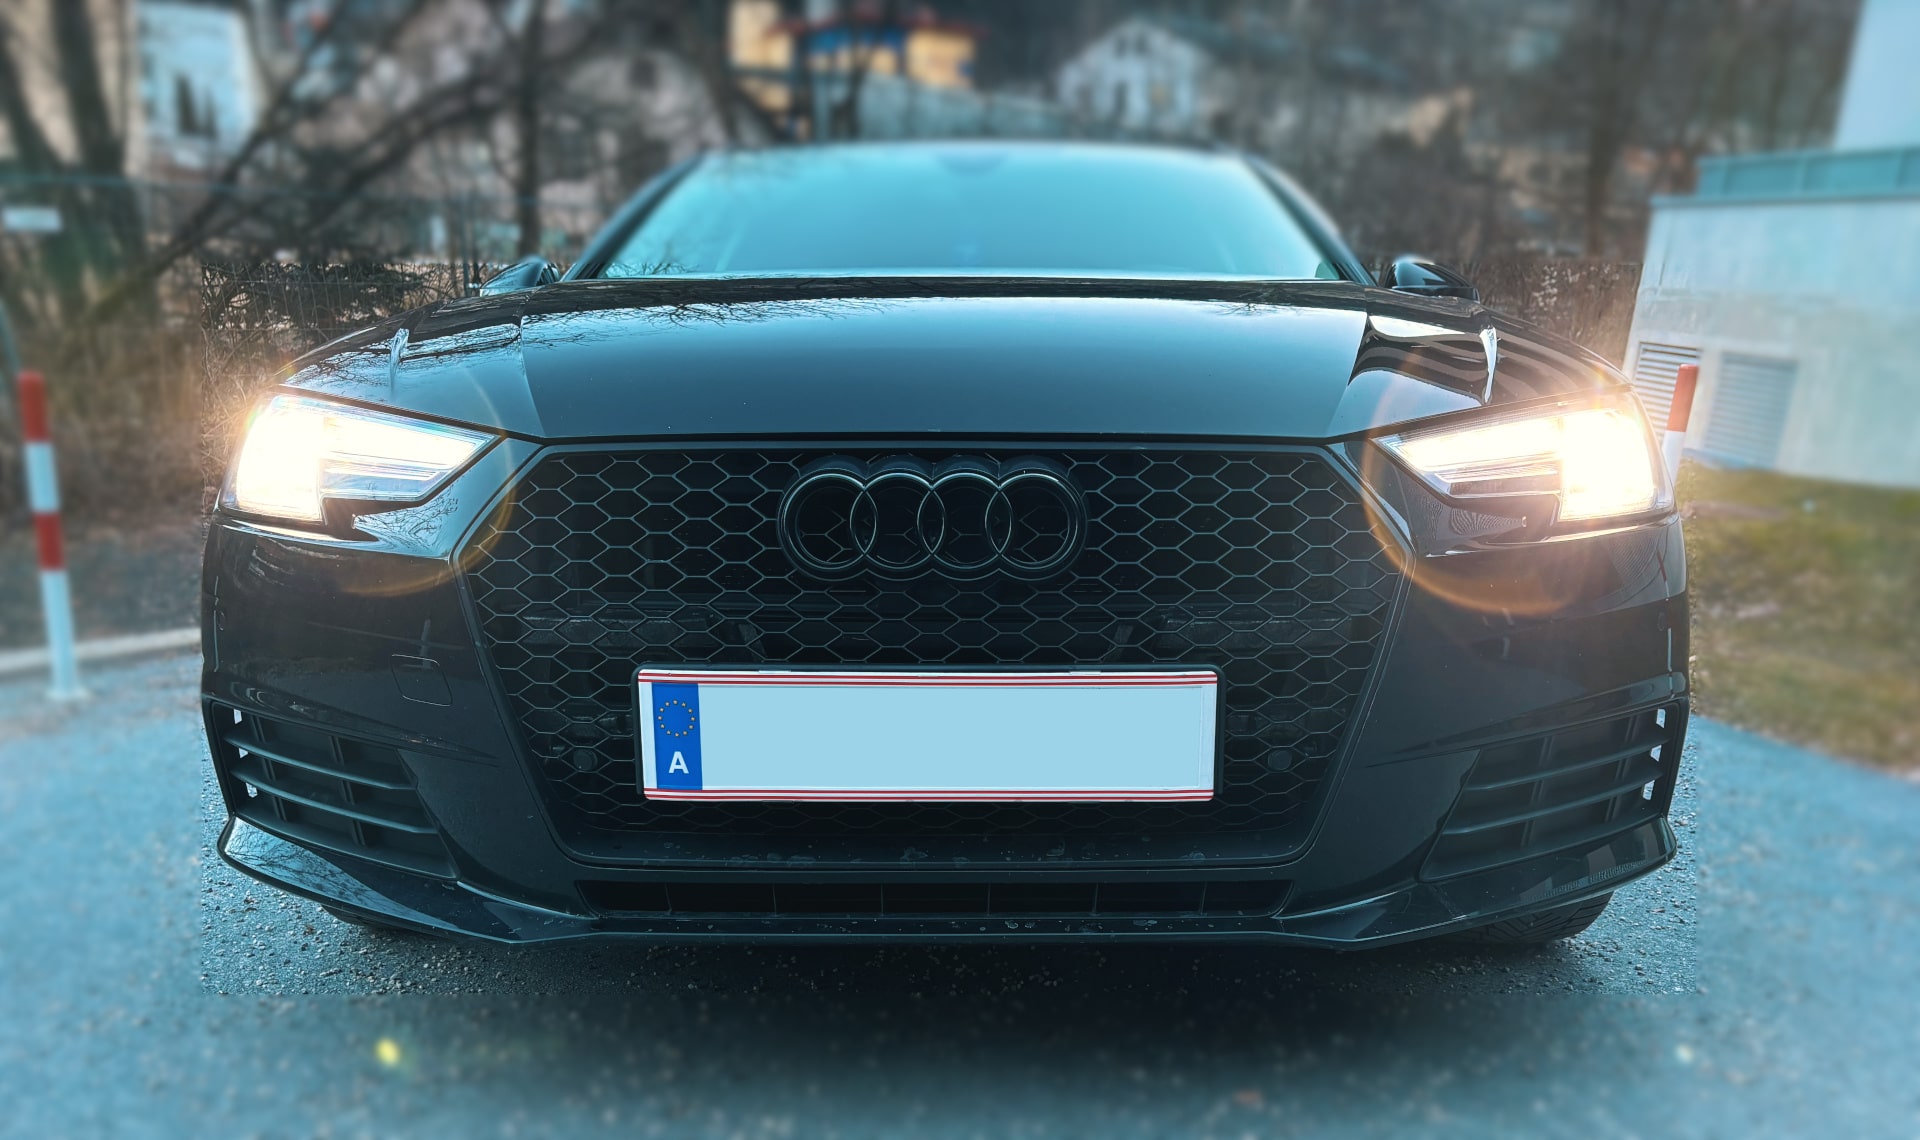
If you want to give your Audi A4 a personal touch, there's no way around replacing the radiator grille. The RS radiator grille is not only an eye-catcher, but also very easy to install. In this detailed step-by-step guide, we show you how to replace the radiator grille on your Audi A4 and retrofit an RS grille.
- Which RS grill is the right one?
- Tools required
- Step 1: Disconnect the battery & remove the wheels
- Step 2: Removing the bumper
- Step 3: Separate the radiator grille from the bumper
- Step 4: Fitting the new RS grille to the bumper
- Step 5: Transfer components to RS grill
- Step 6: Painting the carrier & mounting the bumper
- Conclusion & before/after
- More Articles
Which RS grill is the right one?
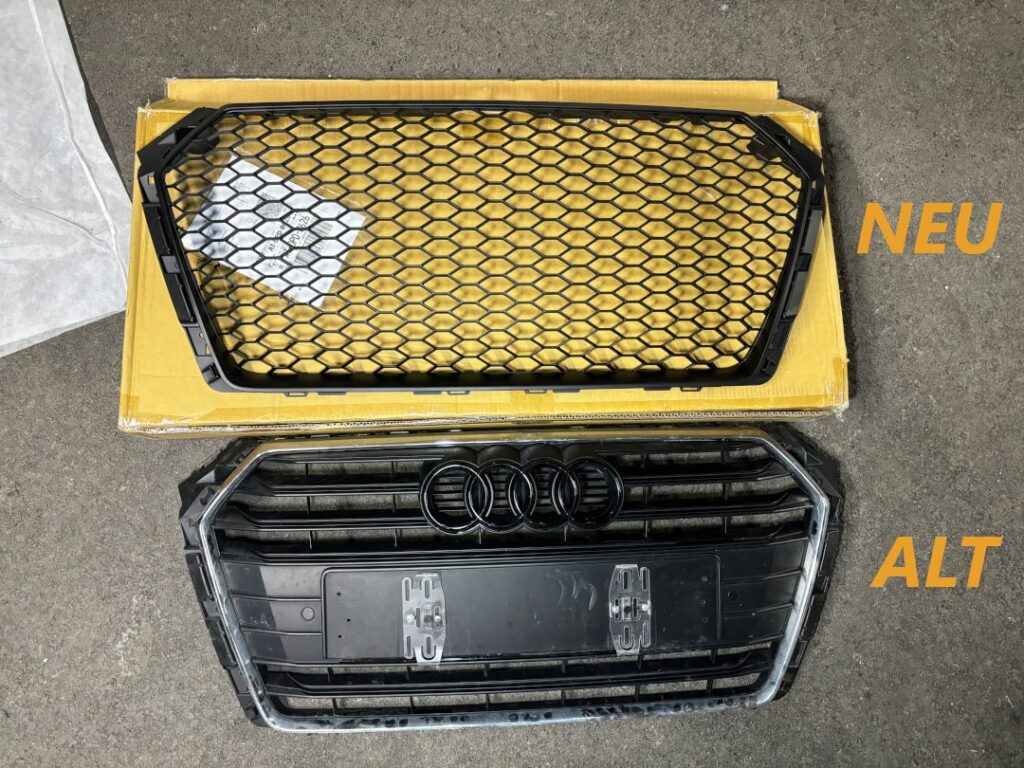
Before you get started, you should make sure that the selected RS grille really does fit your car perfectly. Pay attention to the Exact model designation and year of manufacture of your Audi. This guide shows you how: Replacing the Audi A4 radiator grille and retrofitting the RS grille on an Audi A4 B9 Avant year of construction 2017.
When making your decision, it is important that you take a look at the Honeycomb design and the parking sensor mounts throw. There are different designs here, which also have a corresponding influence on the Mounting the parking sensors have. A low price can also mean that the installation of the parking sensors has not been solved well enough.
This is mainly due to the Narrower honeycomb designwhich does not allow for easy assembly. As we like to improvise and want to show you how you can save money, we have nevertheless opted for the relatively simple assembly of this Audi. Cheaper version of the RS grillwith the narrower and, in our opinion, more beautiful honeycomb design.
We will show you how you can attach the parking sensors to this grille in a practical and attractive way in the chapter "Transfer parking sensors".
Here you will find the RS grille installed in our instructions to choose from:
- Kühlergrill ohne Emblem Sport Look im Wabendesign Performance Schwarz Matt – Sportliche, aufwertende Optik – Einfacher Austausch – Eintragungsfrei – Inkl. Nummernschildhalterung – Inklusive Halterungen für die PDC Sensoren – Sehr gute Qualität – Absolut passgenau – Neu und original verpackt
- kompatibel mit Audi A4
Typ B9 / 8W
Limousine / Avant
Bj. 05/2015 – 11/2019 (Vorfaceliftmodell)
Nicht bei RS und Allroad Modellen passend
If you are with the do not want to improvise parking sensors and money is no objectthen we recommend that you purchase the second RS grill. It is installed in the same way as the upper RS grill.
- Compatible for Audi A4 B9 8W Sedan / Avant pre-facelift from model year 10/2015-2019
- Restrictions: not for Allroad, RS4 and facelift from 04/2019!
Impressions of the honeycomb grill and why the grill has paid off at any price can be found in the "Conclusion & before/after".
Tools required
Smooth conversion requires the right tool. Make sure you have the following conventional tools available:
*Affiliate links, information in footnote or here.
A jack is not absolutely necessary. However, we recommend that you still "jack up"to make it easier to access the screws on the underbody. It also makes the whole process easier and you gain some height and space.
*Affiliate links, information in footnote or here.
Step 1: Disconnect the battery & remove the wheels
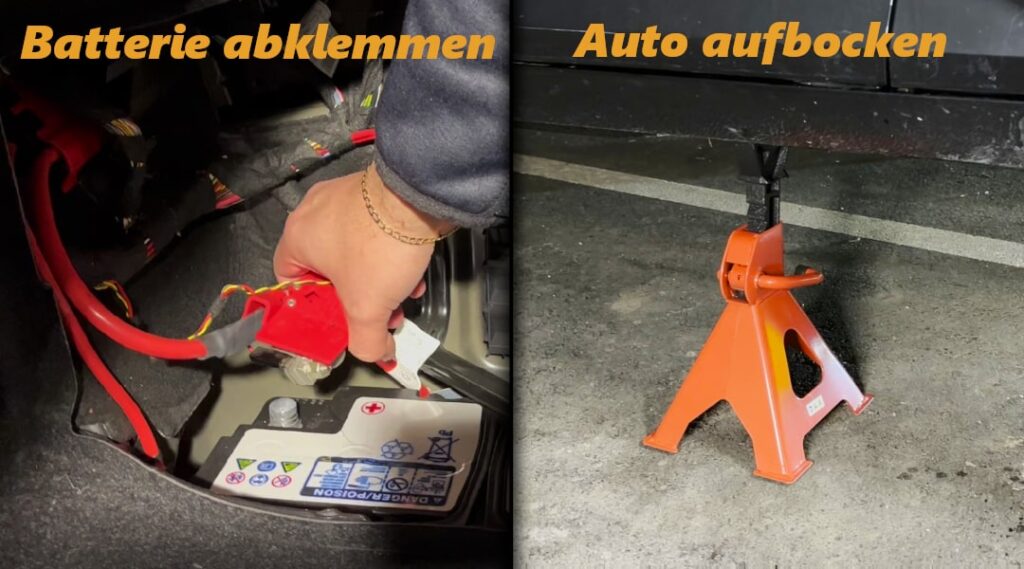
As you have to disconnect the parking sensors, the crash sensor and, if present, the front camera, you should disconnect the Disconnect the battery before dismantling. This prevents you from Unnecessary error codeswhich must be corrected later.
At the same time, you can also jack up your car if you have the opportunity to do so. Dismantling the wheels. As previously mentioned, lifting the car is not a must, it however, facilitates the workflow. Alternatively, you can turn the wheels to one side and start removing them in the wheel housing.
Step 2: Removing the bumper
The following Screw connections must be released in order to remove the bumper from a Audi A4 B9 to dismantle:
Wheel arch fittings:
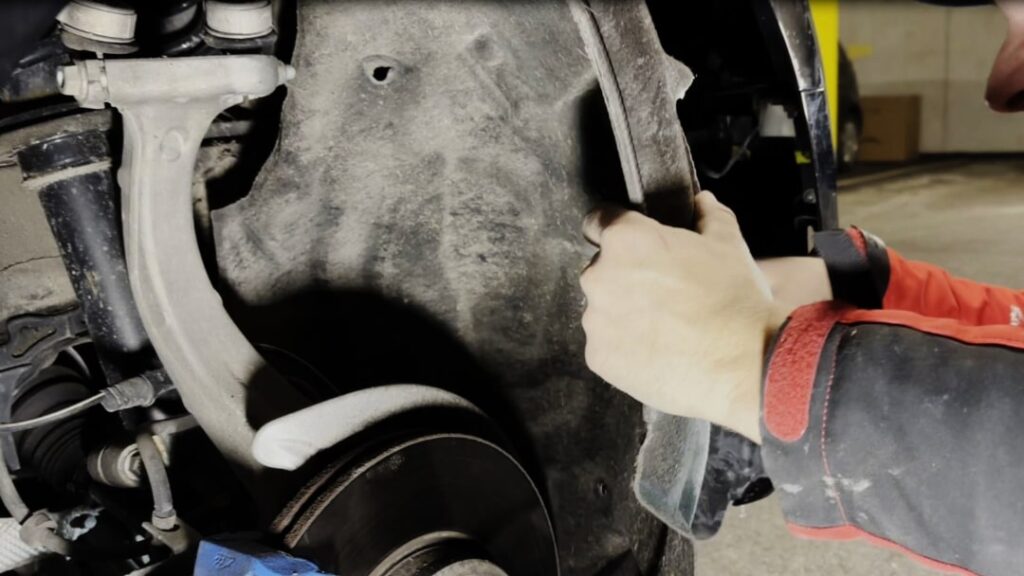
It is advisable to start dismantling the Dirt traps (plastic covers) in the wheel housing. These are each marked with 6 Torx screws and 2 x 10 hexagon nuts and can be easily unscrewed.
In principle, not all screws need to be unscrewed. It is sufficient if you Bend the plastic cover slightly to the side to gain access to the screw connections behind it.
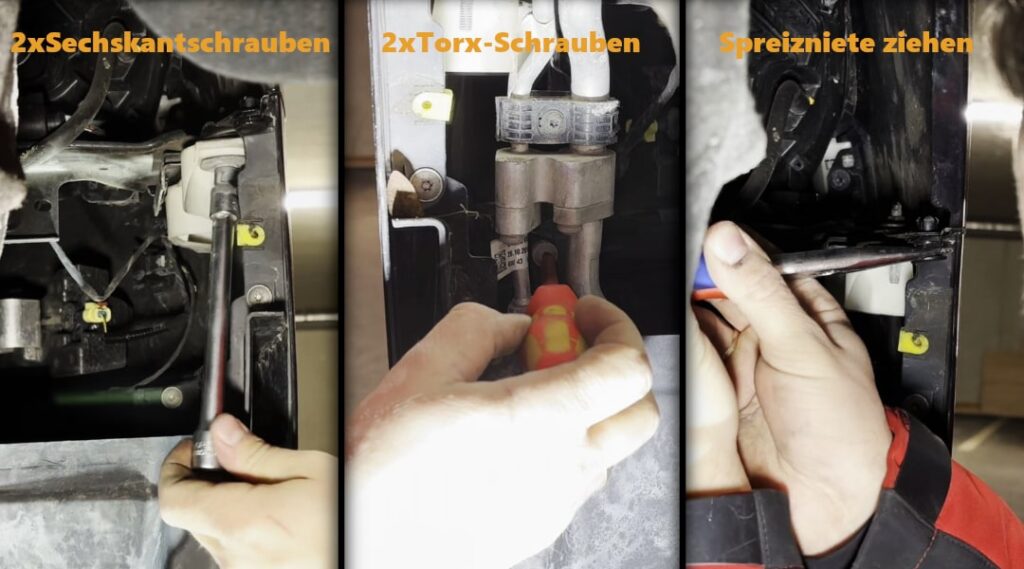
If you now Access behind the wheel arch the next step is to get two Loosen the 10 mm hexagon head screws and two Torx screws. The hexagon bolts are fastened vertically and connect the bumper to the rest of the body.
The Torx screws are fastened horizontally and connect the bumper to the Front carrier. Don't forget to use the Plastic clip (expanding rivet) to pull it out. This is located directly next to the hexagon head screws. The following pictures show the respective positions:
Screw connections on the underbody:
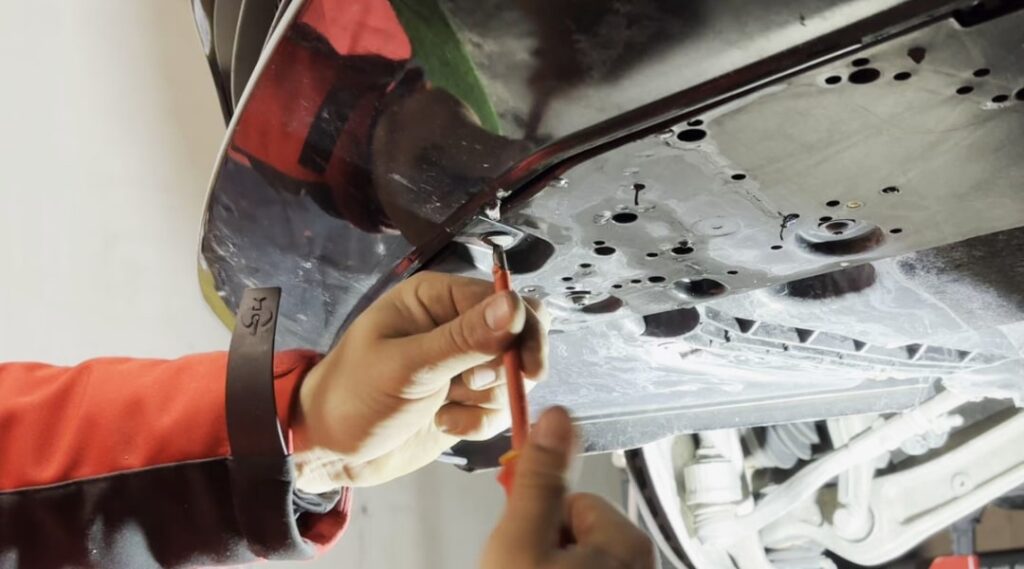
Then get underneath the car and remove the front five Torx screws on the underbody.
Screw connections in the engine compartment:
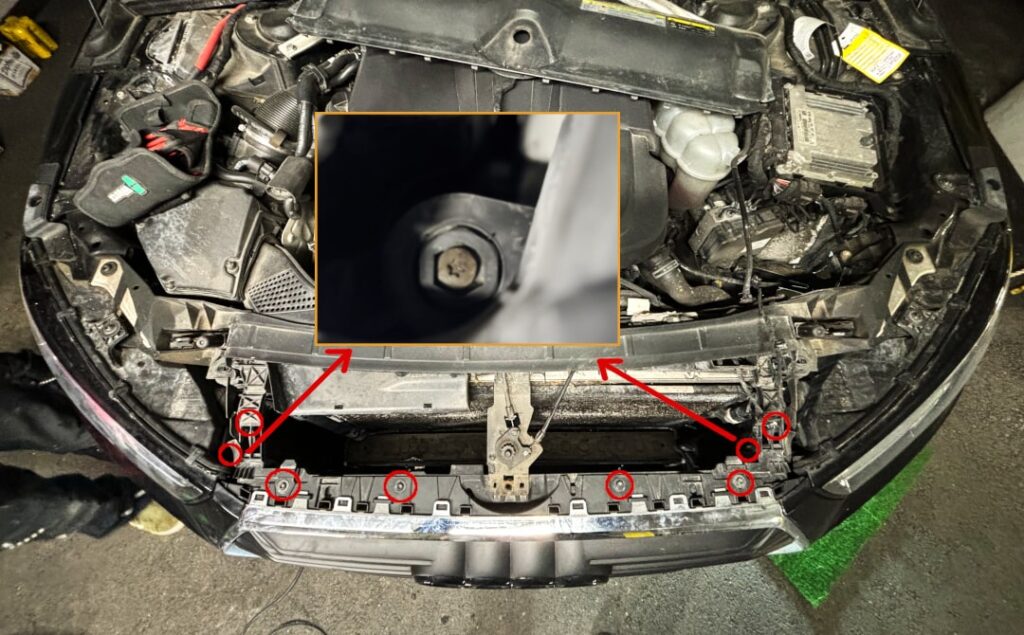
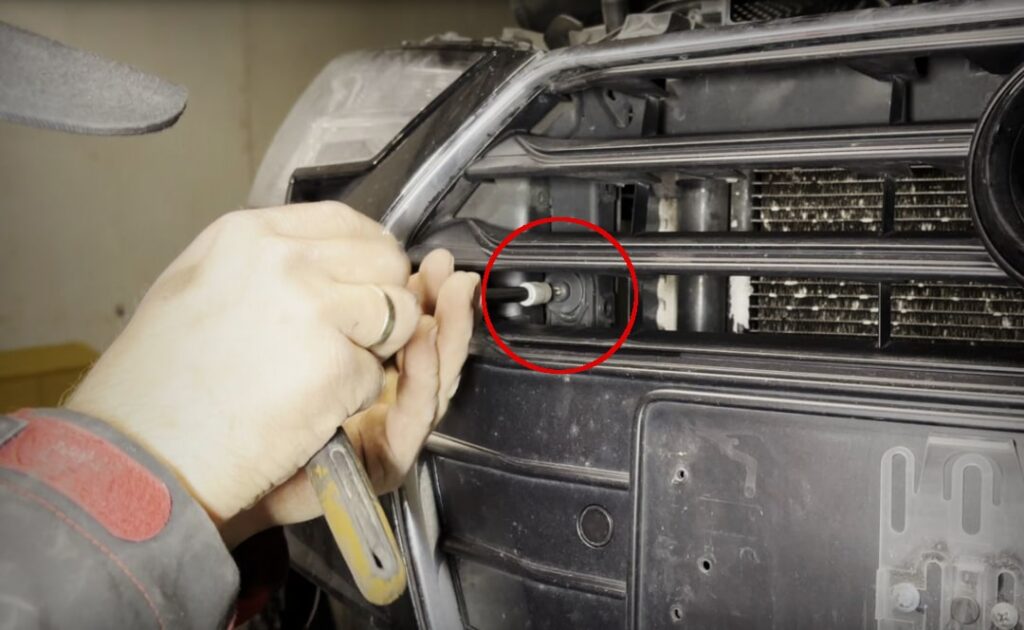
The last screws are located at the top front of the engine compartment (4 Torx screws vertically and 2 horizontally), two Torx screws left and right attached to the Bumper carrier from above and 2 Torx screws left and right directly behind the radiator grille.
Once you have released these, you should be able to unclip the front bumper with a firm "tug". In the following photos you will find the Positions of the screw connections:
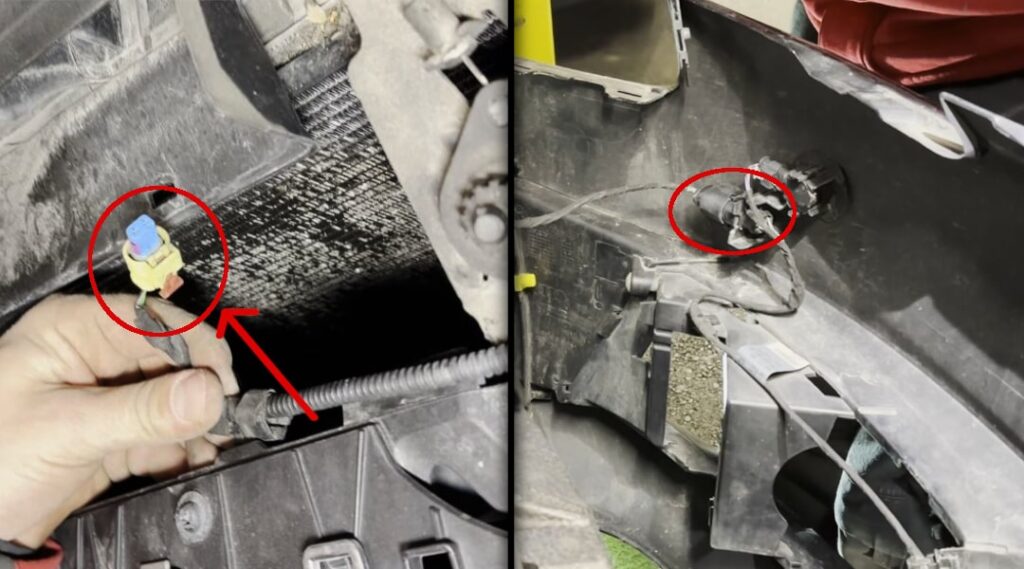
Finally, you solve the Plug connection of the parking sensors and the crash sensor and put the complete bumper to one side. The removal of the radiator grille can now begin.
Step 3: Separate the radiator grille from the bumper
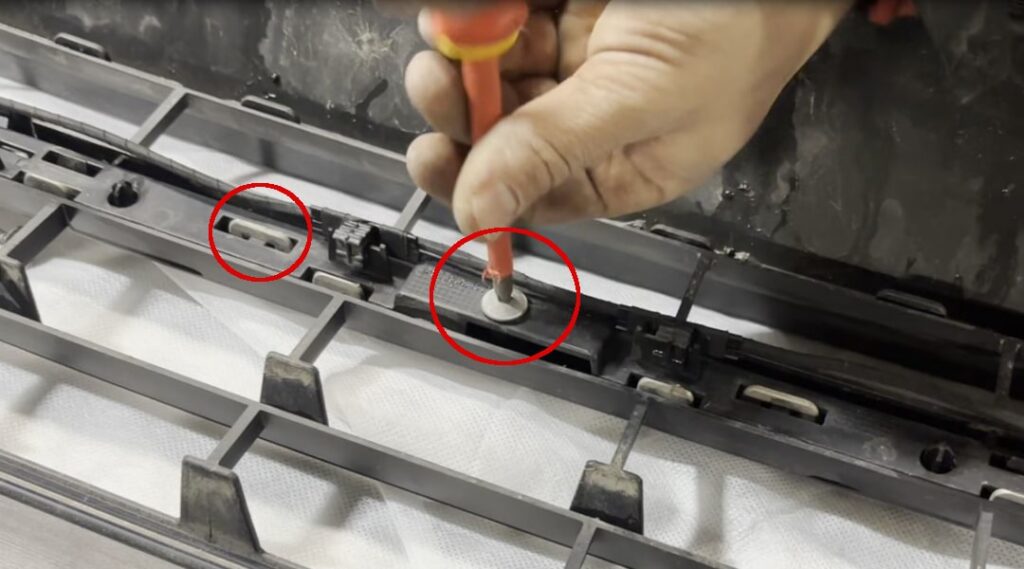
To detach the grille from the bumper, all of the Connections and clips be exposed. The plug connections are relatively easy to unlock and can be levered out with a screwdriver.
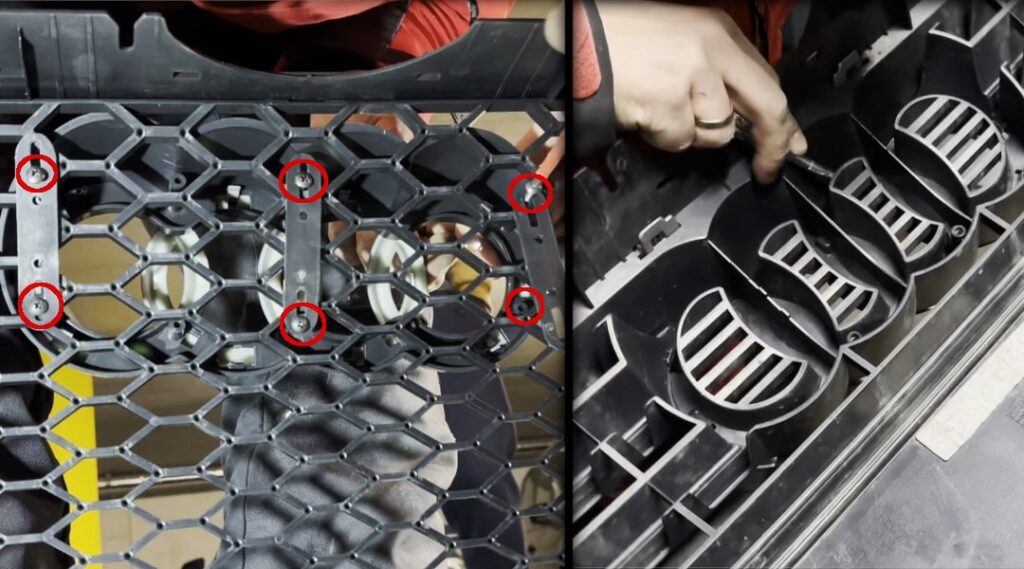
In addition to the brackets, you must Unscrew 7 Torx screws around the radiator grilleto finally get the grille out. The following photo shows an example of the brackets and screws to be removed.
How to release the brackets is explained in self-explanatory be. Make sure that the plastic is generally not too cold, otherwise the brackets can break easily.
Step 4: Fitting the new RS grille to the bumper
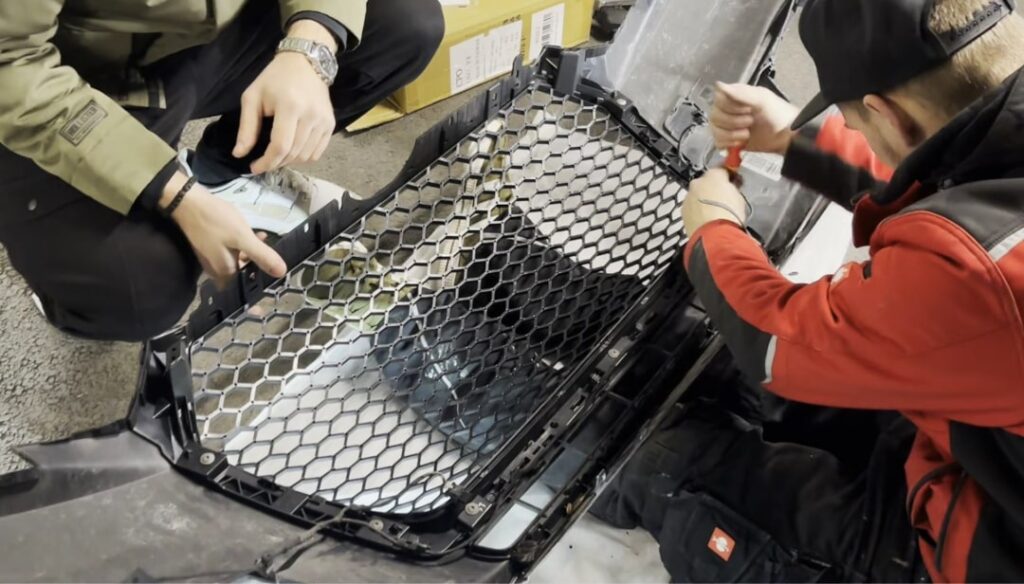
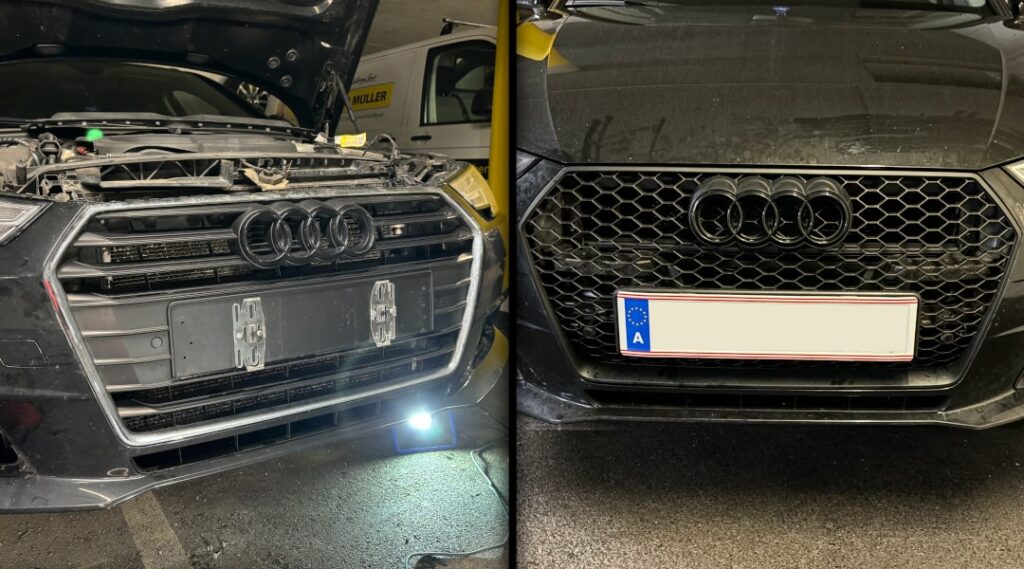
Before you start transferring the components to the new RS grille, you should Mount on the bumper beforehand. This will give you a better picture of the overall picture and allow you to better assess the appearance.
This also allows you to check whether the RS grill actually fits and whether there have been any manufacturing or delivery errors. Although this can happen, it is clearly a Rarity.
To do this, simply attach the new radiator grille and Connect all brackets and clips as they were on the original. Then you must not use the Cable holders for the sensors forgotten.
Finally, all you have left are the 7 Screw connections all round which you simply screw back again. Once the new grille is firmly attached to the bumper and everything is in place, you can start transferring the license plate holder and sensors from the old grille.
Step 5: Transfer components to RS grill
Depending on which RS grille you have opted for, the mounting system for License plate, camera, parking sensors all the way to Audi emblem different. In most cases, however, the system is self-explanatory and installation is easy. For this black RS grille, proceed as follows:
Audi emblem transferred:
First, dismantle the Audi emblem from the original radiator grille. It is best to use a thin screwdriver for this. The emblem is only attached with clips and can be easily removed from the Rear side can be unlocked.
Alternatively, you can simply lever out the emblem from the front. Now mount the new bracket with the adopted Audi emblem using the "Fastening plate" from the scope of delivery to the center of your honeycomb grille.
Transfer license plate holder:
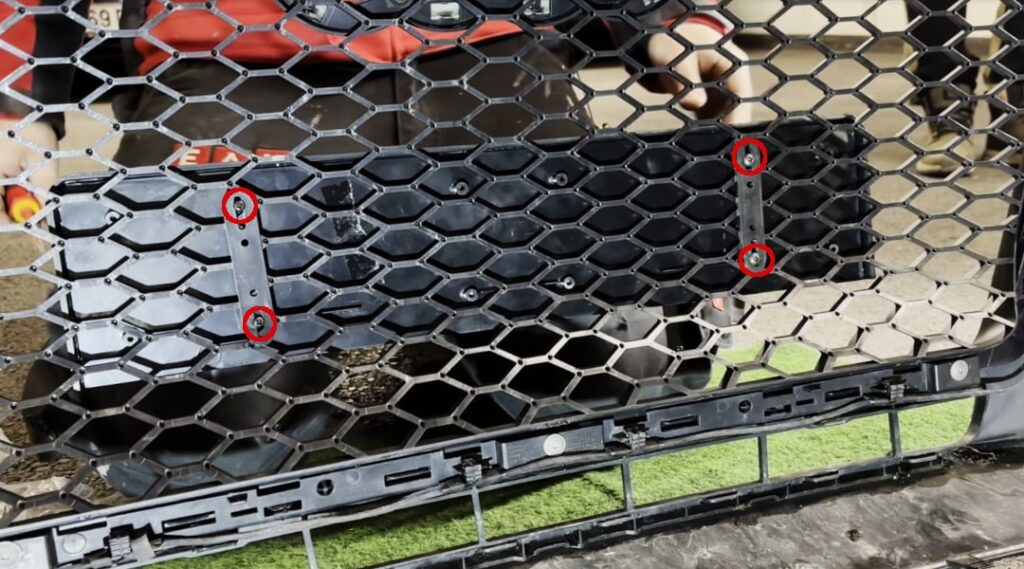
Mounting the new license plate holder works on the same way as the emblem. Remove your old license plate holder from the original radiator grille and attach it to the new plastic holder supplied.
In principle, we recommend that you Frameless license plate holders to switch. These are easier to attach and simply look much better in combination with the new grill. Here you will find a frameless holder that not expensive and at the same time StVO-compliant is.
- ✅ 𝐙𝐈𝐄𝐇𝐓 𝐁𝐋𝐈𝐂𝐊𝐄 𝐌𝐀𝐆𝐈𝐒𝐂𝐇 𝐀𝐍 -...
- ✅ 𝐅Ü𝐑 𝐉𝐄𝐄𝐃𝐄 𝐅𝐀𝐑𝐁𝐄 - Our transparent...
- ✅ 𝐌𝐈𝐓 𝐒𝐓𝐕𝐙𝐎 𝐙𝐔𝐋𝐀𝐒𝐒𝐔𝐍𝐆 - ROADZ License plate holder...
- ✅ 𝐄𝐈𝐈𝐍 𝐒𝐈𝐂𝐇𝐄𝐑𝐄𝐒 𝐆𝐄𝐅Ü𝐇𝐋 - The frameless...
Transmit parking sensors:
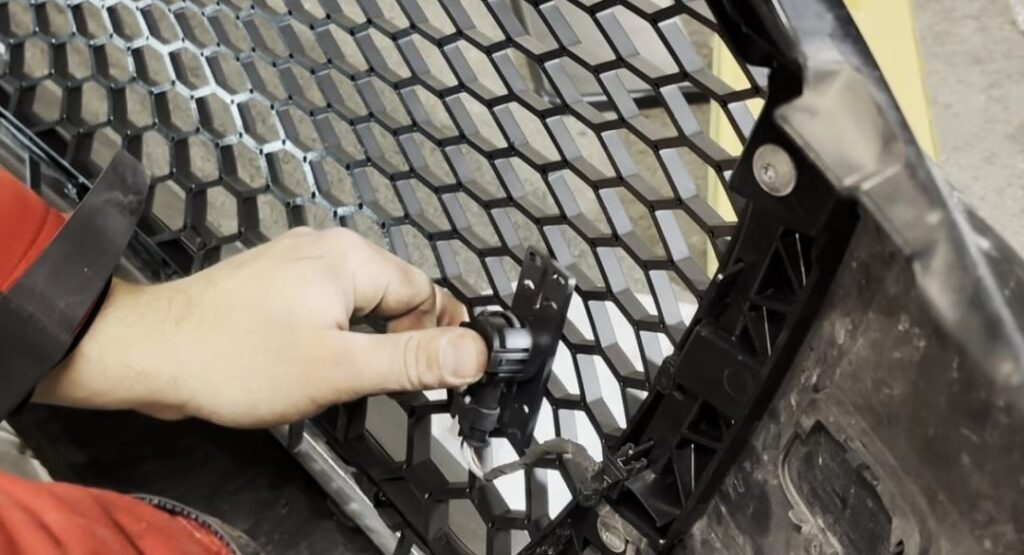
First, remove the parking sensors from the old radiator grille. Remember, which sensor was on the right and which sensor was on the left. You can simply lever the parking sensors out of their current holder and insert them into the new holder (sleeves).
Theoretically, mounting should be done in the same way as with the license plate holder (with the "plates"). However, we have opted for optical reasons decided against this and only use the supplied "Sleeves" for the parking sensors.
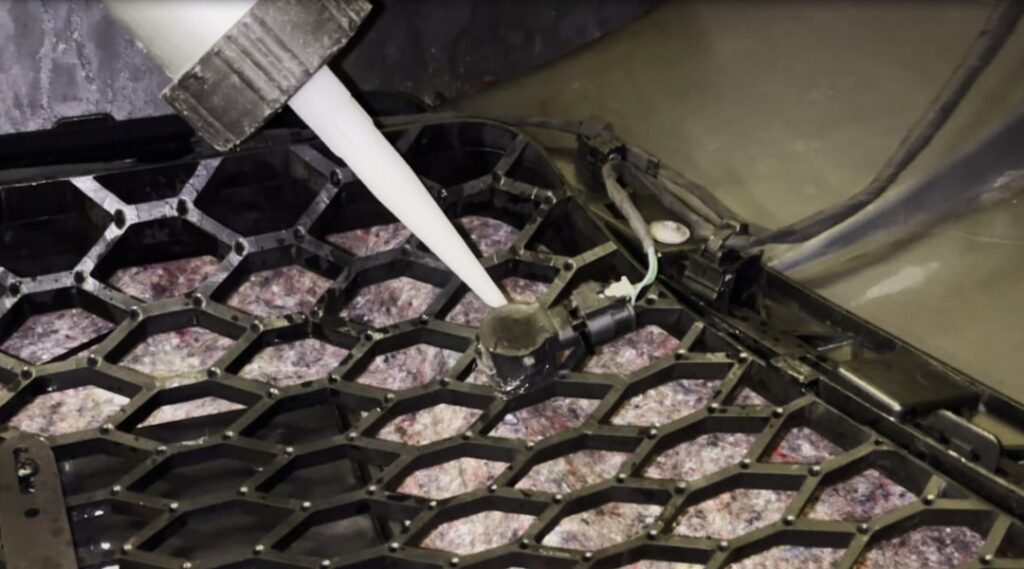
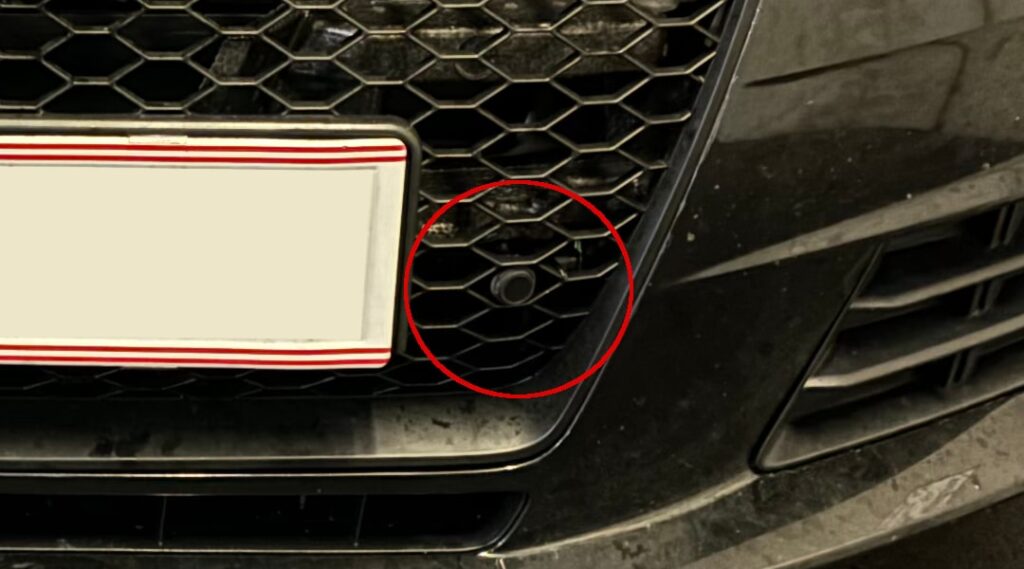
The sensors are simply inserted into these Sleeve holder plugged in and with a little Adhesive glued to the honeycomb grille. This means that it will only the bracket glued to the honeycomb grille and the parking sensors can be unplugged at any time if required. We simply cut out the plastic plates around the sleeve.
The size of the sleeves is also ideal for this and provides enough adhesive surface to be able to attach them in a "honeycomb hole". If you don't trust your glue, you can also use a small (black) cable tie. You won't even notice it and you'll be on the safe side.
Step 6: Painting the carrier & mounting the bumper
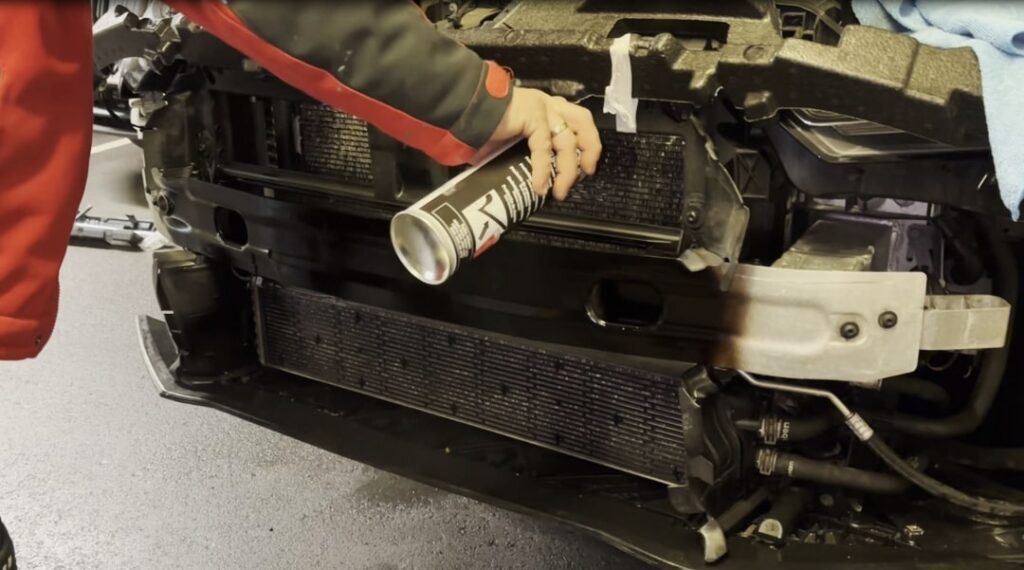
Before you start reassembling the car, we recommend that you check the paint the silver bumper support behind the radiator grille black. It improves the image a lot, and no huge white carrier stands out behind a completely black honeycomb grille.
You can therefore simply use it with a black spray can paint to improve the overall appearance. Whether you ultimately want to paint the carrier or not is of course up to you. However, it is not absolutely necessary.
Now place the bumper with the newly fitted RS grille and connect the sensors with the car again. Then attach the bumper so that all clips and brackets engage securely. Check the corners in particular so that they are secure again. in line with the headlights are.
Next, screw the bumper back on in the reverse order to disassembly. The following screw connections must be reattached:
Then check carefully that everything is securely fastened and that you haven't forgotten any screws. That's it!
Conclusion & before/after
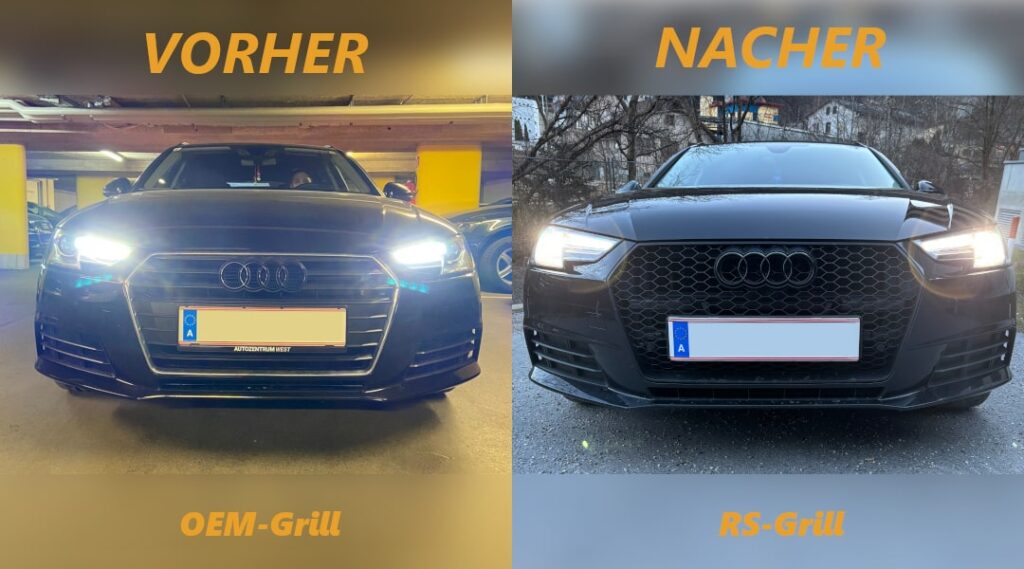
You have just successfully completed your Audi A4 radiator grille replaced and him with a black RS grille embellished. As you can see, the process is very simple and with a little craftsmanship and these instructions.
An annoying, but small Disadvantage with these models is that the Bumper removed first to change the radiator grille. The process is a little inconvenient, but as you can see it's not an obstacle. In our opinion, the purchase was worthwhile definitely profitable and the result will undoubtedly draw attention to your Audi.
Finally, we'll show you two more Before/after pictures from the car. Enjoy the change!
* Affiliate links are marked with a *. When you purchase one of these products, we receive a small commission. Nothing changes for you and the offer/price remains the same. You can find more information about affiliate links here.
More Articles
BMW Sport Plus coding: Unlocking driving mode - instructions
BMW Sport & Comfort Plus codingUnlocking driving mode - BMW coding made easy - In this guide you will learn step by step how to...
BMW Emergency Call System Error Battery Replacement | G-Series GUIDE
BMW emergency call system error? solution: change the battery! The well-known BMW emergency call system error (B7F341) occurs in many BMW vehicles, whether E-series,...
Change wheel bearing yourself - INSTRUCTIONS for VW Passat B7
Radlager selber wechselnAnleitung für VW Passat B7 In diesem Beitrag zeigen wir dir, wie du das vordere Radlager an einem…

