Replacing the Steering Column Switch
Guide for BMW F models
Are the indicators or windshield wipers going crazy? Is the steering angle sensor defective? Do some buttons on the steering wheel no longer work or have the gearshift paddles failed? The most common cause of these symptoms is a defective steering column switch/shift center. The control unit could be defective or an internal connection could have become loose.
However: Changing the steering column switch (shift center, SZL) on BMW F models seems more difficult than it actually is. These specific instructions will show you how easy it is to change the steering column switch on BMW F models yourself.
- Required tools & spare parts
- Step 1: Disconnect the Battery
- Step 2: Removing the Airbag and Steering wheel
- Step 3: Disassemble the old Steering Column Switch (SZL)
- Step 4: Install new Steering Column Switch (SZL)
- Step 5: Refitting the Steering Wheel and Airbag
- Step 6: Code the new Steering Column Switch (SZL)
- Step 7: Calibrate the Steering Angle Sensor
- Conclusion on this "How to"
- More Articles
Required tools & spare parts
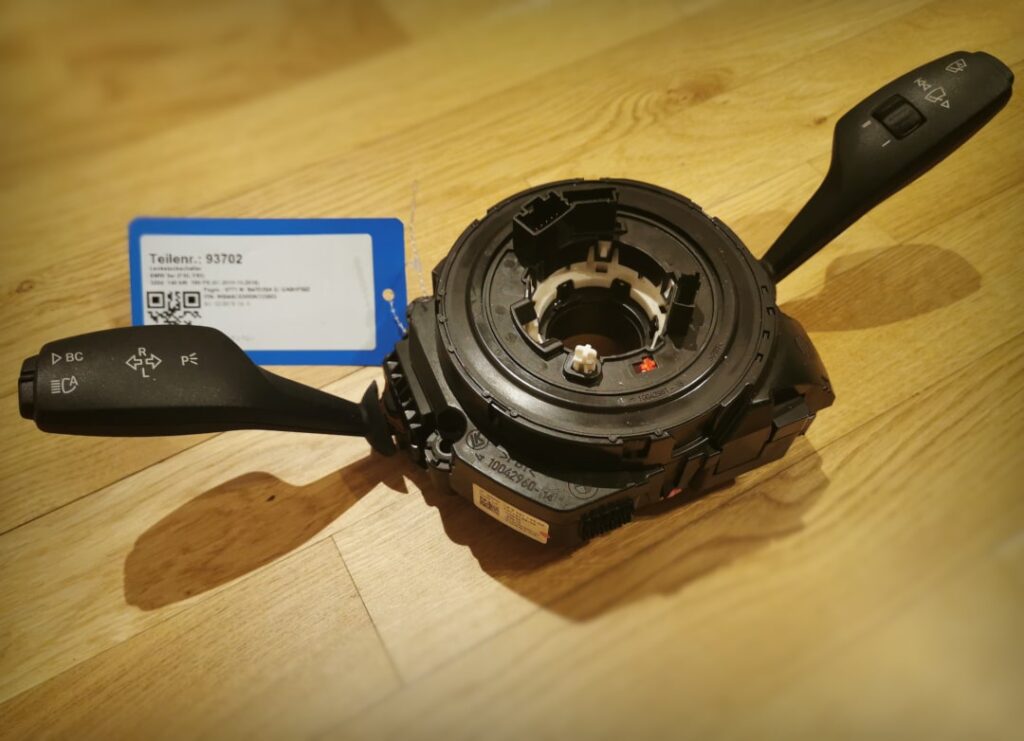
Steering column switch / SZL module *
BMW F22 F30 F32 F36 F82 SZL SHIFT CENTER 9253751 (For BMW F30)
* Affiliate links are marked with a *. When you purchase one of these products, we receive a small commission. Nothing changes for you and the offer/price remains the same. You can find more information about affiliate links here.
Step 1: Disconnect the Battery
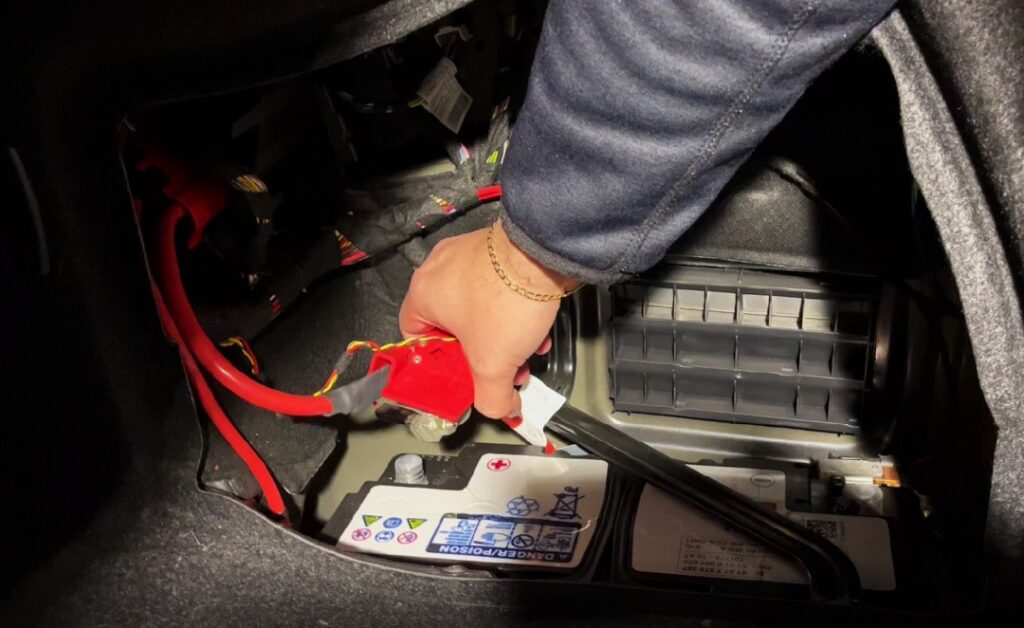
The first step is to safely disconnect the battery. The main reason for this is that the airbag is being removed, and you want to avoid generating unnecessary error codes. Additionally, it is generally recommended to disconnect the power source (the battery) when performing electrical work on the vehicle.
To do this, turn off the engine and open the battery housing in the trunk. Then, disconnect either the negative terminal (black cable) or the positive terminal (red cable). It is not necessary to disconnect both terminals, but it can still be done as an additional safety measure.
Important: Do not close the trunk! Of course, your car's central locking system won't work without power either. You could accidentally lock yourself out.
Step 2: Removing the Airbag and Steering wheel
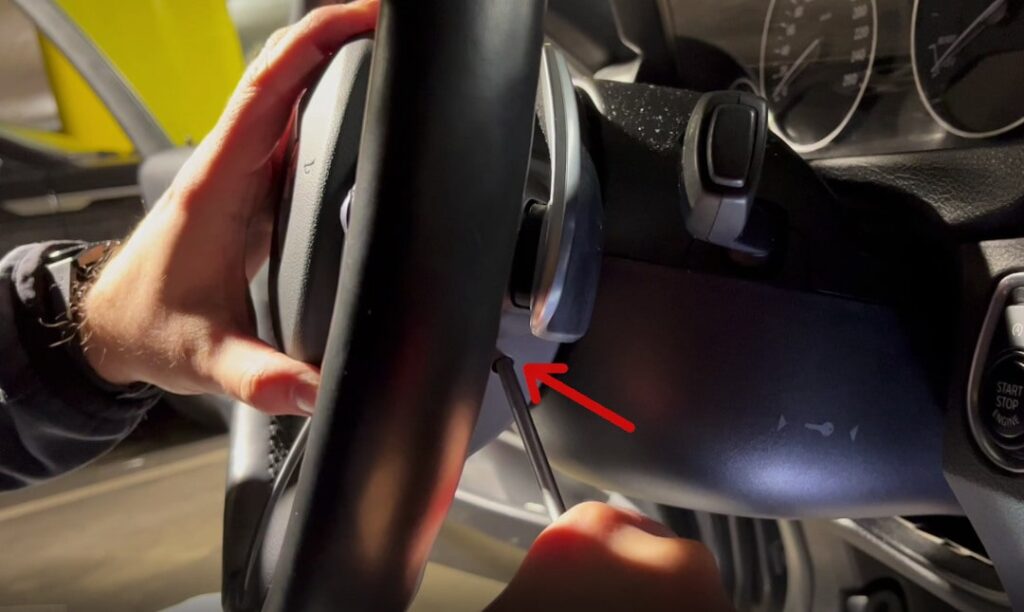
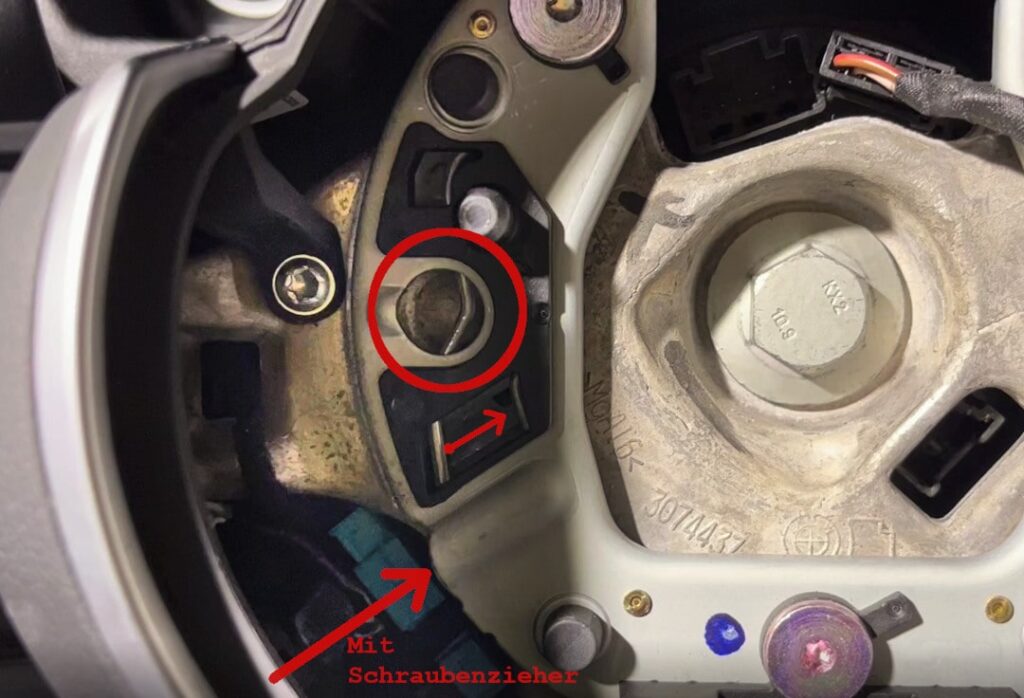
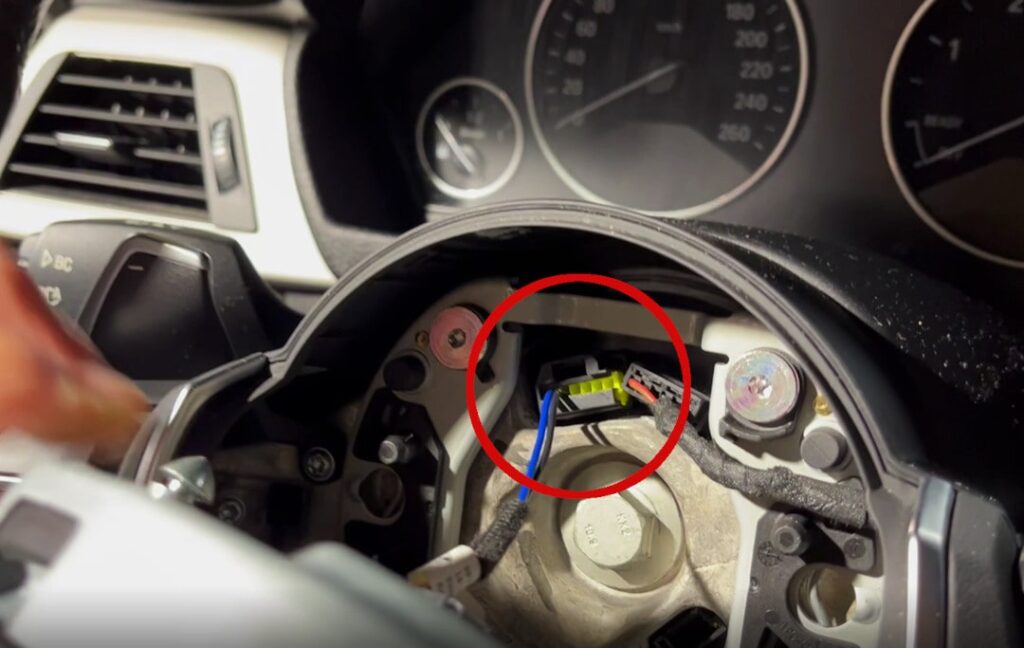
The disassembly process is the same for the M package as it is for the standard steering wheel. On the rear side of each steering wheel, there are two slots or holes. Insert a large flat-head screwdriver into these holes as shown in the photo. Try to activate the lever on each side to release the airbag. You will hear a noticeable "click" as it disengages. Then, disconnect the airbag plug and carefully place the airbag to the side (refer to the images).
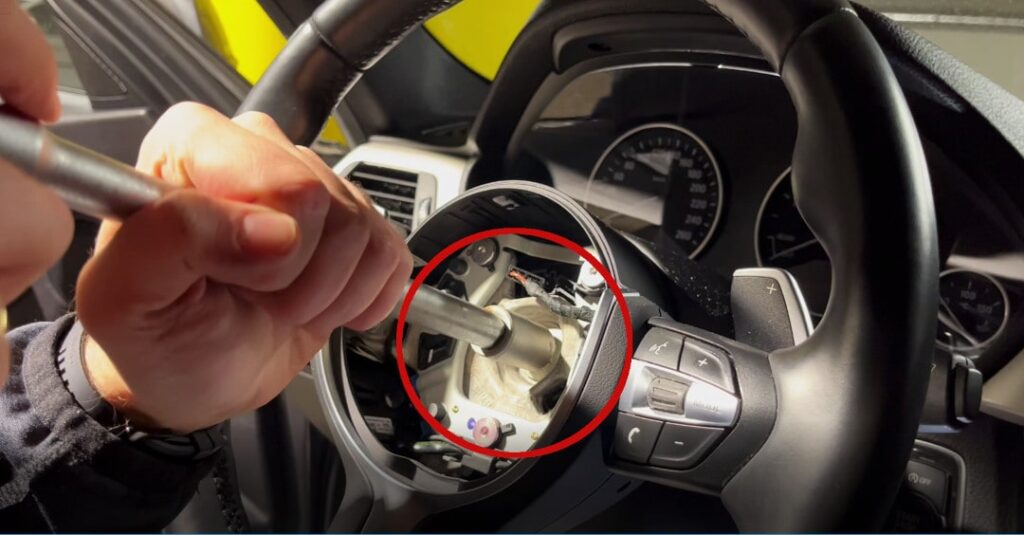
The steering wheel is attached to the steering column with a 16mm hex bolt. Once the bolt is removed, you can easily pull out the steering wheel.
Step 3: Disassemble the old Steering Column Switch (SZL)
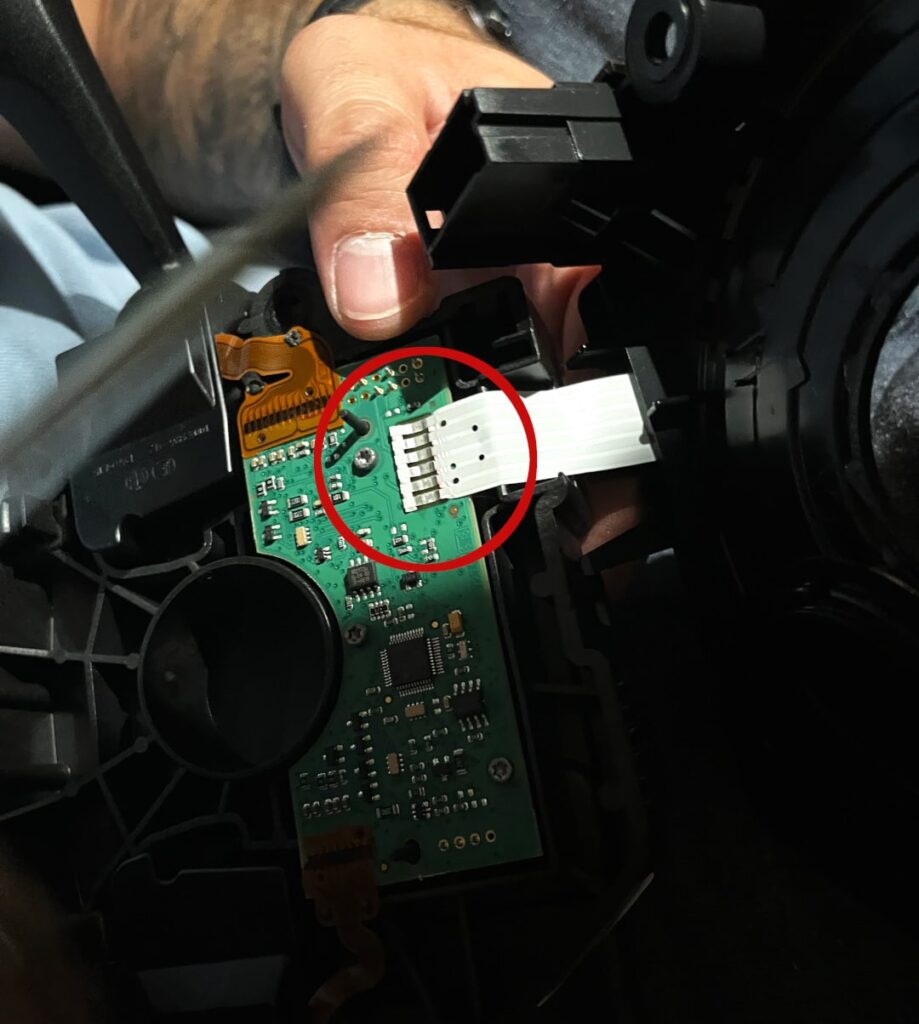
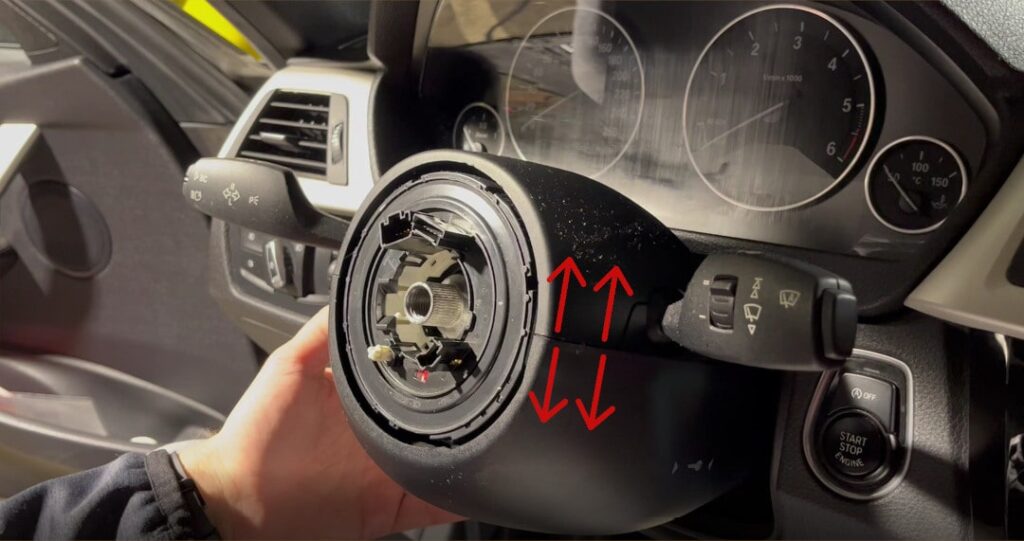
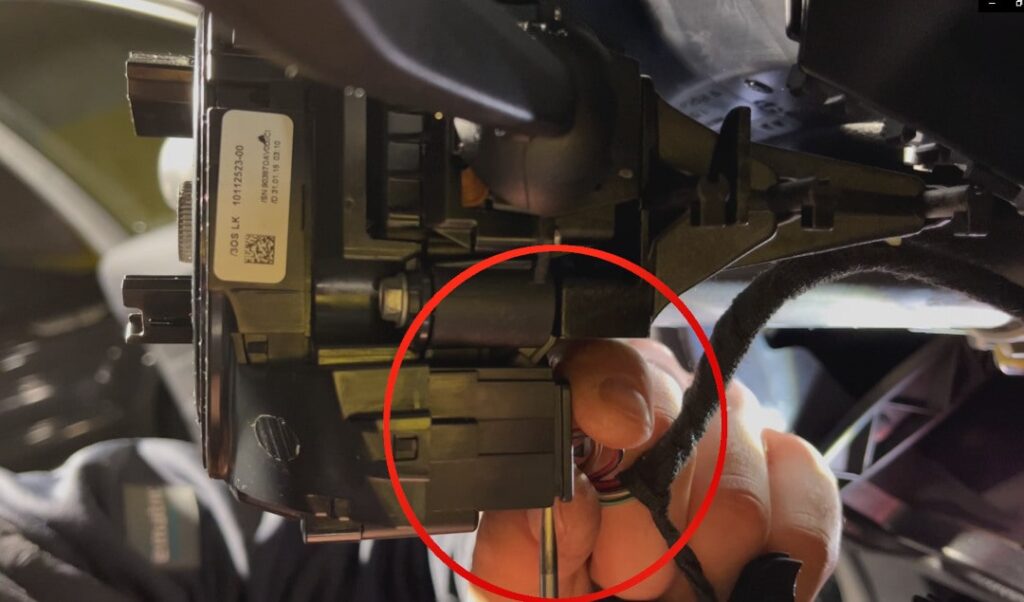
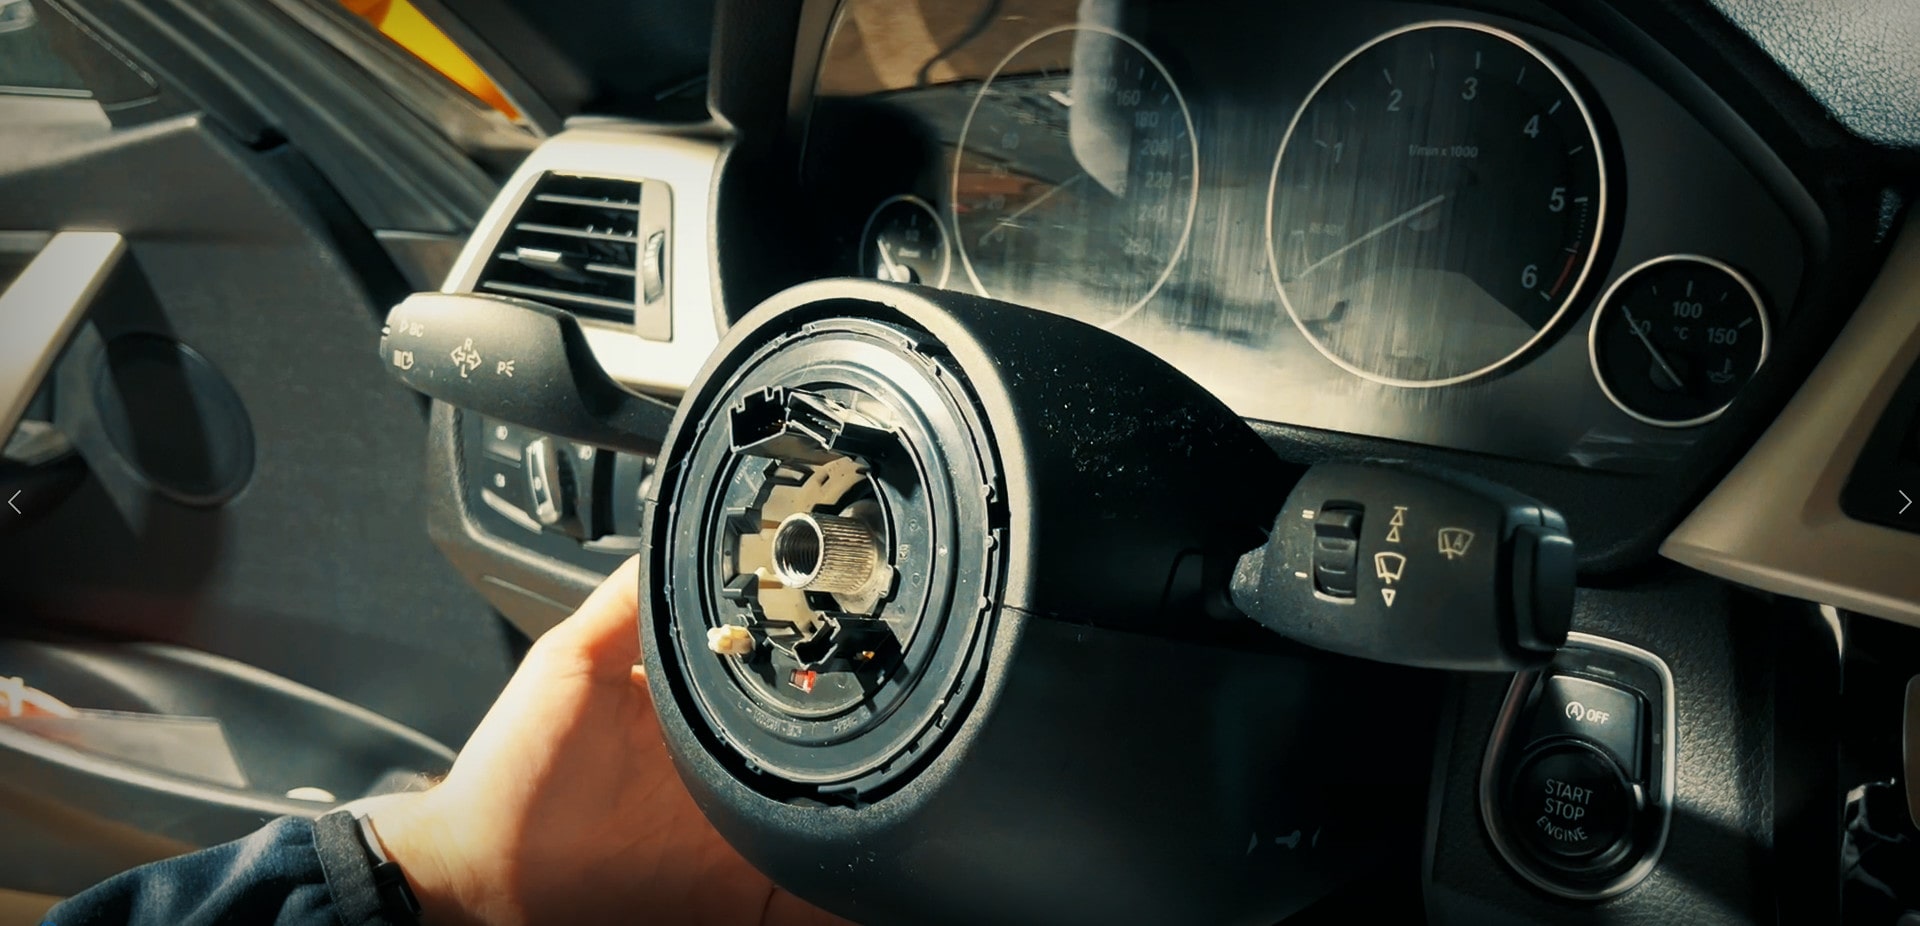
Next, first remove the upper cover of the steering column, followed by the lower cover. These are secured with plastic clips and can be easily unclipped. On the rear side of the control unit, there are two plugs that need to be disconnected. One of them has a "lever lock". You release it by simply pushing the lever upwards and pulling out the plug.
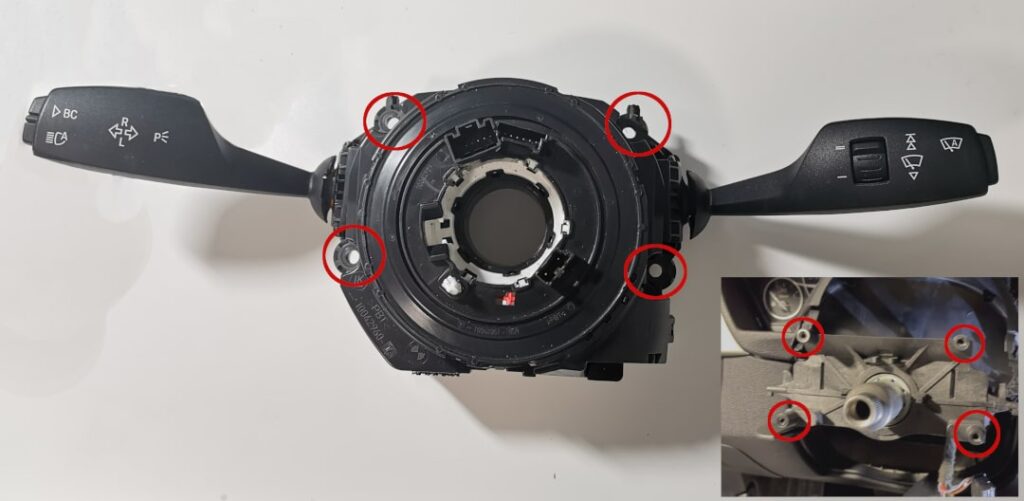
The steering column switch/control unit is secured to the steering column with four 8mm hex bolts. Once the bolts are removed, you can simply pull the unit off the steering column.
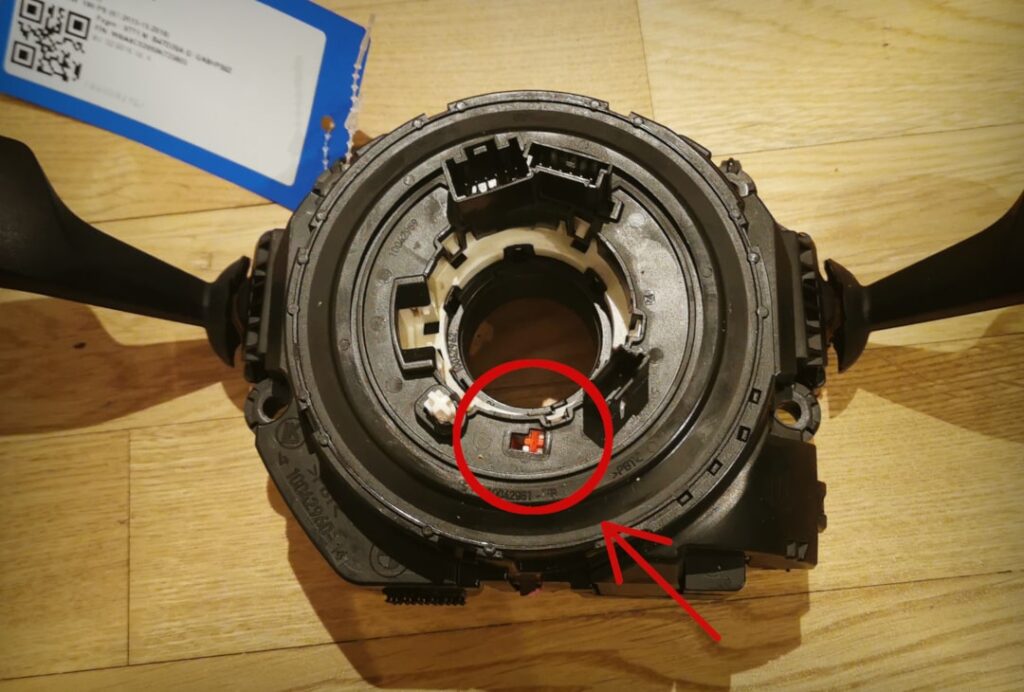
Step 4: Install new Steering Column Switch (SZL)
Step 5: Refitting the Steering Wheel and Airbag
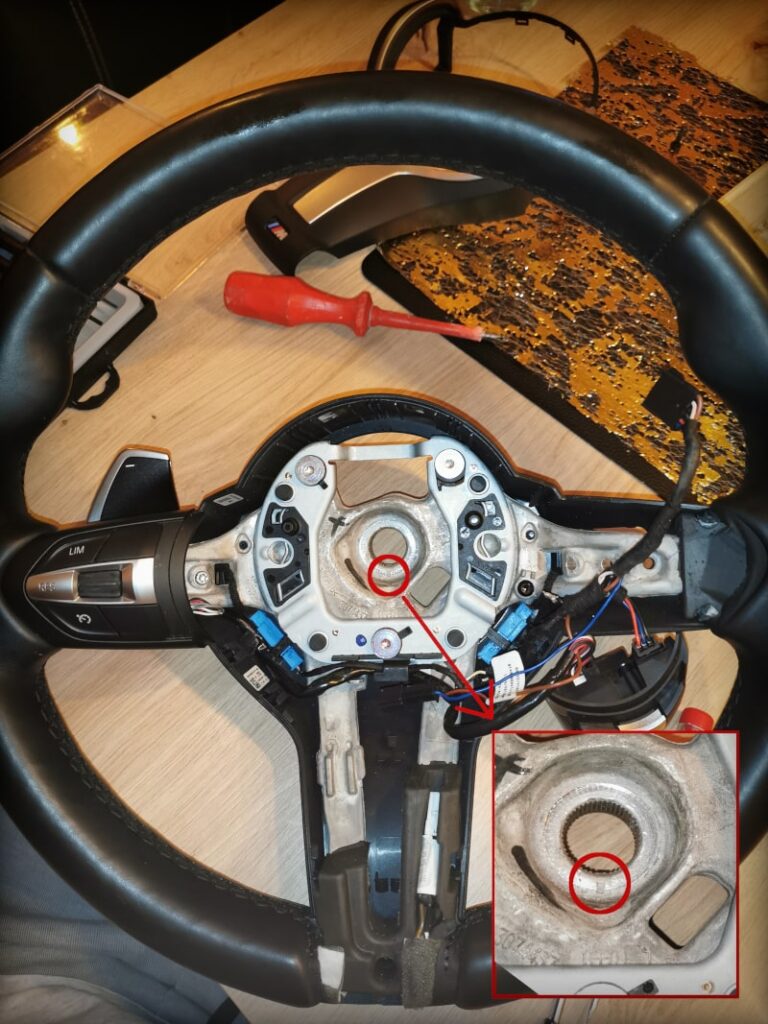
There is a notch on the thread of the steering column that aligns with the notch on the thread of the steering wheel. This ensures that you cannot reinstall the steering wheel incorrectly. So, you don’t need to worry about the correct position of the steering wheel during reassembly. Reconnect the airbag and carefully press it back into its position until you hear a "click" on both sides.
Once everything is reassembled, reconnect the battery and start the car. If no error messages appear (such as with the BMW F30 LCI) and everything functions correctly, then this guide is complete for you. However, depending on the model, it is likely that you may now encounter error messages. In this case, coding is necessary, as the car has not recognized the new SZL.
Step 6: Code the new Steering Column Switch (SZL)
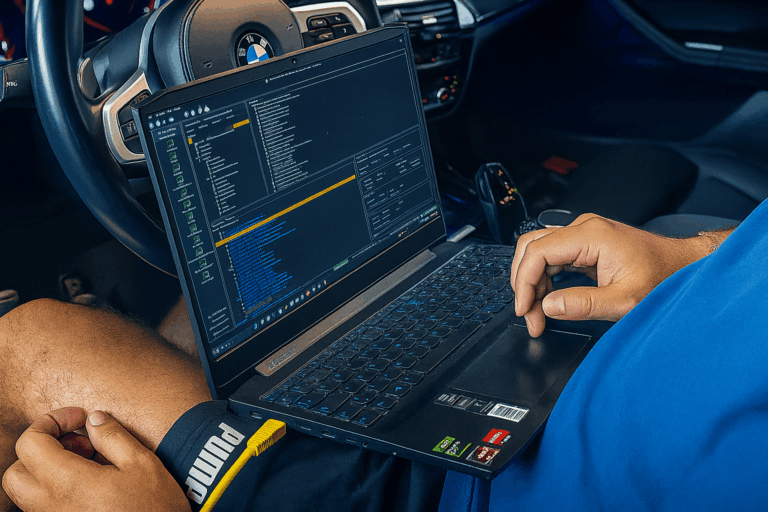
For coding, you will need an OBD/Enet cable* and the E-Sys program. Since you do not need to make any changes to the FLA, the standard version of E-Sys is sufficient, and the PRO version is not required.
1.) Establish connection with the vehicle
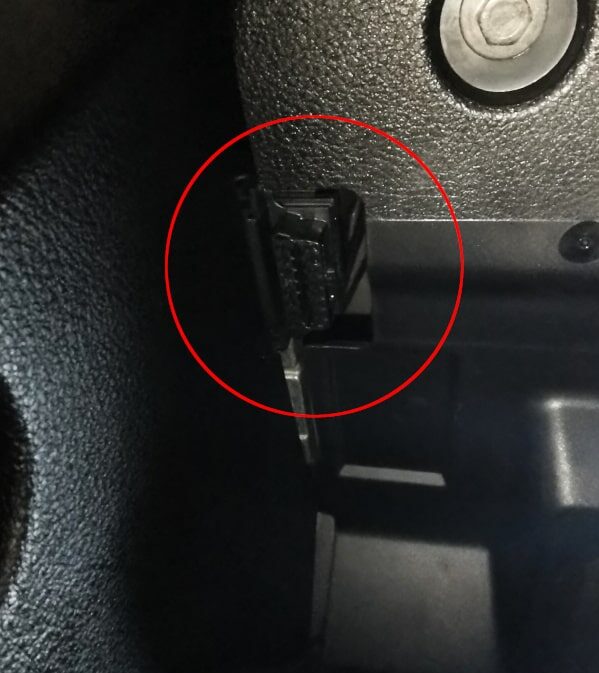
First, turn on the ignition of your BMW. Then, connect your laptop to your BMW using the OBD/Enet cable and the OBD port in the car. This is located in the driver's side footwell.
Next, either turn on the engine or connect the battery to a power source. We recommend performing all coding procedures with the engine running or while charging the battery.
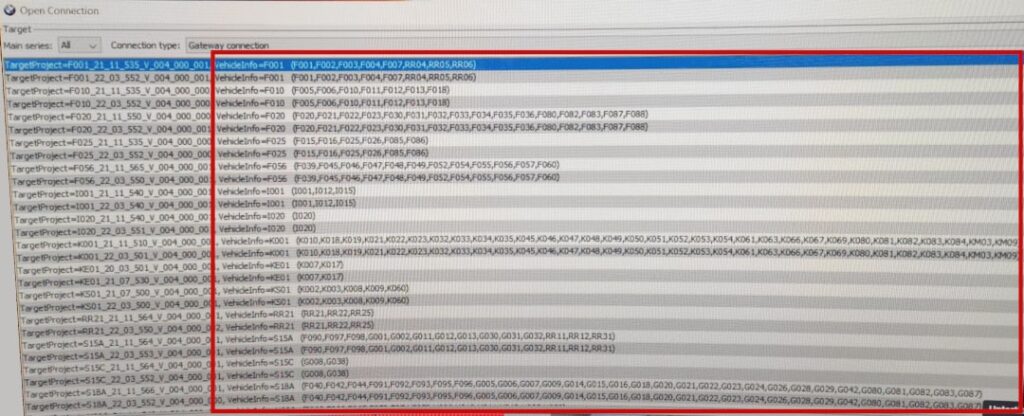
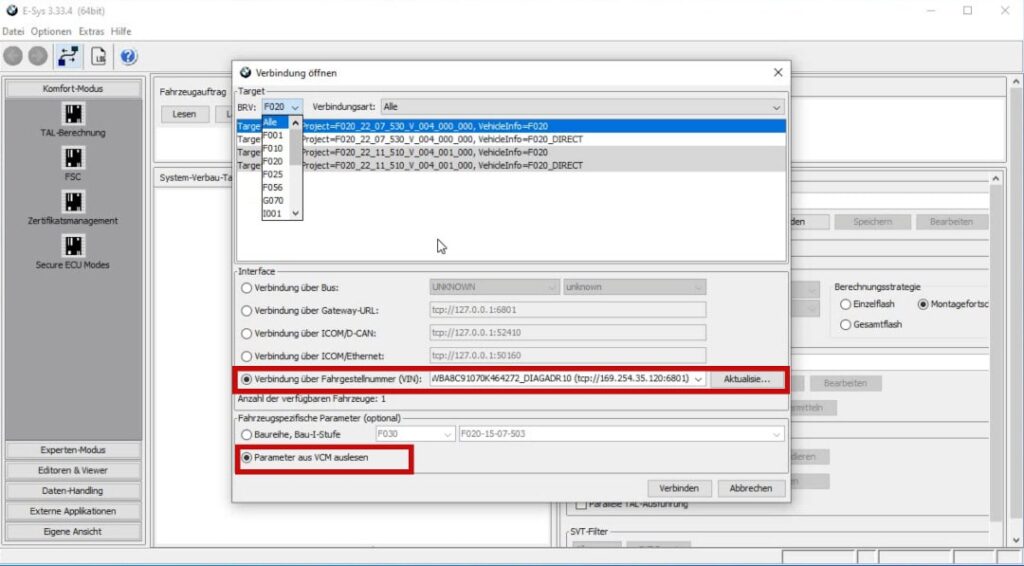
The first task is to connect the program to the vehicle. To do this, click on the top connection button and select your model according to the table below. It doesn't matter which of the two available entries you choose for your model. The only important thing is that you do not select the "DIRECT" option. For example, for the F30, you must select the F20 option.
In the same window, accept the following settings and click on "Connect".
2.) Read out vehicle order (FA) and ECM
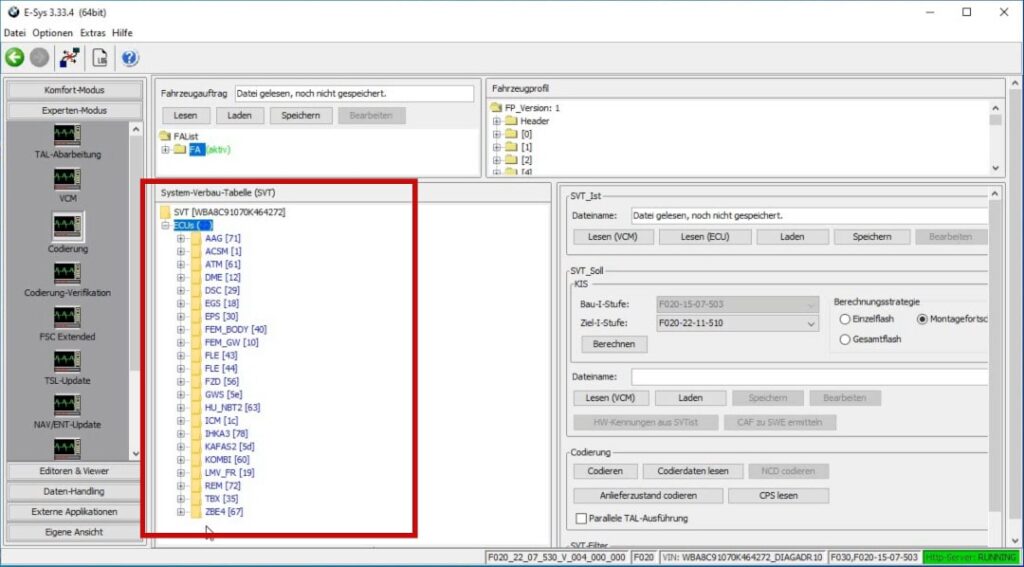
The next step is to read the FA and then display the individual control units. To do this, click the following buttons in the shown order:
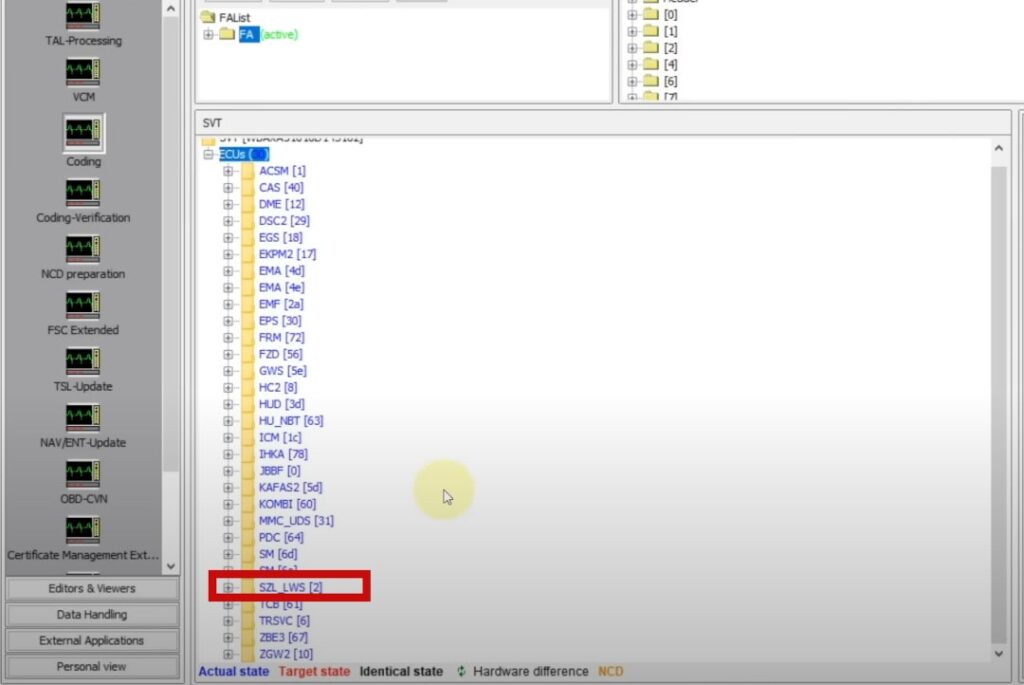
In the list of control units, there is a folder named “SZL_LWS”. This designation stands for the steering column control unit and steering angle sensor. This is the control unit of the steering column switch that is to be reassigned to the vehicle.
3.) Assign new CAFD and code it into the vehicle
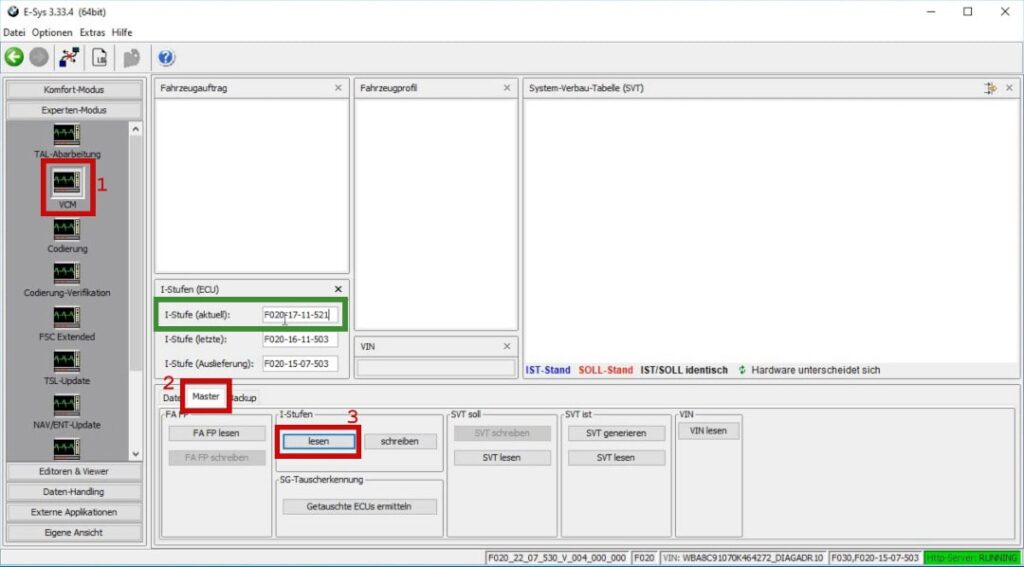
When you expand the SZL folder, you'll notice that the CAFD point is not green. This means that no CAFD has been assigned to the new control unit. To resolve this, you first need to find your current software I-level. To do this, go to the “VCM” menu and click on the “Master” button. Next, click the “Read” button in the I-level window.
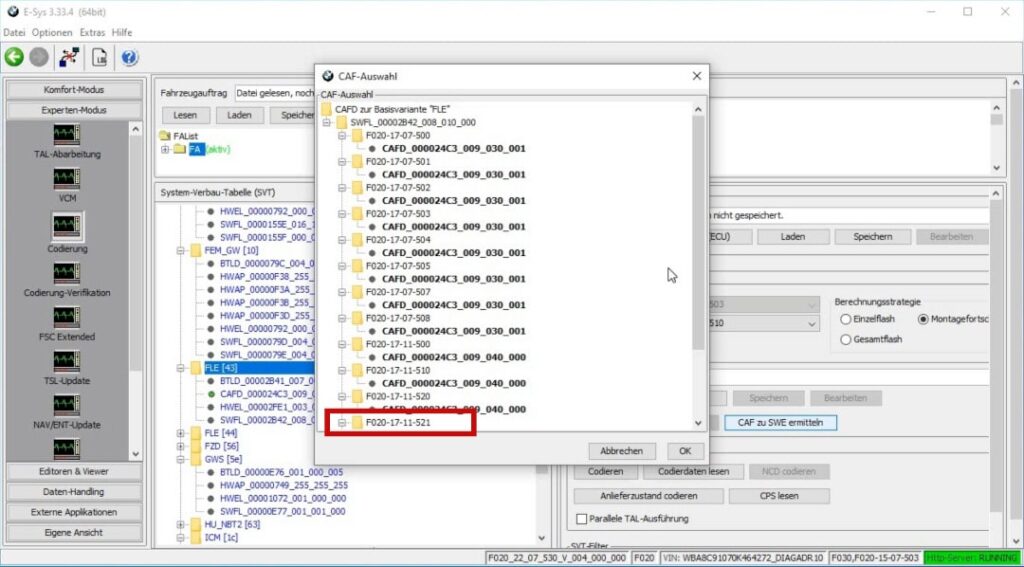
Note down the I-step and then return to the “coding” menu. Now, select the SZL_LWS control unit folder again and click on “Determine CAF for SWE” on the right side of the window. A list of available CAFD for the control unit should appear. Select the CAFD that matches the date of your I-step and confirm by clicking “OK”.
Once the new CAFD is assigned, right-click on the “SZL_LWS” folder and click “Code”. When the coding is complete, restart the car and the steering column switch should work again. For a detailed process, refer to the video at the top.
Step 7: Calibrate the Steering Angle Sensor
There are different methods to calibrate the steering angle sensor after replacing the SZL. A widely used method is with the ISTA+ program (BMW diagnostic tool). However, some OBD diagnostic scanners now also include the “calibrate steering angle sensor” function.
Since the installation of the ISTA+ program is complex and does not always work 100%, we calibrate the steering angle sensor in this guide using the MUCAR CS4*. The MUCAR CS4 is a diagnostic tool with 5 maintenance functions (including steering angle sensor calibration) and standard OBD functions such as reading error codes, and more. In our opinion, it's the perfect tool for DIY enthusiasts.
- 【10 volle OBD-II/EOBD-Funktionen】 Unterstützt das Standard-OBD-II-Protokoll nach 1996,…
- 【4 Systemdiagnose】Die mucar CS4 Diagnose-Software ist ein kostenloses lebenslanges Upgrade, ein…
- 【5 Wartungs-Resets】Der mucar CS4 Autoscanner bietet auch 5 lebenslange kostenlose…
- 【EU OBFCM】Dieses Produkt entspricht der Verordnung der Europäischen Union (EU) 2020, die…
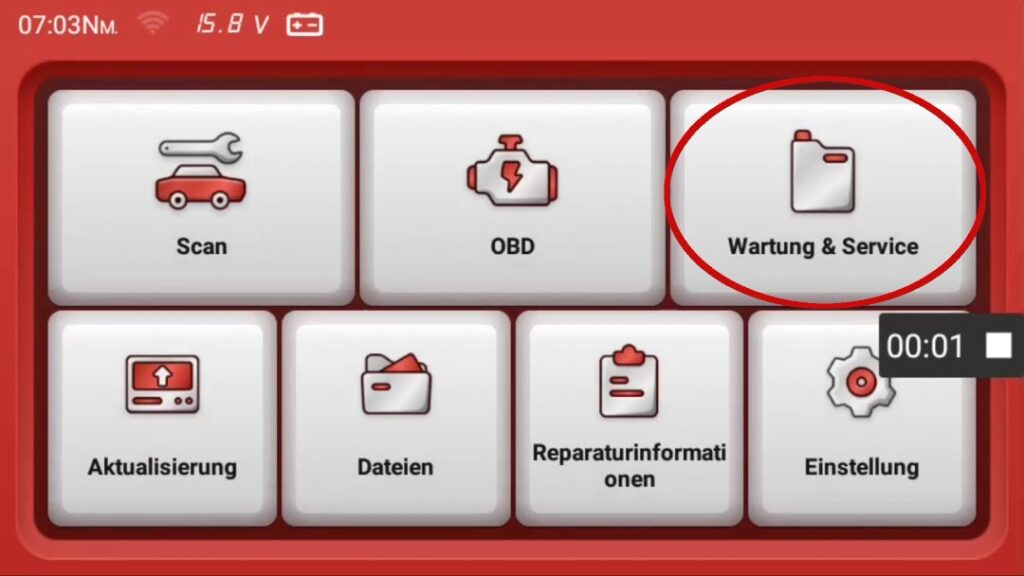
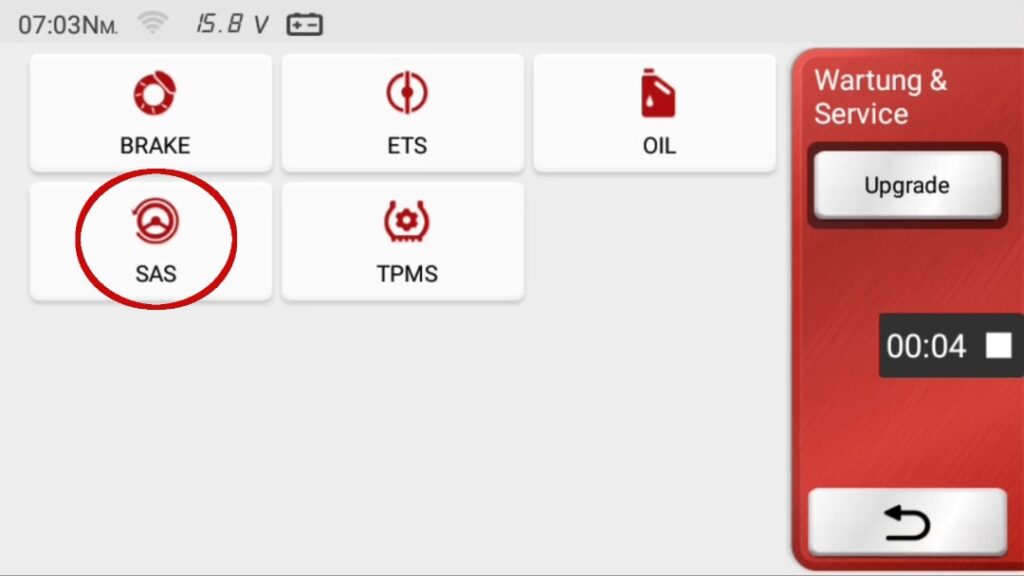
First, turn on the ignition and connect the diagnostic device to your car. To do this, simply plug the cable from the MUCAR into the OBD socket and starts up the device. When the device has started up and all Updates installed you go to the menu "Maintenance & Service". Then click on the field "SAS".
Next, set the steering wheel to the center position. The center position is reached when your wheels are aligned straight ahead. The alignment can be done by eye measurement, which is sufficient for the configuration.
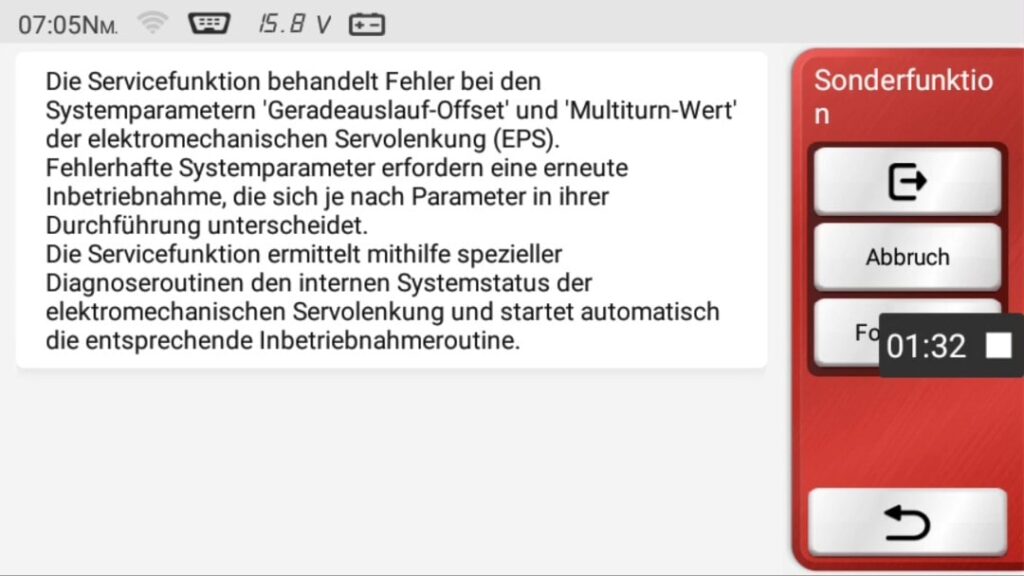
Finally, simply follow the on-screen instructions and let the device do its work.
Conclusion on this "How to"
If you have followed all the steps sequentially and carefully, there should be no issues when replacing the steering column switch. However, if problems still occur, we are always available to listen and will try to assist you through our contact form.
In general, we consider this repair to be easy and believe that this replacement can be done by any “DIY enthusiast” at home. However, we would like to mention at this point that we do not take any responsibility for damages and that this guide is intended solely as assistance. The responsibility lies with you.
Affiliate links are marked with a *. Nothing changes for you and the offer/price remains the same. You can find more information about affiliate links here.
More Articles
BMW Android Auto & Carplay retrofit | Plug & Play | CARLUEX
BMW Android Auto & Carplay retrofitCARLUEX Experience Are you driving a BMW built before 2020 and want to finally use Android Auto?...
BMW Sport Plus coding: Unlocking driving mode - instructions
BMW Sport & Comfort Plus codingUnlocking driving mode - BMW coding made easy - In this guide you will learn step by step how to...
BMW coding software comparison 2025 | ESys, BimmerCode & Co
BMW Coding Software ComparisonESys, BimmerCode & Co. There are now countless tools for coding a BMW. Different software providers offer...
