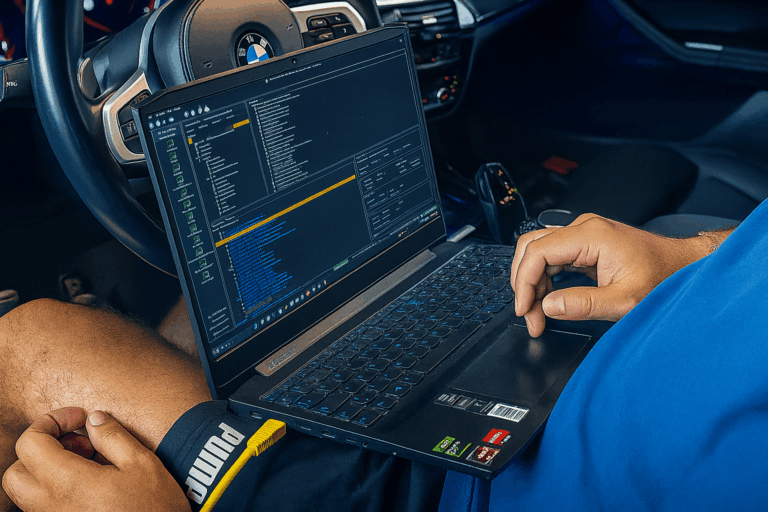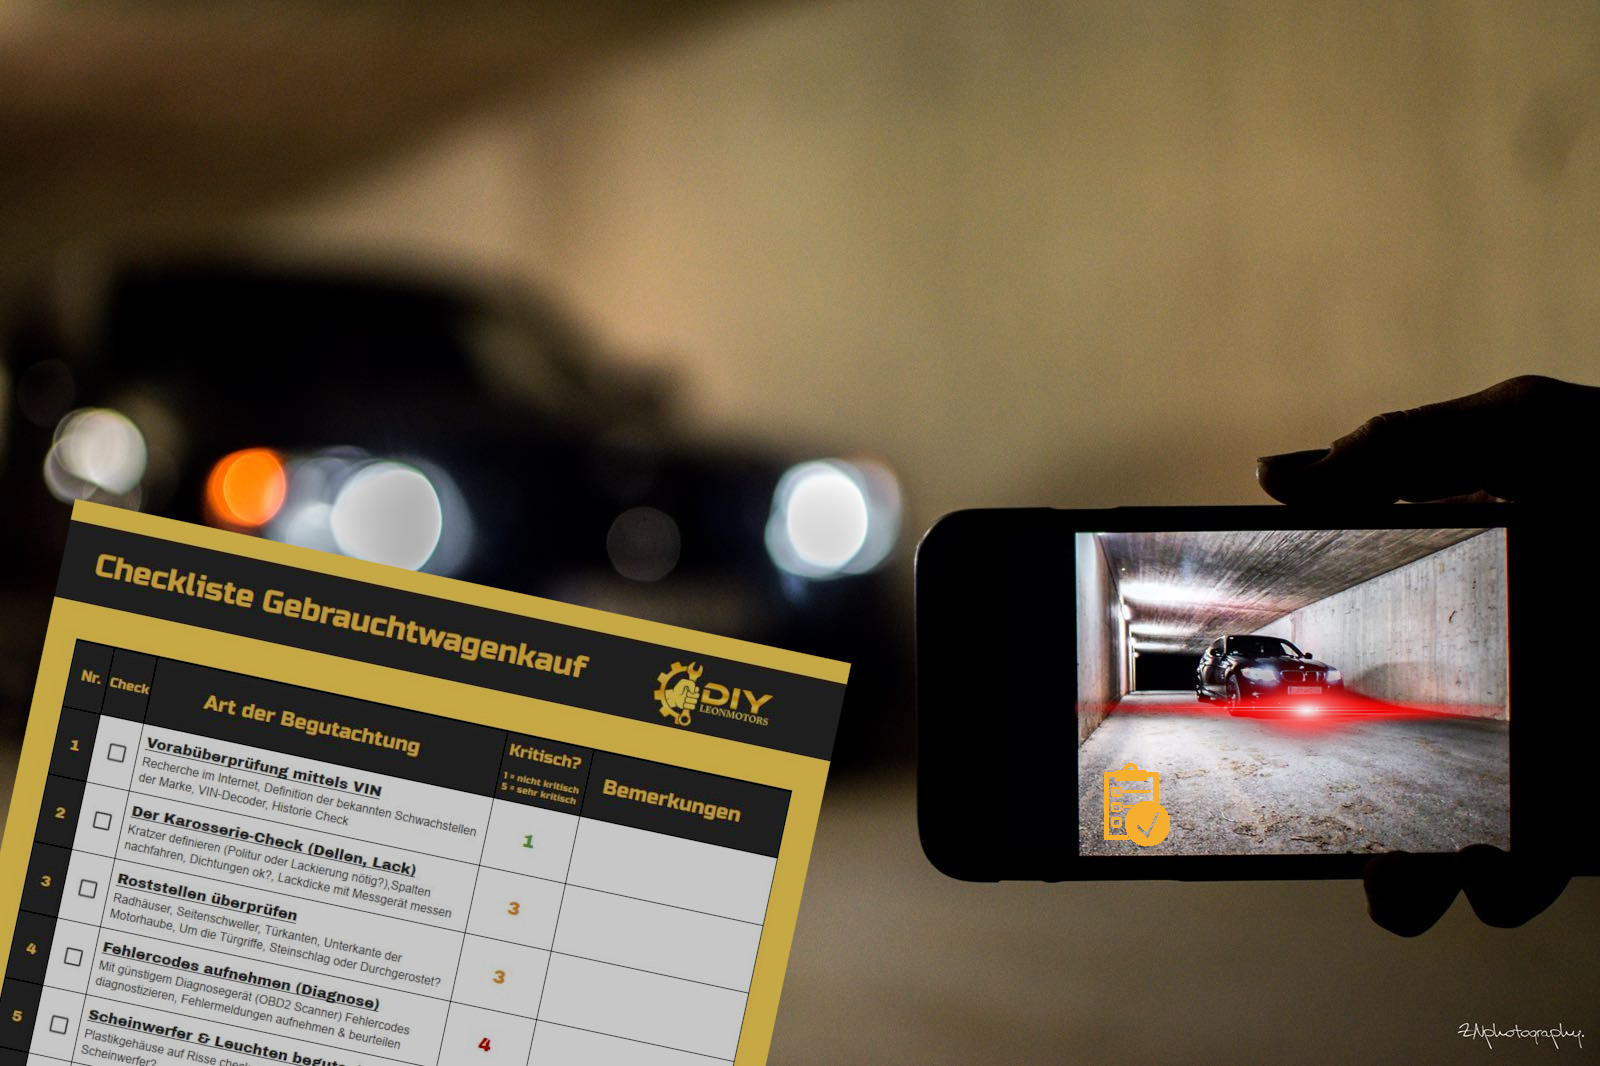
Checklist for buying a used car
12 Defects & Hints you should watch out for!
Don't let yourself be ripped off!
Before you sign the purchase contract, you can save a lot of money with a proper appraisal. This checklist for buying a used car will help you avoid any nasty surprises and give you more arguments when negotiating the price. Here we show you step-by-step what you should look out for when buying a used car.
(+ checklist as PDF)
- 1) The preliminary check using VIN
- 2) The bodywork check
- 3) Check rust spots
- 4) Record error codes
- 5) Inspect headlights & rear lights
- 6) Check exhaust for oil leakage
- 7) Check tires & rims
- 8) Check brake pads & brake disks
- 9) Inspect wheel suspension & shock absorbers
- 10) Inspect the underbody
- 11) Inspect the engine compartment
- 12) Test drive checklist for buying a used car
- Questions when buying a used car
- Conclusion & checklist for buying a used car as PDF
- More Articles
1) The preliminary check using VIN
Make a Online check before you go and look at the used car in person.
Numerous VIN decoder on the Internet provide you with a lot of information and history of the vehicle for less than 10€.
You can find the VIN (chassis number) in your registration.
During this check, you can check whether the vehicle has been involved in an accident, for example.
A Google search with the make of the vehicle and the search term "weak points" behind it is also part of a thorough search. Once the car has passed the "online test", you can
and start the assessment.
Are you from Austria and want to buy a used car abroad? Then our guide will help you
Import a car Austria with the individual steps required.
2) The bodywork check
Check the bodywork for dents & scratches
Dents or bulges are easier to treat than scratches.
From a certain scratch depth, you can no longer polish it out. Here you would have to use a spray gun.
You can find out whether a scratch is too deep for polishing, by lightly running your fingernail over the paint damage.
Stay with the If you run your fingernail over it, the scratch can no longer be polished and should be repainted.
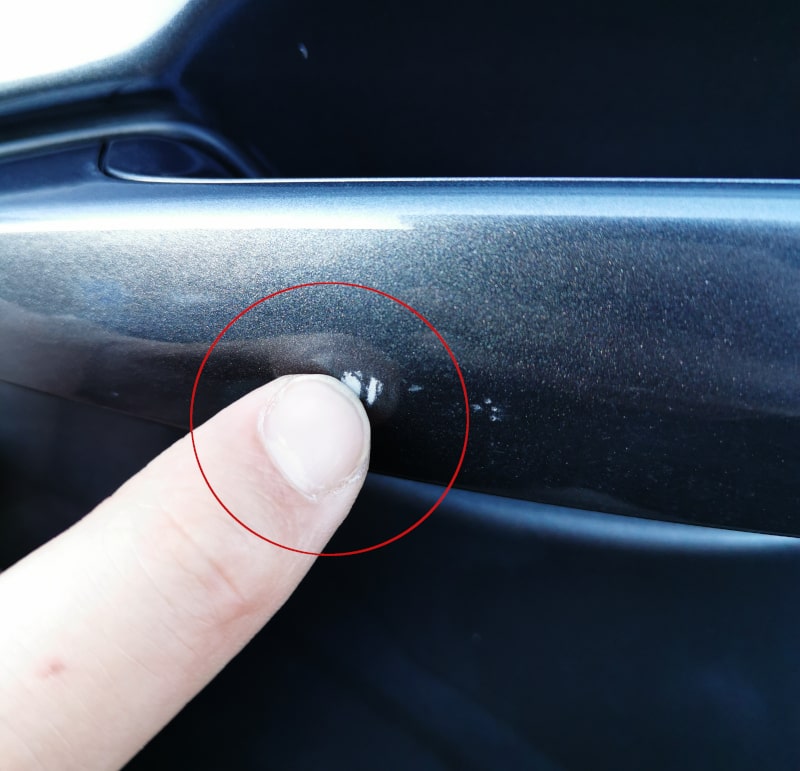
If you take the repair into your own hands, these are about 80€ that you spent on paint and accessories would have to. A fender paint job, for example, costs upwards of €500. If a scratch is not a problem for you, you should have this at least fill with a touch-up pen. This is particularly important for metal parts in order to Avoid rust formation.
Check the paint thickness
You can no longer recognize professionally repainted parts with the naked eye. To find out whether the car had bodywork damage or had to be repainted, a coating thickness gauge helps.
This measuring device shows you the thickness of the paint layer. It is almost impossible to achieve the same paint thickness as the original when repainting.
You can use the measuring device to find areas that need to be replaced, repaired or repainted. If the measuring device shows a greater difference in the measured values at certain points, you may have a Accident car stand in front of you.
- 【Coating thickness gauge for car paints】 The coating thickness gauge is used to measure the thickness...
- 【Automatic reading】 Developed with dual technology, they enable automatic reading of...
- 【Parameter】 Measuring range: 0 - 1500 um (0 - 59.1 mil); Accuracy: ± (3% + 2um); Resolution: 0.1...
- 【Easy to read】 The large LCD display shows the metal type, working mode, number,...
The measuring device is easy to use and protects you from fraud. As this will certainly not be your last used car purchase, it also saves you additional effort and costs in the future.
Tracing the body gaps
In addition to checking the paint layer thickness, you should also take a look at the Body gaps throw. Are they even? Is the gap the same size everywhere?
Unevenness or noticeable gap sizes also indicate an accident with repair or an unclean assembly.
In any case, we advise you to talk to the dealer or private seller if you discover such things.
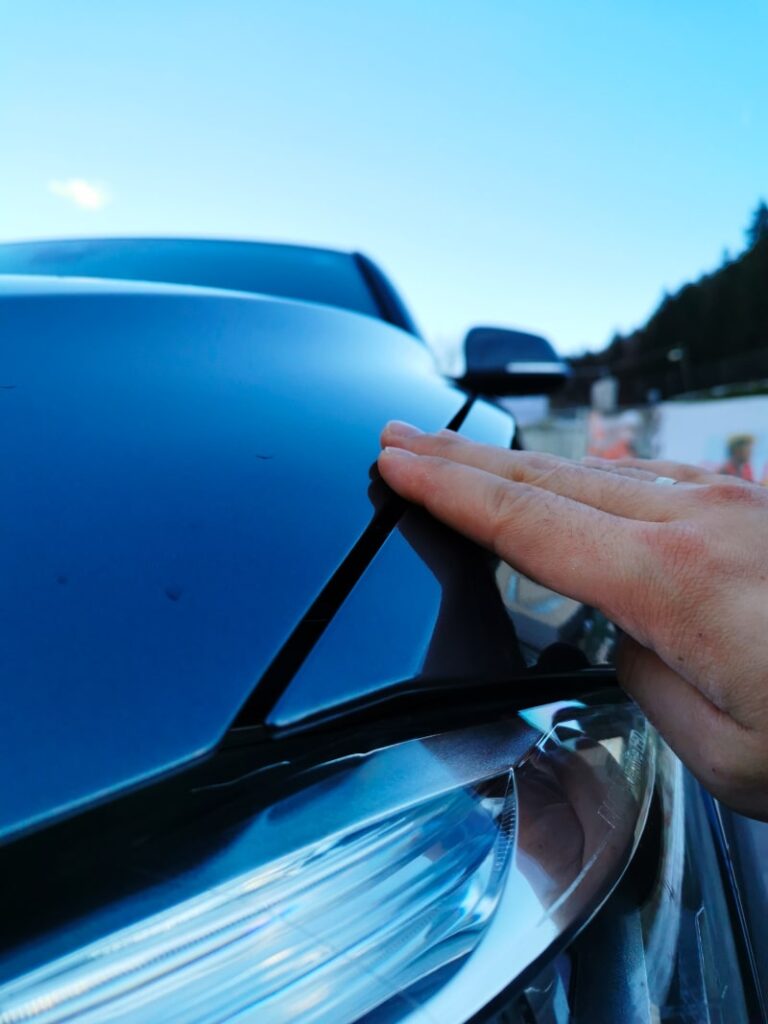
Seals (windows & doors)
The older the vehicle, the more likely it is that the seals will no longer seal reliably. Cracks and brittleness occur much faster in cars that have been exposed to severe weather conditions.
You should always take a quick look at all the seals. In some places, these may have been completely torn away. You can find the most important seals to check here
3) Check rust spots
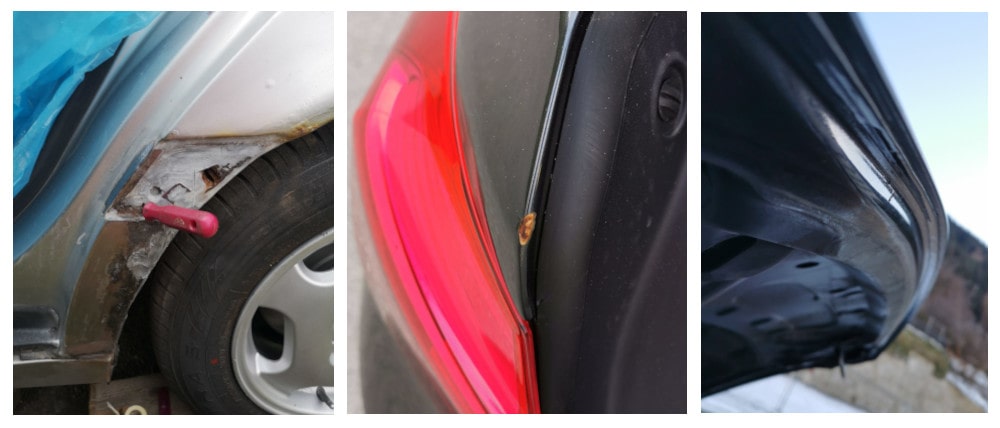
Little rust in one place means more rust in the future. Of course, no rust at all is the best. But sometimes the dream car at the dream price has a nightmare rust spot. That's why you take a close look at the rust so that you can finally assess it. Small rust spots, which can be found on Stone chips on the hood can be easily corrected with a Fix touch-up pen. However, if the metal is rusted through and disintegrates when touched, the only solution is to replace the body part. Examine these areas carefully:
The cost of removing rust spots depends on the extent of the rust. Here you can expect the same prices as for a paint job.
4) Record error codes
For the used car purchase checklist, the Diagnostic device not be missing. With the help of a OBD2/CAN Scanners you can Read out and analyze current error codes supplied by the vehicle. If the seller has not deleted the fault memory, you also have access to older fault codes for the vehicle. The diagnostic device also exposes manipulated mileage readings.
There are various types and models of OBD2/CAN scanners on the market. You don't need the most expensive and comprehensive device to read and analyze fault codes. A normal, inexpensive scanner like the one we use here will suffice:
- 【Elite Version OBD2 Diagnosegerät】Das mucar CS4 OBD2 Diagnosegerät ist eines der…
- 【Tolle Geschenkidee mit hochwertiger Verpackung】Beste nützliche Voreinstellung für Ihren…
- Lösen Sie das Problem selbst – 4 Diagnosesysteme plus 5 Reset-Service: nicht nur für ABS, SRS,…
- 【Geeignet für fast alle Autos und unterstützt 13 Sprachen】Unser mucar CS4 OBD2 Diagnosegerät…
The scanner makes your purchase decision a lot easier and, above all, protects you from Fraud.
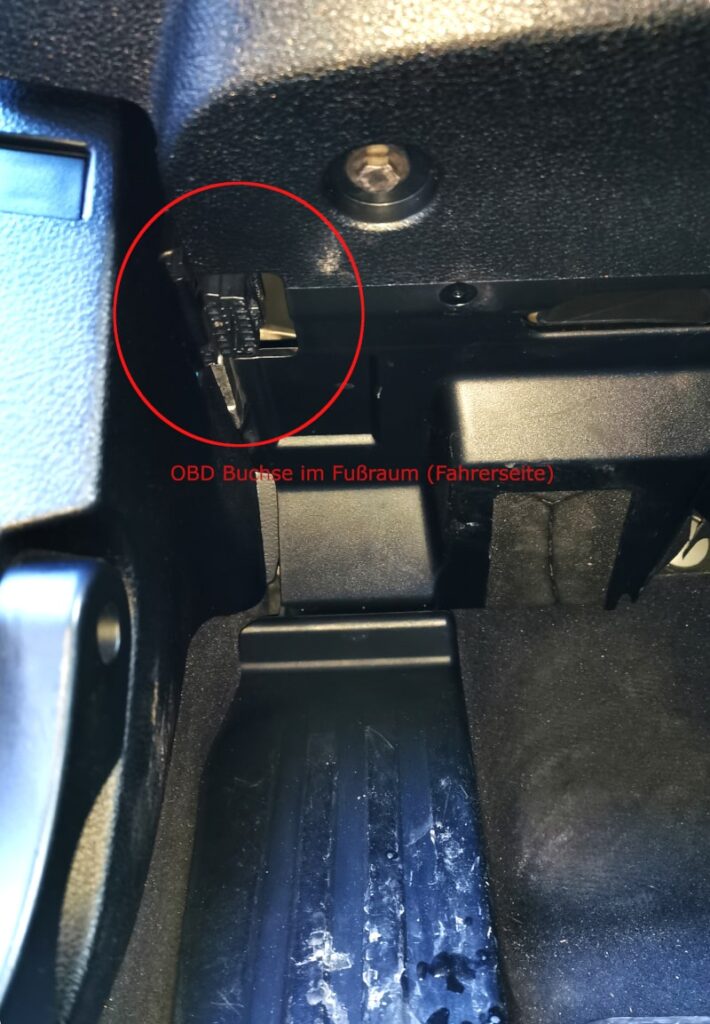
A few tips: The ideal time to read out the fault code is definitely during the test drive. Stop at a corner and display all error codes and error descriptions. Connect the diagnostic device to the OBD2 socket. Most manufacturers have this socket in them Footwell on the driver's side.
5) Inspect headlights & rear lights
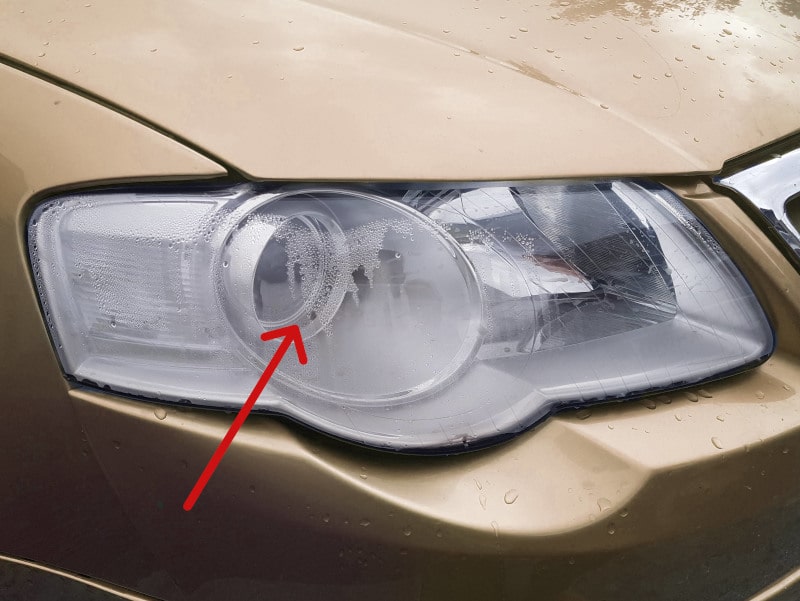
The largest The weak point of the headlights and rear lights is the plastic housing behind them. If the headlights condense or let water into the interior, in most cases the Housing has a crack. If the housing is only minimally cracked, you can use the Welding the gap (plastic welding). However, if parts are broken off or completely demolished, you would have to replace the headlights. Headlights and rear lights are expensive, so it would be advisable to pay the purchase price. by at least €150 per defective luminaire. If the seller has not already taken these defects into account in the purchase price.
6) Check exhaust for oil leakage
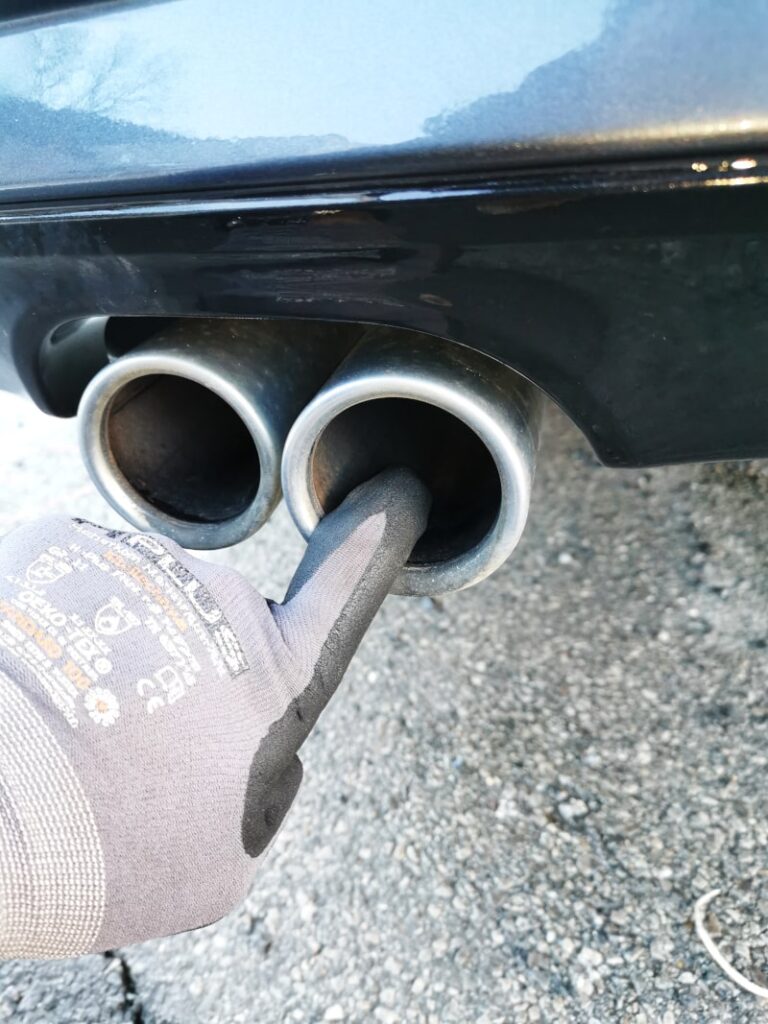
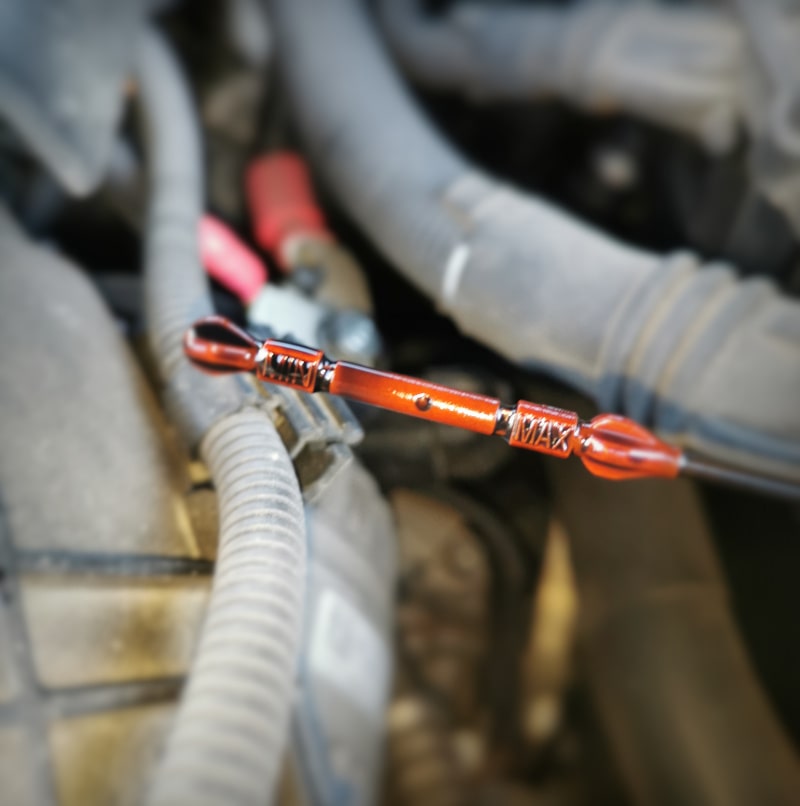
Check the exhaust for oil leaks. Put on a glove and run your finger inside the exhaust cover. If you see oil on your finger or smell burnt oil, then oil has entered the combustion process. This can be caused by defective cylinder head gasket, defective valve stem seals or a defective piston ring. However, it is also possible that the previous owner has filled in too much engine oil. This can be easily checked with the oil dipstick in the engine compartment. If the oil level is OK (below MAX and above MIN), you must assume that one of the defects mentioned above has occurred. The repair of one of these defects is in most cases Three figures in the workshop.
7) Check tires & rims
Many people underestimate the value of rims and tires when buying a used car. Of course, there is a difference whether the vehicle has 4 or 8 tires. With 8-ply tires, you save at least half of the workshop visits for changing and balancing tires. That's 40-80€ depending on the type of rim that you could save every six months.
Assessment of tires (age? tread? damage?)
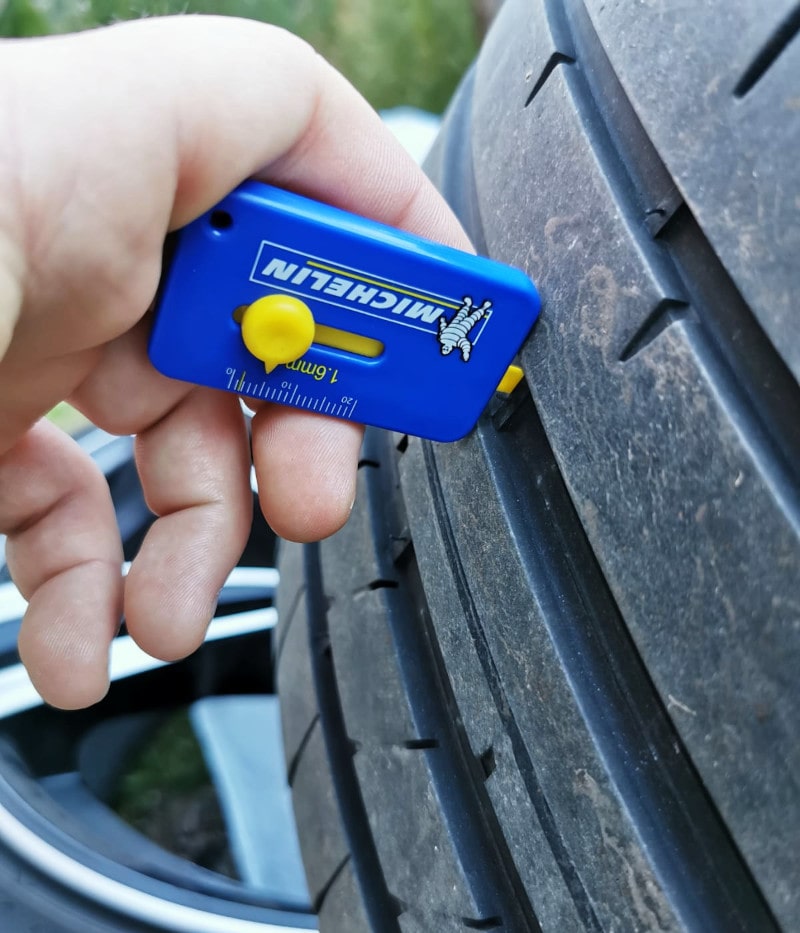
Are the mounted tires worn or too old? Then these are at least 250€ upwards (depending on tire size and type) that you need to invest in new tires. Check the Minimum tread depth and age from the tires.
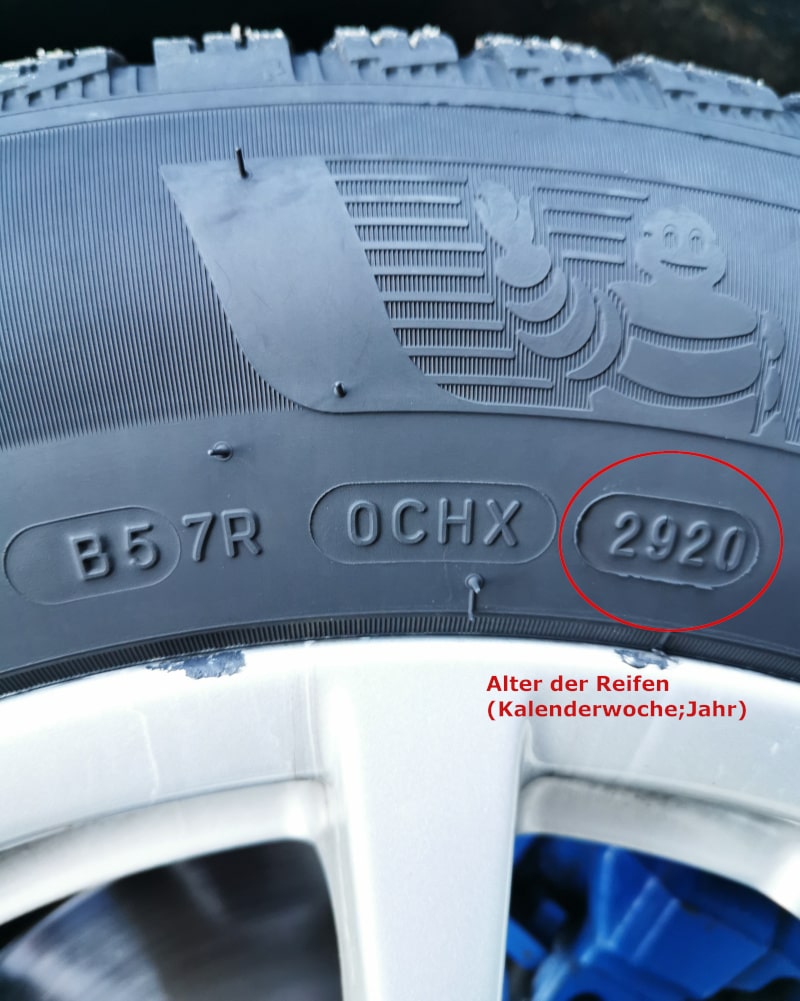
Is the tire sidewall too abraded or are there even blisters?
Then the tire should be thrown away and the purchase price reduced.
Evenly worn tires?
Don't forget to check the track settings. Sit in the car and steer to one side until it stops. Now take a look at the front tires. Are the tires evenly worn? If the inside or outside of the tire is more heavily worn, the tire must be replaced. Wheel alignment be arranged. If you notice an enormous difference (as in this picture below), the tire must also be replaced. A track adjustment is Part of the wheel alignment and costs you approx. 50€ -100€.
Below we explain how you can also detect errors in the axle geometry during the test drive.
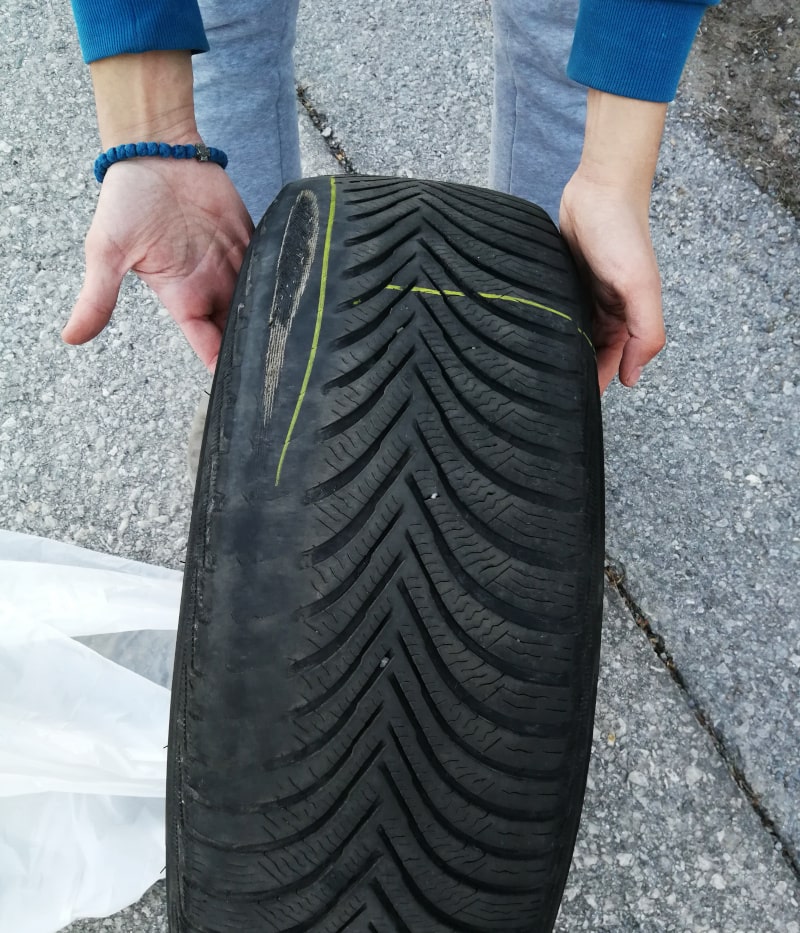
If only the inside of the tire is more worn, then there is too much pressure in the tire. Conversely, if the outsides are more worn → the tires are underinflated.
Curb damage to the rims?
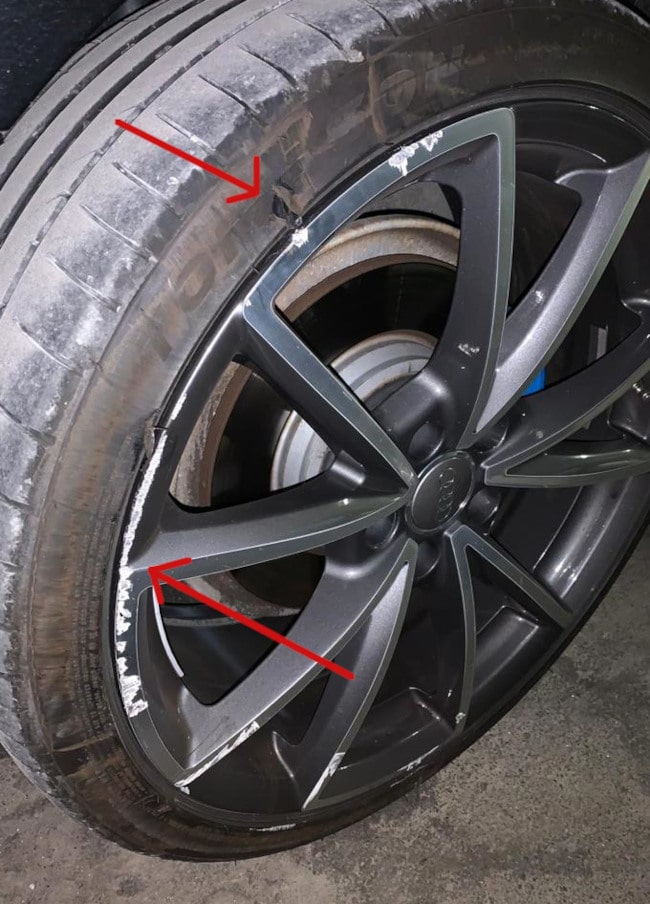
You should check the rims for severe abrasions and Check curb damage. Although these are not technical defects, the appearance may play a role for you. Small scratches or abraded edges are almost normal on used rims.
If no cracks or severe deformations of the rim are visible to the naked eye, you have already checked everything. You can only find out whether the rims are chipped or need to be balanced with the help of the mechanic's balancing machine.
8) Check brake pads & brake disks
Look at all 4 brake disks and brake pads. The rear axle will be a little more difficult, but here you can check the Simply feel the brake pads.
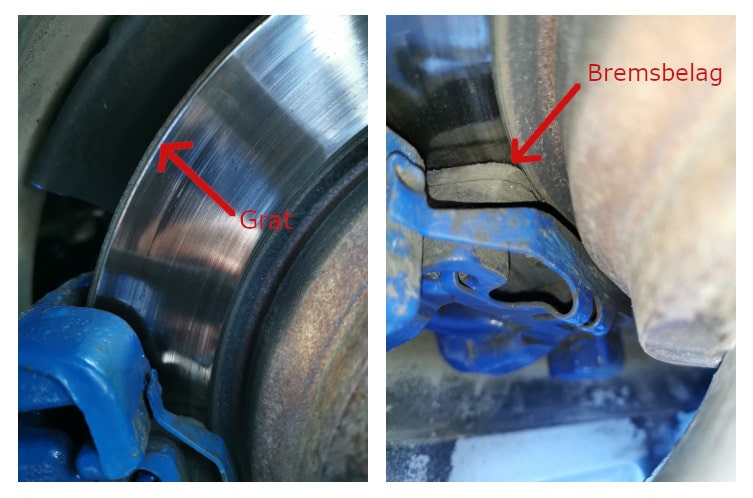
In any case, you should have another Material investment of at least €250 for 4x brake discs and brake pads.
9) Inspect wheel suspension & shock absorbers
Grab with your hands one of the wheels and shake it with full force. Push in and pull out towards you. Try to distribute your strength in all directions to get as much Bringing movement to the bike.
The bike should are allowed to move minimally or not at all. No noise should also be audible. If this is still the case, there is something wrong with the suspension.
For the front axle, you can Look behind the wheelto diagnose the damage if necessary. For the rear axle, you will need to use a lift.
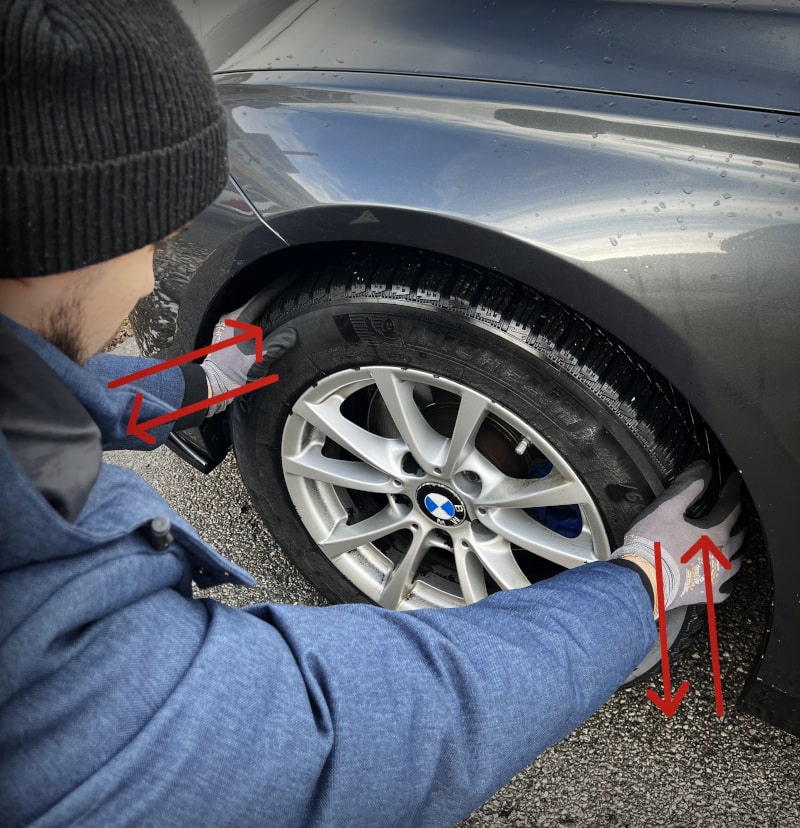
The inspection of the shock absorbers works in a similar way. Place your hands on the mudguard and push the car down. Try the car to the Swing up and down to bring.
This is exactly what the shock absorbers should prevent and the car Swing a maximum of 1 to 2 times. The second oscillation would even be too much. The second oscillation should rather be a damped version of the first oscillation.
If your used car bounces more than 1.5 times, driving comfort and safety are not guaranteed.
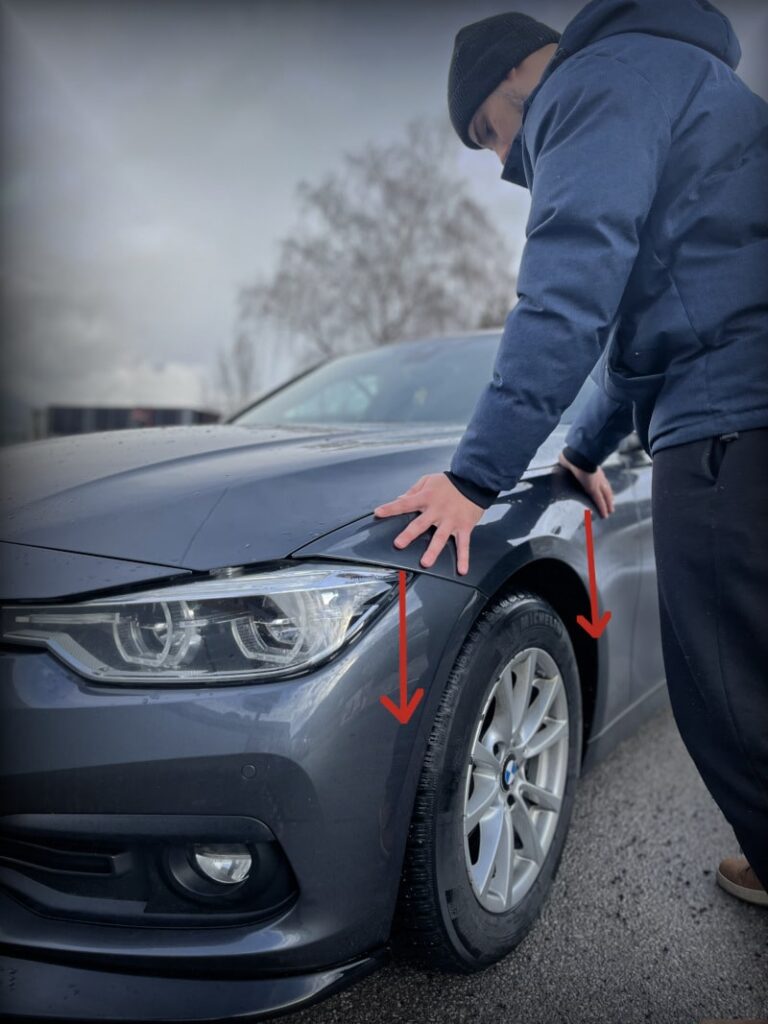
The cost of new shock absorbers varies from car manufacturer to car manufacturer. If no sports suspension or similar is installed as an original part, the material costs for 4x shock absorbers between 100€ - 550€. For sports versions or luxury vehicles, the costs are upwards of €1000.
10) Inspect the underbody
Don't forget to look under the car. Watch out for oil stains and puddles on the floor.
In principle no liquid should leak out and there should be no plastic covers or anything else hanging down.
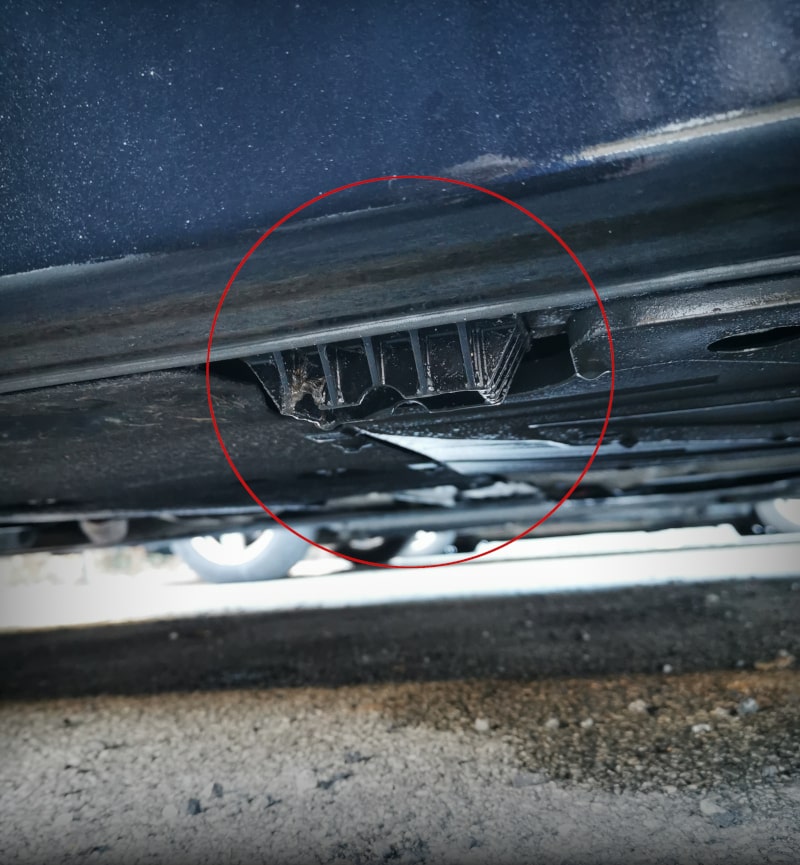
Check whether the Jack mount under your car is intact. It is not uncommon for one of the 4 pieces to be missing or dented.
However, these are easy to change and cost around €10.
11) Inspect the engine compartment
The rough check (V-belts, hoses, brackets)
It is important not to overlook any details when carrying out this inspection in the engine compartment. Here are a few tips:
⇒ Shake test
Shake all containers and fastenings briefly to see if they are tight. Broken brackets are not uncommon.
⇒ Check hoses for cracks
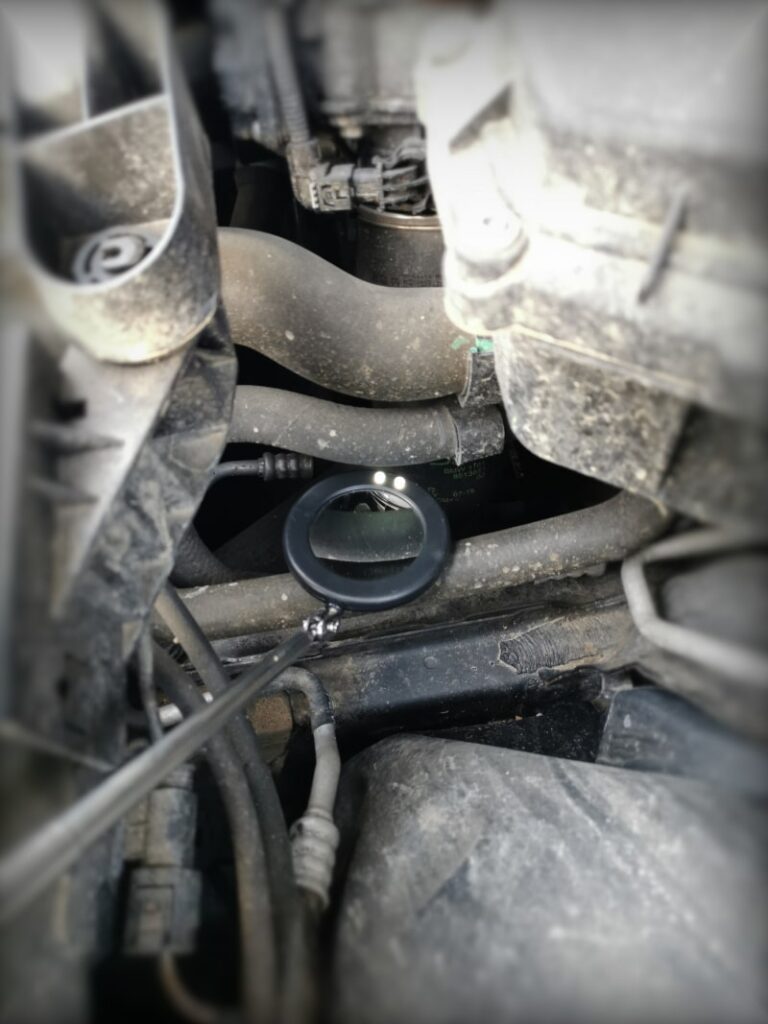
In stupid cases, cracks form on the lower side of the hose and are not noticeable without scanning the hoses. We use a extendable mirror. This is not expensive and can also be provide deeper insights into the engine compartment. A helpful and inexpensive tool that you can use in a wide range of applications. In this case to search for Cracks in the pressure hoses.
- Practical helper I Telescopic mirror with 2-fold ball joint and LED lighting
- Ultra-flat mirror with a height of just 10mm I Extendable 28 to 88cm I Non-slip soft grip for...
- Ideal for heat meters and geocaching
- For illuminating dark and inaccessible areas I bright white LED
⇒ V-belt
Keep an eye on the V-belt. This should not leave any yellowish traces not be brittle and certainly not form cracks. The V-belt is changed approximately every 80,000 - 100,000 kilometers and costs around €20. However, the cost of changing it is higher.
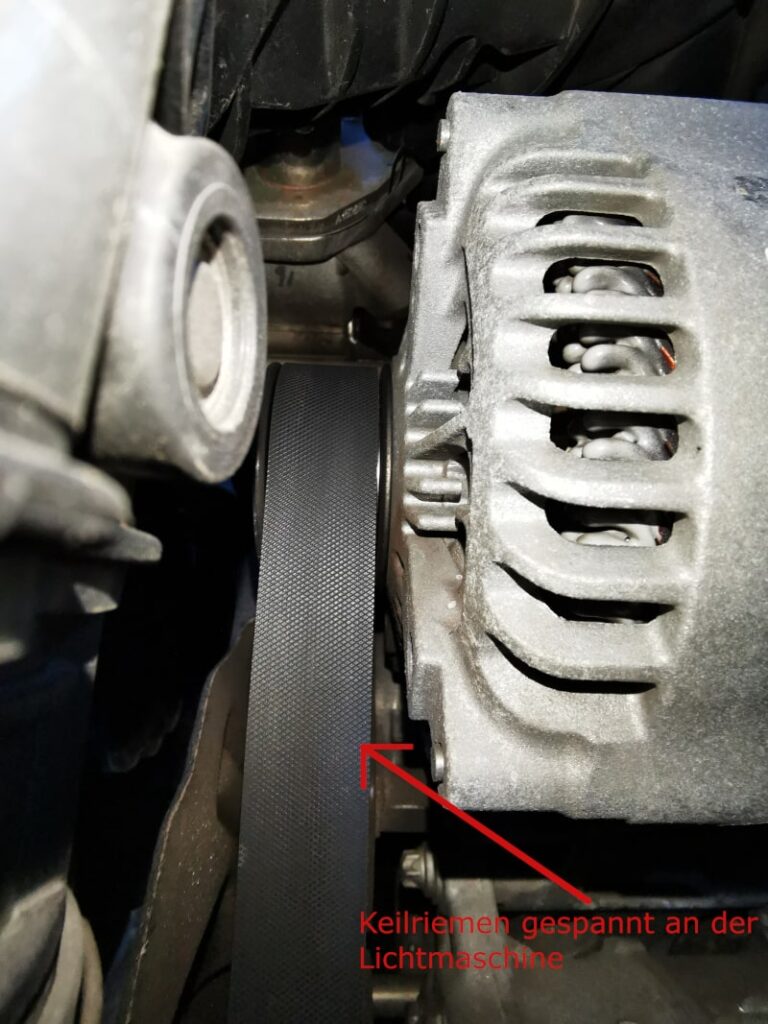
As with the underbody, no liquid should leak out of the engine compartment. Check the engine compartment floor and the lower components for oil stains or moisture. Of course, something may also have gone wrong when topping up the oil or coolant. If you notice anything, ask the seller whether he has recently topped up the fluid.
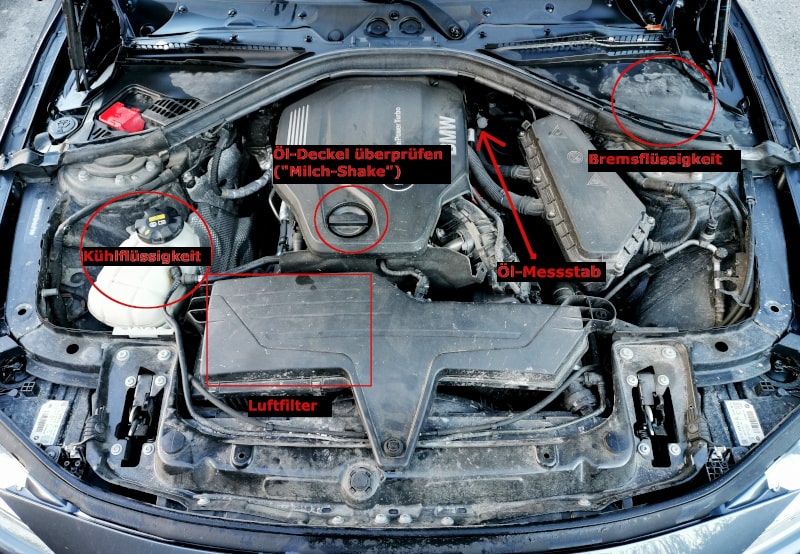
Check oils & fluid condition
⇒ Engine oil
The engine oil must not be above MAX. or below MIN. When opening the oil cap no yellowish "milkshake" jump out at you. This would mean that the Motor overheats has been. In this case, the only thing that helps is to run away. Engine damage is clearly a knockout criterion.
⇒ Cooling liquid
The coolant should show no traces of oil and not filled above MAX or below MIN. Be careful when opening the coolant tank! Do not unscrew the cap when the engine is burning hot. The pressure build-up in the container can cause it to fly around your ears.
Proceed with caution and only ever open the container slowly and when the engine is at most lukewarm.
⇒ Brake fluid
Brake fluid is corrosive to skin, metals and plastics. For your own protection, it is better to wear gloves.
It is common practice to change the brake fluid properly (complete replacement with bleeding) immediately after buying a used car. The reason for this is that previous owners often forget to change the brake fluid or the car has been parked for a long time. Long "non-use" of the brakes causes traces of water to form in the brake fluid, making it unusable. You can easily recognize the accumulation of water.
Fresh brake fluid is yellow and clear. Old and unusable brake fluid is greenish and cloudy.
⇒ Servo oil
The servo oil is described by the manufacturers as Lifetime filling sold. We see it differently and claim that Servo oil should also be changed at a wide interval. The condition of the servo oil does deteriorate over the years and can cause defects in the servo motor. It does not hurt to take a quick look in the servo oil reservoir. If this cannot be found in the engine compartment, the car probably has electric steering (BMW F30). The amount of servo oil must be correct (between MIN and MAX). The oil should also still have some of its original color left. Servo oil is amber to reddish in color (green is also possible). Under no circumstances should it smell burnt or be too viscous.
⇒ Measure battery voltage
The battery is located in most vehicles front under the hood. With some manufacturers (e.g. BMW) this is located in the side wall at the rear of the trunk.
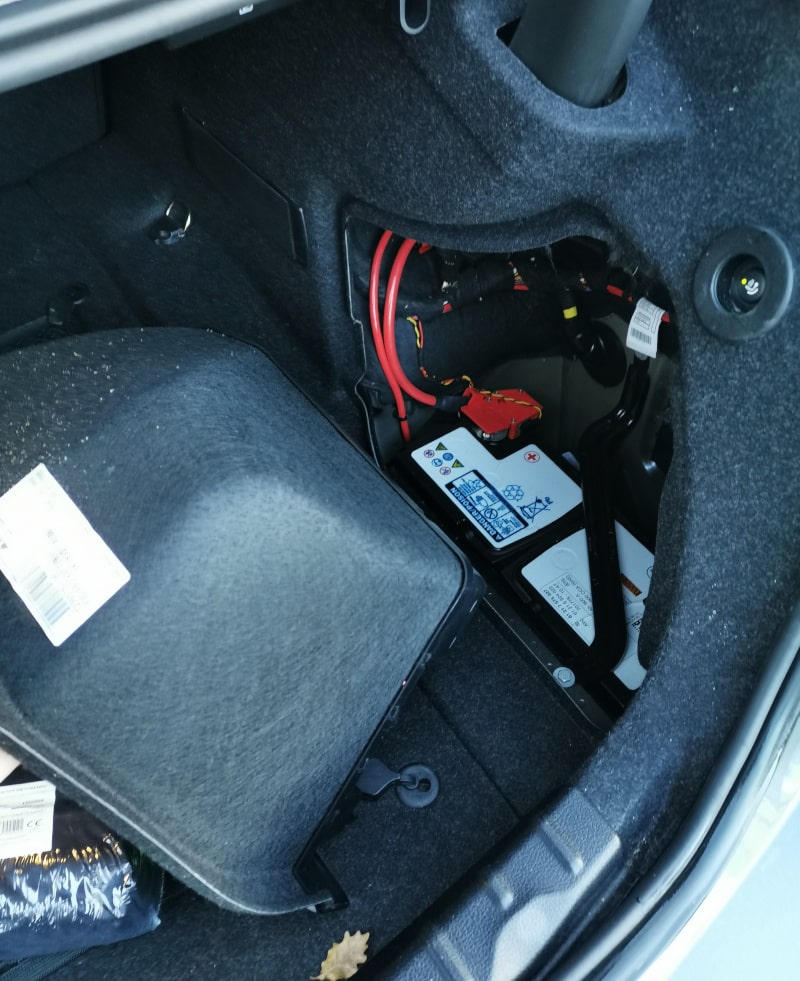
If electrical consumers are intermittent or the car is difficult or impossible to start, this may be due to the battery. Pack your Switch off the multimeter and check the voltage between the plus (+) and minus (-) terminals in DC voltage mode.
If this below 12 V, the battery may be dead or the seller has not charged them after a long period of standing around.
At this moment, you cannot judge whether the battery is broken or not. Whether you as the customer want to take the risk is up to you. One new car battery costs on average approx. 110 € to 220 €.
But if you want to be on the safe side, we recommend a Battery tester to purchase. This shows you immediately when connecting whether the Battery is broken or just needs to be recharged. The device also shows you when the engine is running, whether the alternator is charging the battery or not. This allows you to check the function of the alternator at the same time.
- 🔥【Easy to use】- Connect and Go. It provides a quick display to determine whether...
- 🔥【Safety guaranteed】 - Reverse hook-up and overvoltage protection make it safe and...
- 🔥【High accuracy】 - With a four-digit illuminated digital display, the...
- 🔥【Rubber color body to achieve the original quality】 - Black rubber color on...
12) Test drive checklist for buying a used car
Before you start the test drive, take another look under the used car with the engine running. On hot days, the only thing that may leak is condensation from the air conditioning.
Also check the exhaust and the emissions again. When No blue smoke and the quantity is acceptable (at cold start), you can start the test drive. If blue smoke escapes, this is a sign of burnt oil. We have already dealt with the causes above (defective cylinder head gasket, valves, overfilled oil).
Testing the braking process
While you are warming up the car, you can check the brakes. Accelerate and brake once:
If the steering wheel jerks when braking, the wheels are probably not balanced. If you have already noticed worn brake pads and curved brake discs, this may also be the reason for the juddering.
When braking, the Do not touch the floor with the brake pedal under any circumstances. This would be a sign of brakes that have not been bled or leaking brake fluid.
Test: Steering & track settings
Find a straight line with few obstacles and uneven roads. Then leave for a your hands from the steering wheel for a moment. Repeat this test 2-3 times and observe whether the car pulls to one side. If this is the case, the Track setting adjusted and the used car needs a wheel alignment.
As mentioned above, unevenly worn tires are also a sign of incorrect track settings.
Gear shifting smooth and without jerking?
How does shifting gears feel? Whether automatic or manual transmission:
→ When changing gear, you have to "feel" or listen.
The gear shift should be checked during the test ride not noticeably jerky and no screeching noises (metal against metal).
If the gears are difficult to shift or are not shifting smoothly, the Gearbox oil out of date or there is a defect. Repairing or replacing a gearbox is expensive and time-consuming. It is therefore best to stay away from cars with possible gearbox damage or gearbox oils that are not changed regularly.
Load the car for a short time
Once you have warmed up the engine, it's full throttle!
Let the car run properly for a short time and observe whether there are any unnoticeable weak points. A used car must also be Maintain its performance under full load and don't let up! Test the suspension and steering by performing faster steering maneuvers. But don't overdo it here, you shouldn't jeopardize your safety by doing so. You should also not exceed the speed limits.
Questions when buying a used car
In addition to the PDF checklist and the tips, we have Questions compiled. Confront the seller to get a better picture of the vehicle.
Conclusion & checklist for buying a used car as PDF
If you come across any defects when inspecting the car in person, you should inform the seller and ask them about them. The completed checklist for buying a used car, the questions and the test drive will help you above all in negotiating the price. Before the car purchase is considered for you personally, the seller must justify himself and answer the questions. The main goal is to uncover manipulations and ultimately not lose any money!
You can download the checklist as a PDF here:
* Affiliate links are marked with a *. Nothing changes for you and the offer/price remains the same. You can find more information about affiliate links here.
More Articles
BMW Android Auto & Carplay retrofit | Plug & Play | CARLUEX
BMW Android Auto & Carplay retrofitCARLUEX Experience Are you driving a BMW built before 2020 and want to finally use Android Auto?...
BMW Sport Plus coding: Unlocking driving mode - instructions
BMW Sport & Comfort Plus codingUnlocking driving mode - BMW coding made easy - In this guide you will learn step by step how to...
BMW coding software comparison 2025 | ESys, BimmerCode & Co
BMW Coding Software ComparisonESys, BimmerCode & Co. There are now countless tools for coding a BMW. Different software providers offer...
