DIY Guide: How to Replace the Wheel Bearing
on a Passat
Is the wheel bearing really defective?
To be 100% sure that your problem is actually caused by the wheel bearing, you should read the following article: “Defective Wheel Bearing – Symptoms, Causes & Costs”. There, we explain what a wheel bearing actually is and why it’s important to replace a defective one as soon as possible. In addition, we list all the relevant symptoms and causes of a faulty wheel bearing and discuss the total costs involved. So before you grab your wrench to replace the wheel bearing, make sure to check out the details in the linked article.

Required Tools & Components
Tools
Components:
If you're missing anything, we've linked all the recommended tools and components for this replacement right here:
![Wagenheber hydraulisch 2,5T – TÜV – 85-380mm Hub – flach für tiefergelegte Autos – Rangierwagenheber inkl. Gummiauflagen [Karton]](https://diy-leonmotors.de/wp-content/plugins/aawp/public/image.php?url=YUhSMGNITTZMeTl0TG0xbFpHbGhMV0Z0WVhwdmJpNWpiMjB2YVcxaFoyVnpMMGt2TlRFMk5EWnFNWFJQY1V3dWFuQm58MTc3NzgxNDc5OA=)


Wheel Bearing with Hub *
Wheel bearing incl. hub for VW Passat Variant (365) 2.0 TDI 4motion – with/without integrated ABS sensor.

Step 1: Jack Up the Car & Preparations
1.) Preparation:
Park the vehicle on a flat surface and engage the handbrake. If necessary, secure the rear wheels with wheel chocks to prevent it from rolling. Then loosen the wheel nuts using an impact wrench and the socket size 17. Next, lift the front of the vehicle with a car jack.

2.) Treat all fasteners:
As a general rule, before you start, briefly clean all fasteners with a wire brush and lubricate them with WD-40. This can help prevent seized bolts in advance. Even better would be to do this a day before replacing the wheel bearing.
Step 2: Remove Brake Caliper & Brake Carrier
1.) Loosen the brake caliper:
Entferne als Erstes den Drahtbügel, der den äußeren Bremsbelag vom Verrutschen hindert. Benutze dafür entweder einen Schraubenzieher oder eine kleine Brechstange.

The screws of the brake caliper are located behind the caliper itself. Remove the dust caps from the guide pins and loosen the mounting bolts of the brake caliper with an Allen key size H7.

Then carefully remove the brake caliper and hang it on the suspension with a wire to avoid tension on the brake hose.
2.) Remove the brake carrier:
Remove the brake pads from the brake carrier and loosen the mounting bolts of the brake carrier itself with a socket size 18. These are also located on the backside.


Step 3: Loosen Brake Disc & Control Arm
1.) Remove the brake disc:
Loosen the front mounting bolt of the brake disc with a Torx bit T30 and remove the brake disc. If the brake disc is stuck, use a hammer to gently tap it from behind to loosen it.

2.) Loosen the control arm:
Under the entire wheel suspension are the mounting bolts of the control arm. Loosen these with a socket size 18 and push the control arm out of the suspension to finally gain free access from behind.

Step 4: Loosen the flange bolt & pull out the drive shaft
1.) Loosen the flange bolt of the drive shaft:
To gain full access to the wheel hub including the wheel bearing, you need to loosen the central flange bolt of the drive shaft with a socket size 27. Manufacturers always recommend using a new flange bolt during reassembly.

2.) Pull out the drive shaft:
Once you have removed the flange bolt, you can now push the drive shaft out of the hub. You don’t need to worry about the exact position when pulling it out, as the drive shaft is connected to the hub by a fine splined connection. This means you can safely reinsert the drive shaft into the new wheel hub including the wheel bearing during reassembly.

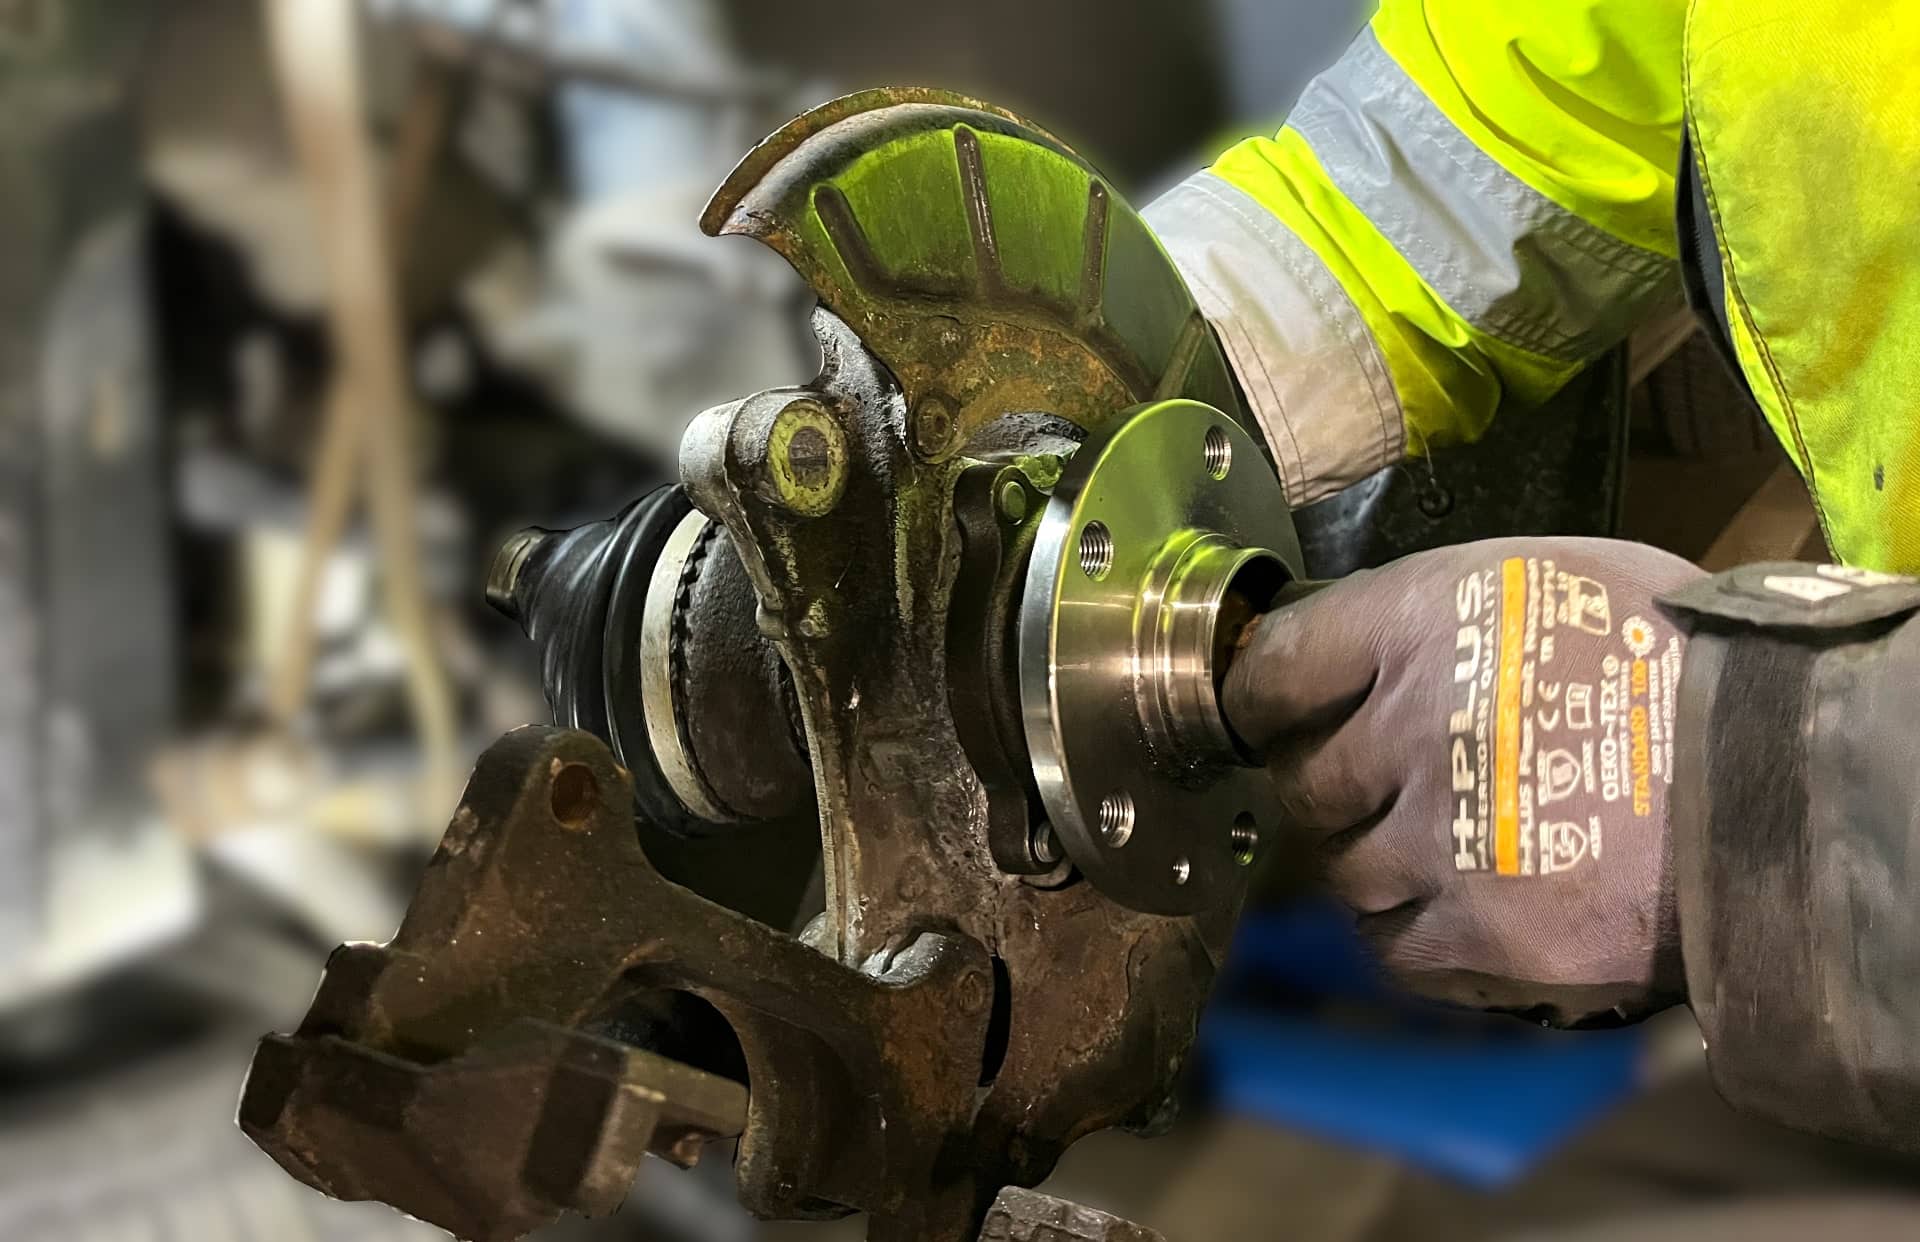
Step 5: Remove the hub with the wheel bearing
1.) Loosen the wheel hub with the wheel bearing:
The wheel hub is secured by a total of four mounting bolts from the rear. These can be loosened using special bits that are not typically standard in every toolbox. These are XZN bits that hold the wheel bearing including the hub in the Passat B7. To loosen them, you need a socket adapter with XZN bit size 12.


2.) Remove the hub including the wheel bearing:
Pull the wheel hub together with the wheel bearing off the axle. You might find it helpful to use a hammer and some WD40 here.

Step 6: Install new wheel bearing including wheel hub
Thoroughly clean the axle mount with a wire brush and brake cleaner to remove dirt and rust. Instead of a regular wire brush, a cordless drill with a round wire brush attachment works best for this.

Next, apply a thin layer of copper paste on the contact points of the wheel hub to prevent corrosion in the future. Place the new wheel hub including the wheel bearing onto the axle and align it properly to secure it again with the new bolts.
Tighten the new bolts with the specified torque (see table below) and use the XZN bit socket size 12 again for this.

Step 7: Reassemble in reverse order
Reassembly is naturally done in reverse order to disassembly, with the exception that you should pay attention to the torque specifications listed in the table below.
Additionally, the axle shaft's central bolt should only be tightened to the specified torque when the vehicle is in its normal position. Normal position means the suspension should not be fully extended. The steps for reassembly are as follows:

Tabelle: Zusammenfassung der Drehmomente
| Component | Bolt | Torque [Nm] |
|---|---|---|
| Hub including wheel bearing | XZN bolt No. 12 | 74 Nm |
| Control arm (strut) | Hex nut No. 18 | 55 Nm |
| Brake disc | Torx 30 bolt | 9 Nm |
| Brake carrier | Hex bolt No. 18 | 75 Nm |
| Brake caliper | Allen bolt H7 | 35 Nm |
| Axle bolt | Hex bolt No. 27 | 195 Nm |
| Räder | Hex bolts No. 17 | 120 Nm |
Hinweis: Consult the vehicle documentation or repair manuals for specific values, as these may vary depending on the model variant.
Conclusion: Replacing the Wheel Bearing Yourself
Replacing the wheel bearing on the VW Passat B7 is a challenging but feasible task for experienced DIY enthusiasts. With proper preparation and the right tools, you can fix the problem yourself and save significant costs.
A major challenge in this repair is definitely the risk of bolt breakage, especially those of the brake carrier. Bolts corrode and seize over time, particularly if the correct torque was not applied during previous repairs. Therefore, when loosening stubborn bolts, you should always proceed with some heat, lubricant like WD40, and above all, patience.
In our opinion, the rest of the wheel bearing replacement process is child's play with this guide for an experienced hobby mechanic. Always ensure to follow the specified torque values and check after the repair that everything functions properly and no symptoms persist.

However, if you do not consider yourself an experienced hobby mechanic or have any doubts, you should leave the wheel bearing replacement to a professional workshop. This guide is intended solely as assistance and does not encourage anyone to work on their car themselves.
Affiliate links are marked with a *. When you purchase one of these products, we receive a small commission. Nothing changes for you and the offer/price remains the same. You can find more information about affiliate links here.
More Articles
Original BMW CarPlay freischalten – Selber, Günstig & Einfach
BMW Apple CarPlay nachrüsten Selber, Günstig & Einfach Du willst Apple CarPlay in deinem BMW nutzen, hast aber keine Lust,…

Hat mein BMW eine WIFI Antenne? So findest du es heraus!
Hat mein BMW eine WIFI Antenne?So findest du es heraus! Hat dein BMW überhaupt eine WiFi-Antenne? Gerade wer Apple CarPlay…

KINGBOLEN Ediag Elite | How good is the diagnostic device?
The KINGBOLEN Ediag EliteOur experience You are a demanding hobby mechanic and are looking for a diagnostic device that doesn't just display error codes, but...