VCDS Battery Coding
How to do it right!
In this guide, we’ll show you step by step how to code a new car battery using the VCDS software. The example vehicle is a 2017 Skoda Kodiaq, but this guide is applicable to all modern VAG car models, including Skoda, VW, and Audi.
- Why Does a Car Battery Need Coding?
- The VCDS program
- Step 1: Establishing a Connection with the Car
- Step 2: Setting the Battery Capacity
- Step 3: Specify Battery Manufacturer
- Step 4: Adjusting the Battery Serial Number
- Step 5: Reading Error Code Memory
- Steering Angle Sensor Calibration
- Conclusion
- More Articles
Why Does a Car Battery Need Coding?
Modern vehicles rely on advanced electronics that depend on a consistent power supply. When replacing a battery, the car’s control unit needs to know the new battery’s capacity to optimize its performance.
Coding ensures precise battery regulation, which is crucial for the longevity and proper functioning of the car’s electrical components. If you’re planning to replace the battery yourself, we recommend first reading our “How to Replace a Skoda Battery” guide before proceeding with the coding process.
The VCDS program
VCDS, also known as VAG-COM, is a powerful diagnostic tool for Volkswagen Group vehicles. It allows not only reading fault codes but also adjusting various control unit parameters.
For instance, VCDS can initiate diesel particulate filter regeneration or, as in this case, code a new battery.
The VCDS software is available in different versions. When searching for the software on the Internet, you will come across many different versions and offers. In principle, there is only one original version from the manufacturer itself, namely from Ross-Tech.
However, you will find countless copies on the Internet, which also fulfill their purpose, but are not up to date and therefore also pose a small risk. For coding the battery as in this example, however, it does not matter which VCDS you have.
The newer the car is, the newer the version of VCDS should be. It's up to you how you get to the software. We naturally recommend the original version.
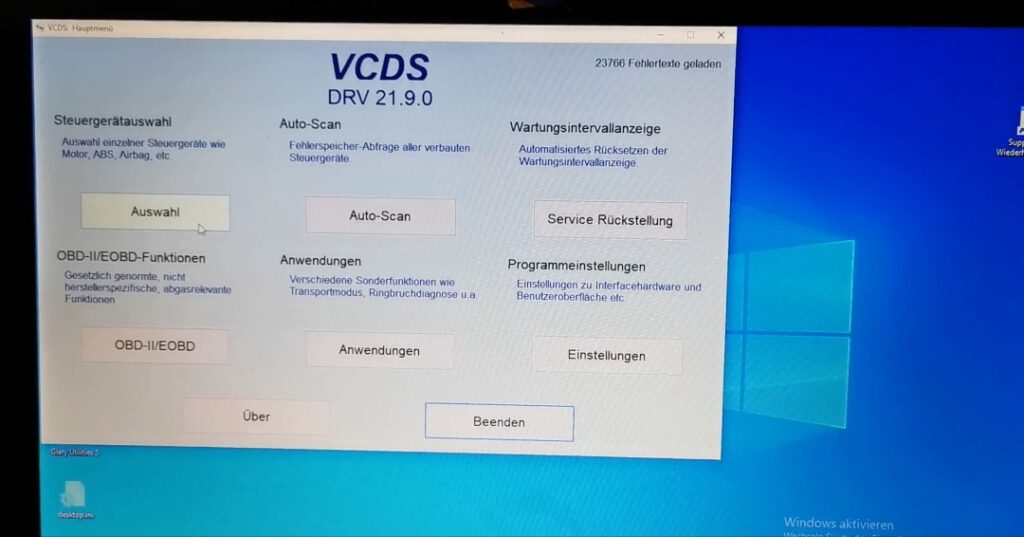
For this tutorial, we’re using Version 21.9.0 to code a battery for a 2017 Skoda Kodiaq.
Step 1: Establishing a Connection with the Car
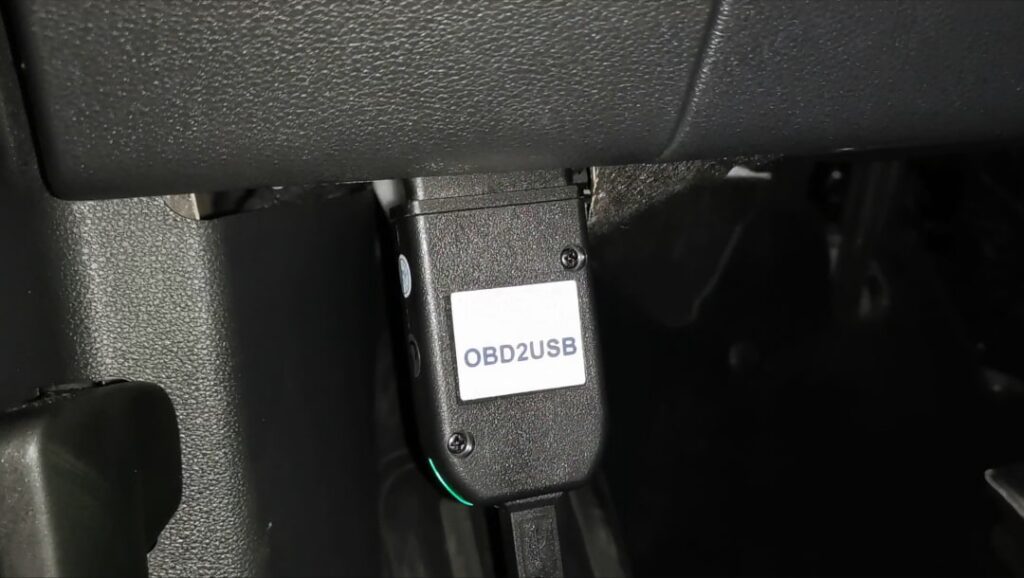
To get started, connect your laptop to the car using a HEX-V2 cable, which is widely available. Here’s a compatible diagnostic cable:
Now use the cable to connect the OBD interface of your car with the USB connection of your laptop. The OBD socket is located in the footwell on the driver's side of all vehicles.
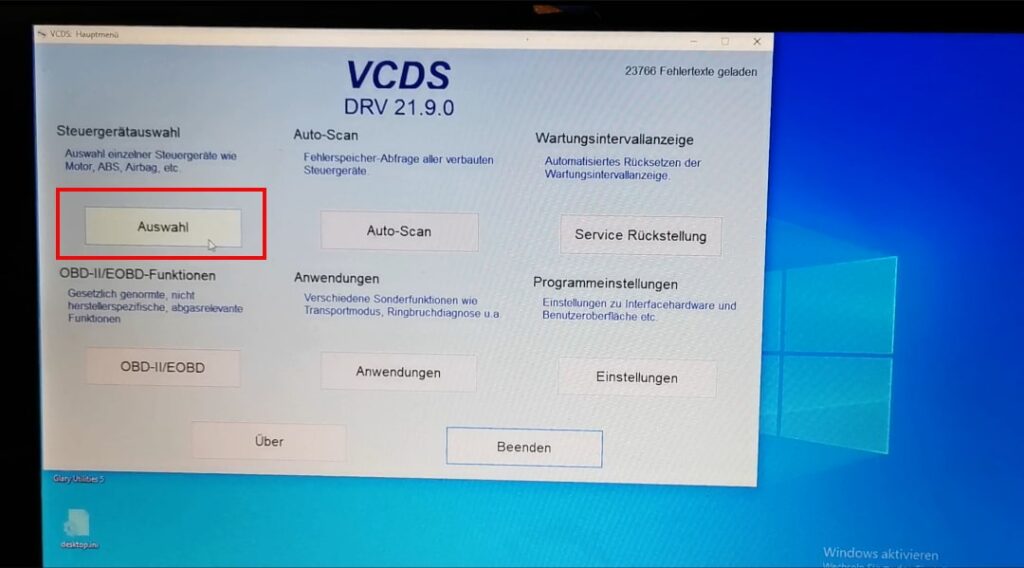
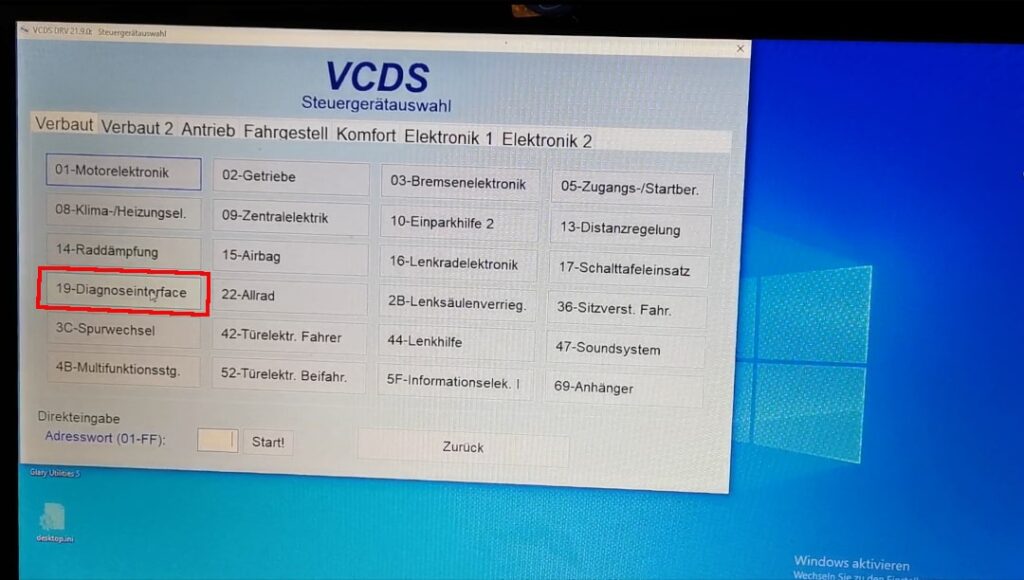
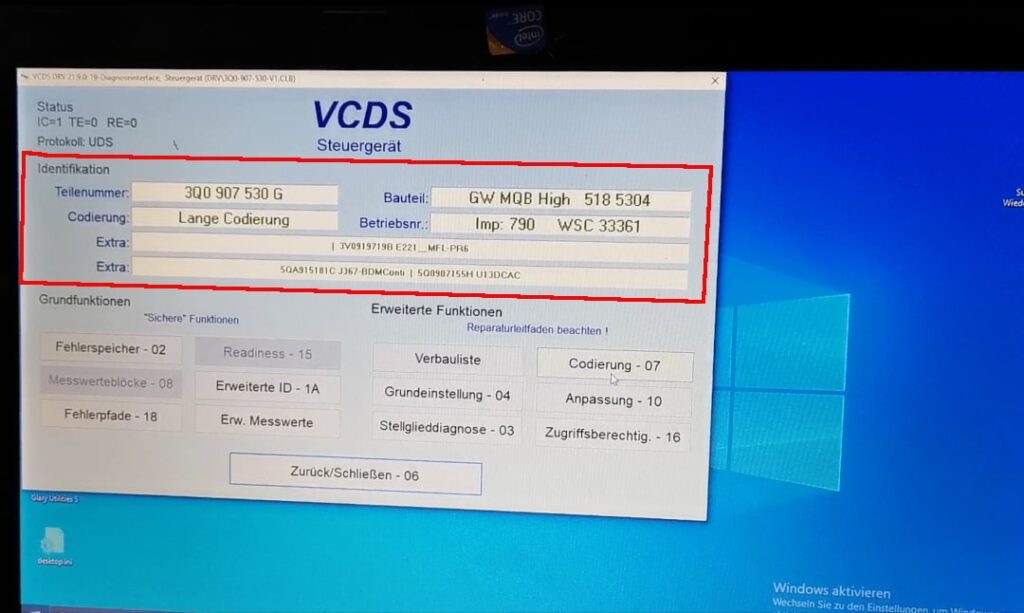
Next, start the program and click on "Control unit selection". Once in the menu, select the item "19-Diagnostic interface" .
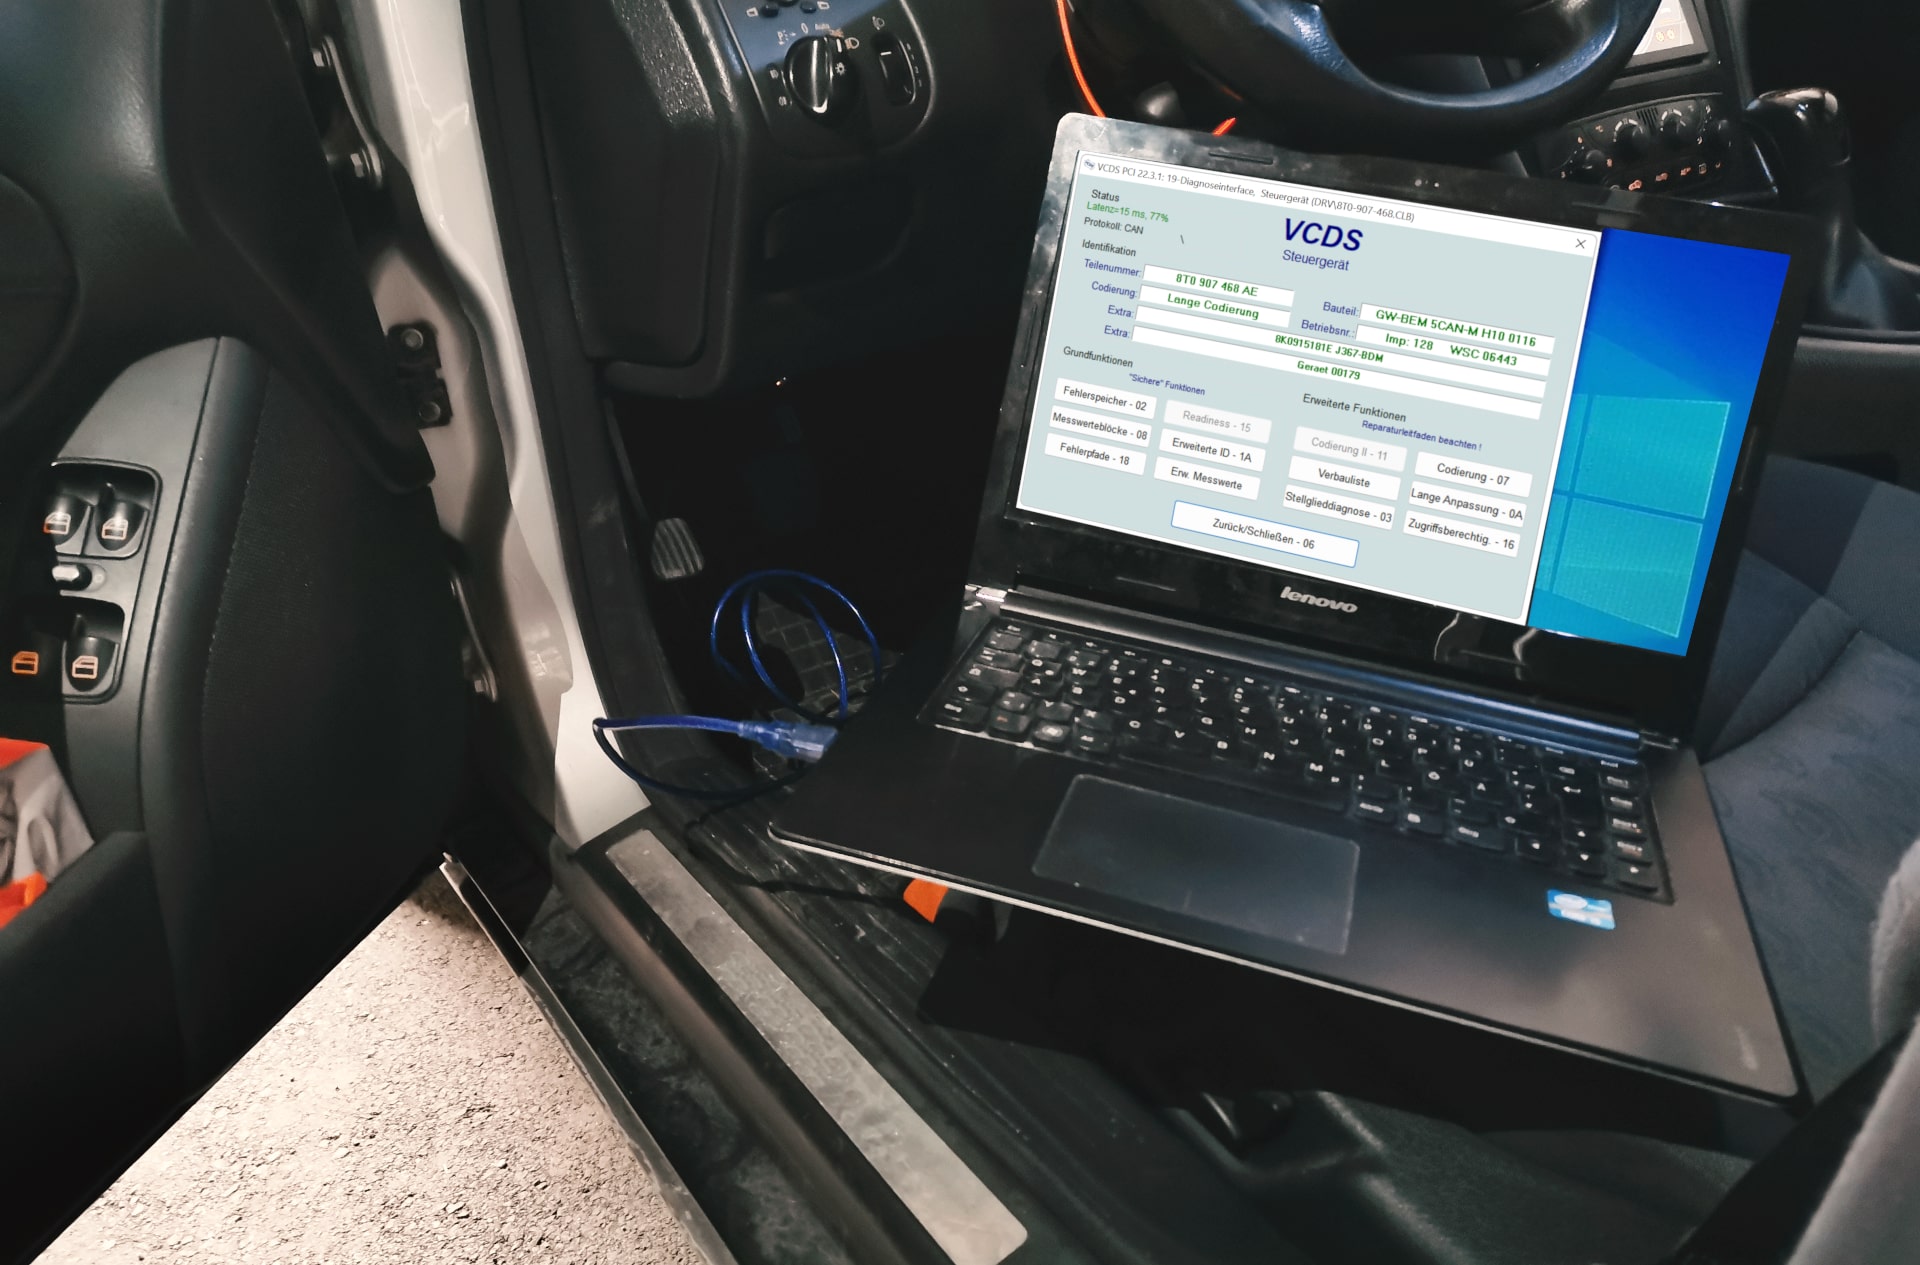
The control unit is now identified there and an attempt is made to find a Connection with the control unit to produce. If you have successfully connected to the car, it will look something like this:
Step 2: Setting the Battery Capacity
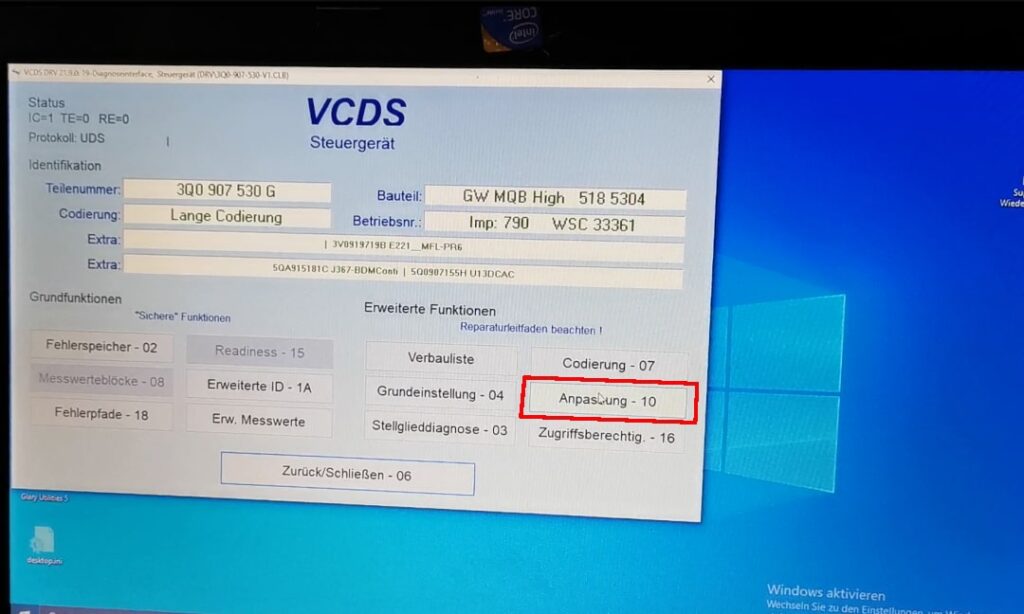
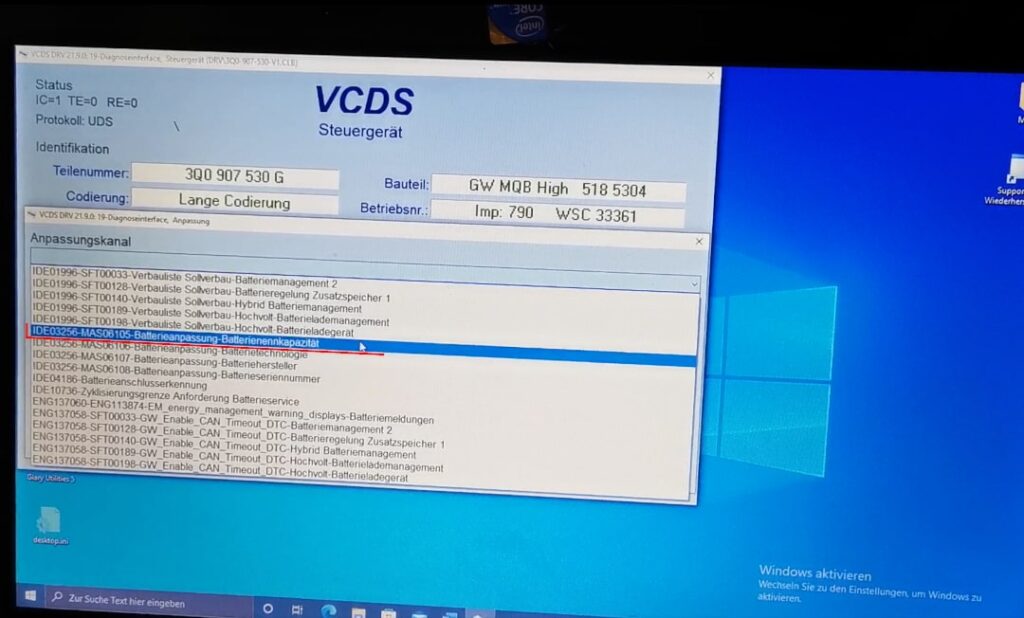
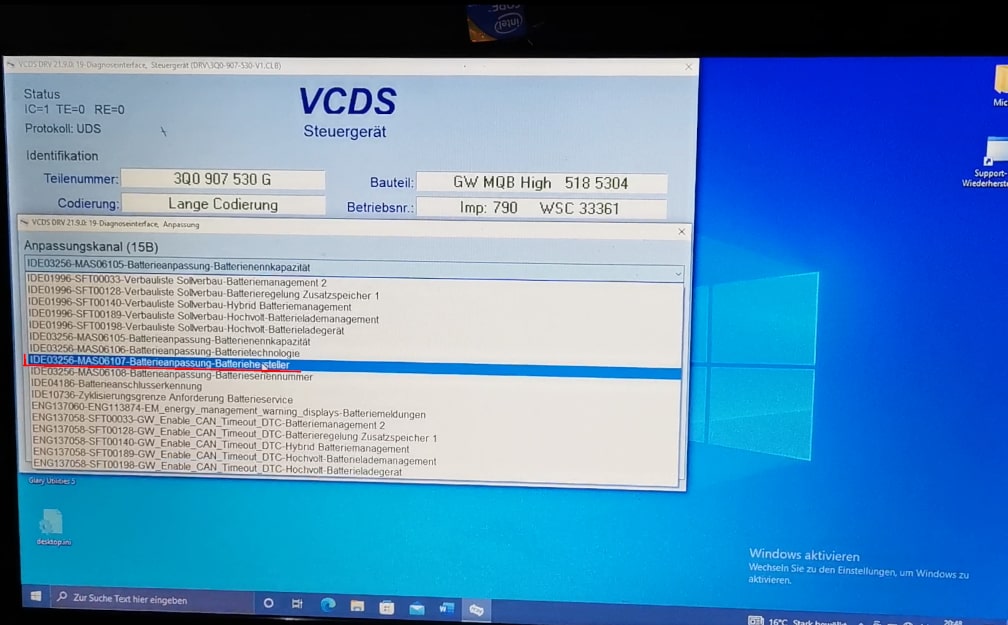
After successfully connecting, navigate to “Adaptation-10” and select the “Battery Adjustment – Battery Capacity” channel.
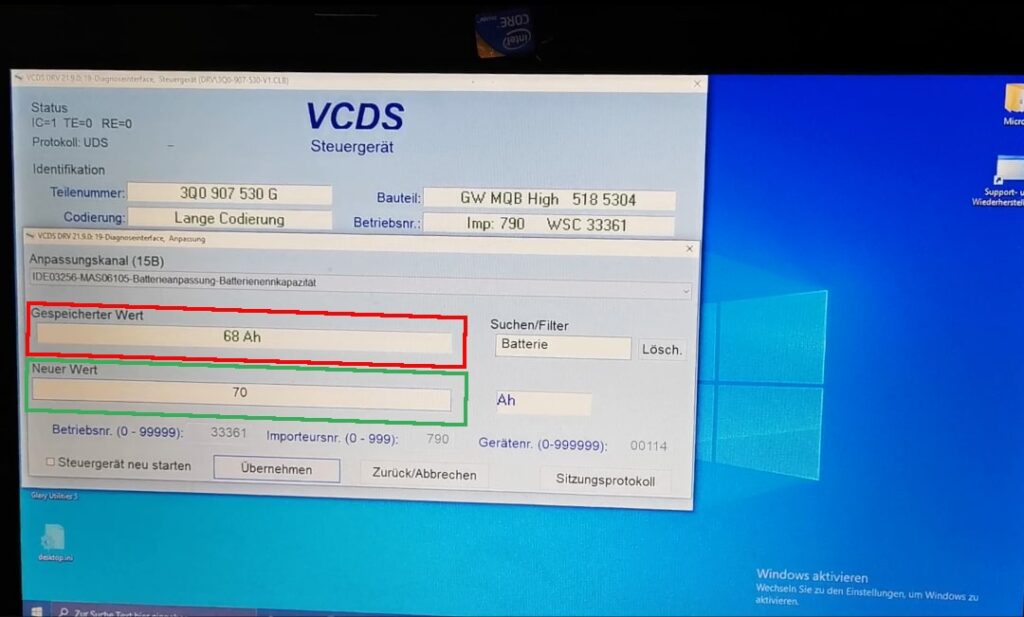
Here, you’ll input the ampere-hour (Ah) rating of the new battery. Ensure the new battery’s Ah value doesn’t differ significantly from the old one. You can find out more about this in the article "Changing the Car Battery".
Since in this example the new battery has 70Ah, we change the value from 68Ah to 70Ah.
Step 3: Specify Battery Manufacturer
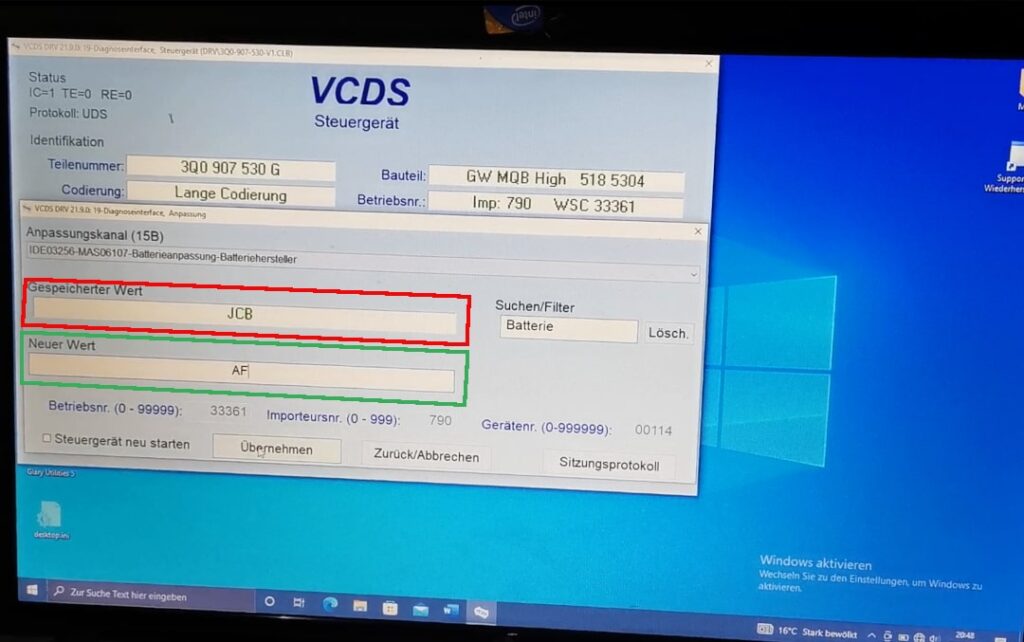
Next, select the customization channel "Battery adaptation - battery manufacturer" .
Once in the menu, enter the manufacturer name of the battery here. The control unit uses Abbreviation and not the complete Manufacturer names. You can see which abbreviation you need from the following list.
In our case, we have installed the "Banner" Battery in the Skoda Kodiaq. Therefore we enter the Acronym "AF".
Step 4: Adjusting the Battery Serial Number
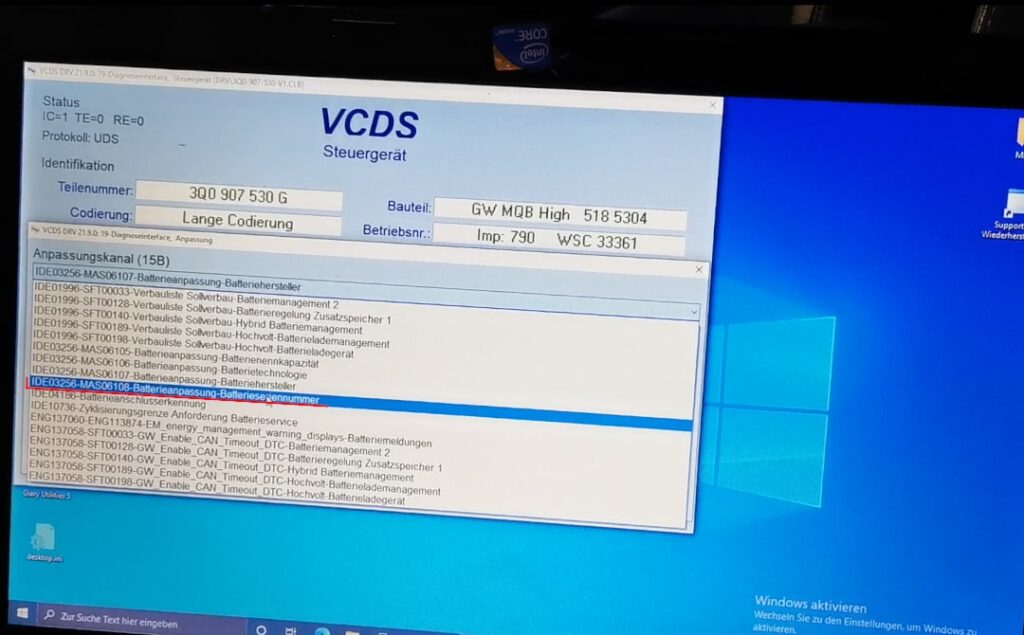
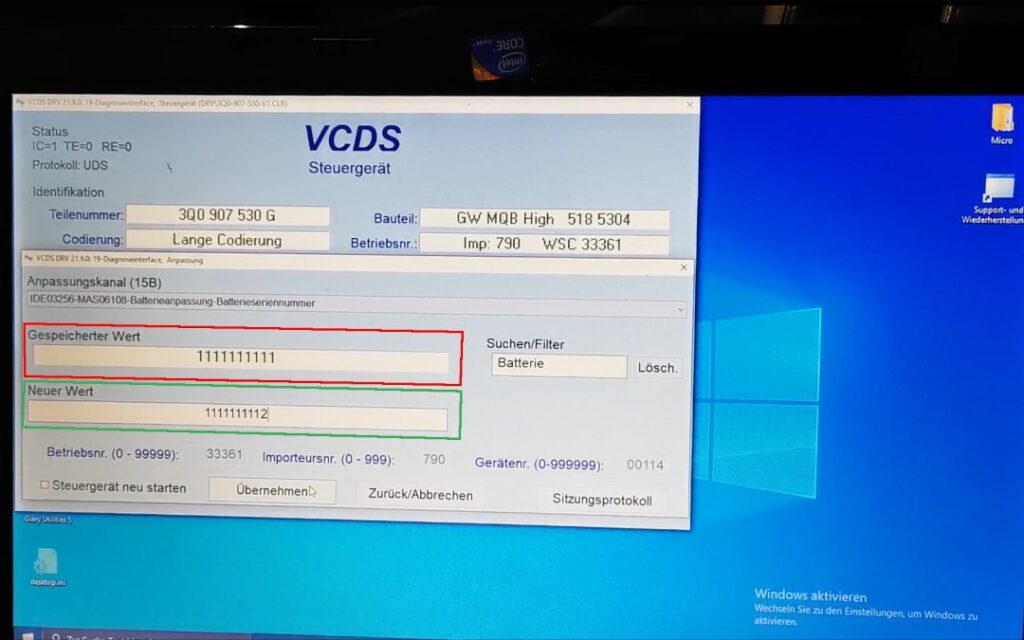
In this step, you change the serial number of the battery under the customization channel "Battery customization-battery serial number".
In most cases, the serial number consists of a series of "Ones". However, it is sufficient if you only change the last digit of the serial number so that the control unit can recognize the new battery. In this example, we have changed the serial number "1111111111" to "1111111112" and confirmed it with the button "Take over" (Übernehmen).
Step 5: Reading Error Code Memory
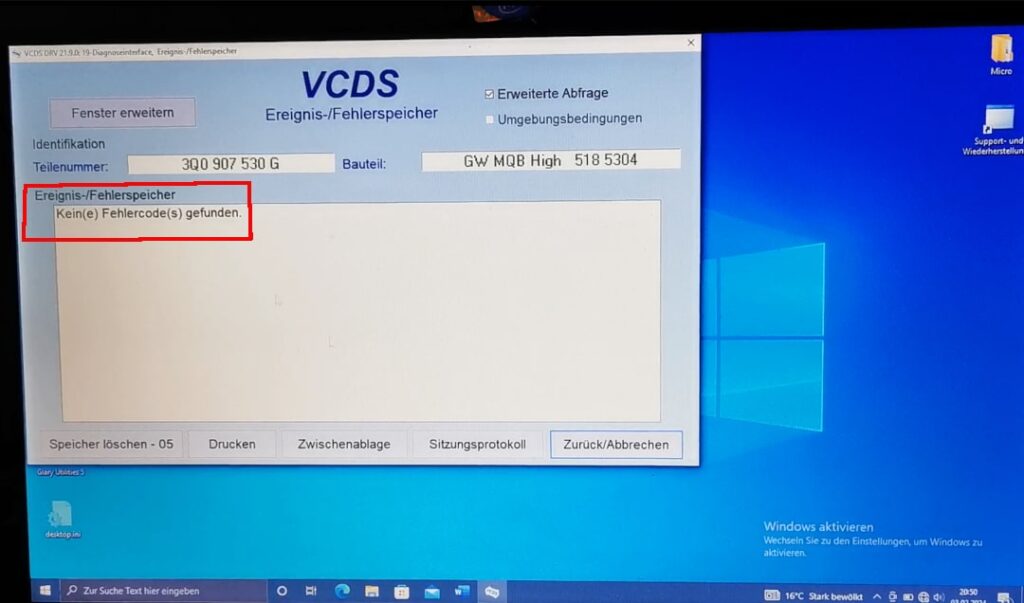
Once you have made the changes, read out the error memory to make sure that everything is working properly.
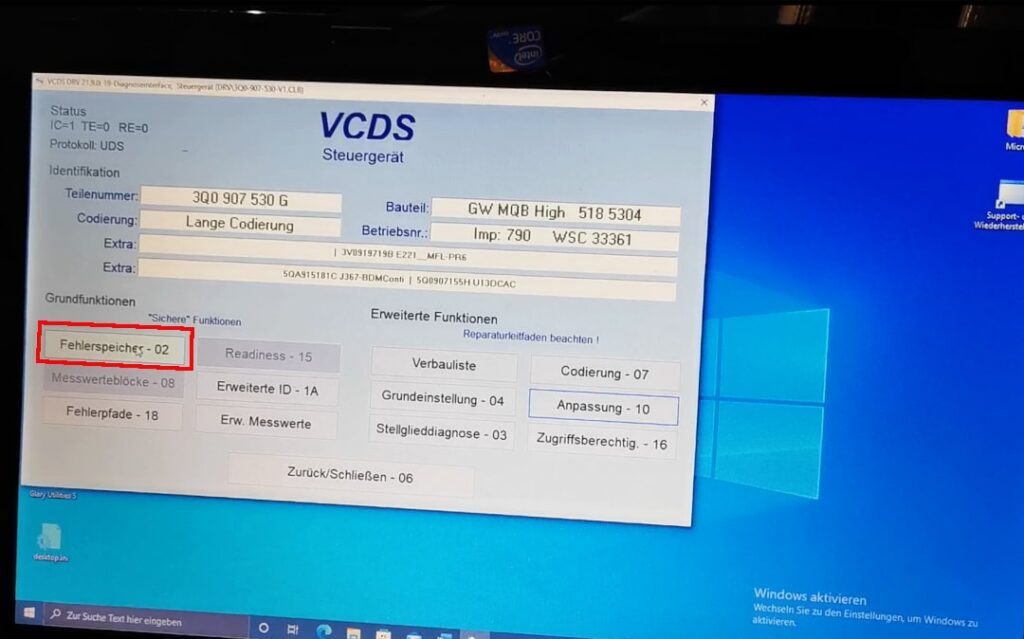
To do this, navigate in the diagnostics interface to the menu item "Fault memory - 02".
If no error codes are present, the coding process of the new battery is completed..
Steering Angle Sensor Calibration
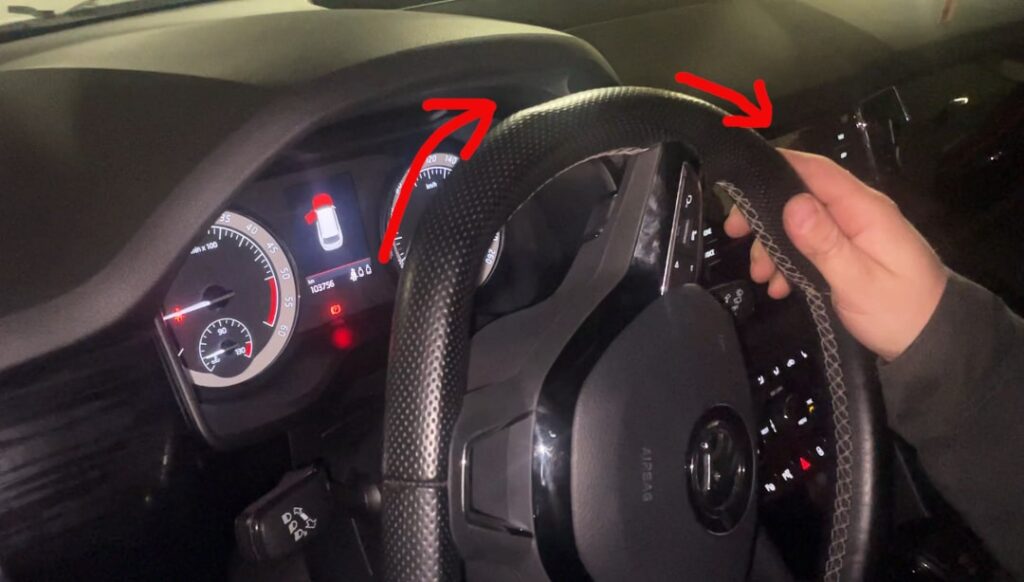
Some newer VAG models, like the Skoda Kodiaq, may require steering angle sensor calibration after a battery replacement.
No software is needed for this step. Simply turn the steering wheel fully to the right and then fully to the left. This should reset the sensor, clearing any error codes.
Conclusion
With this detailed guide, you can now code a new battery in your car using VCDS. Checking for error codes and calibrating the steering angle sensor completes the process, potentially saving you significant costs.
While this process is straightforward and low-risk, remember that you are responsible for any work on your vehicle. This guide is provided for informational purposes, and we cannot assume liability for any damages.
* Affiliate links are marked with a *. When you purchase one of these products, we receive a small commission. Nothing changes for you and the offer/price remains the same. You can find more information about affiliate links here.
More Articles
BMW Sport Plus codieren: Fahrmodus freischalten – Anleitung
BMW Sport & Comfort Plus codierenFahrmodus freischalten – Anleitung BMW-Codierung leicht gemacht – In dieser Anleitung erfährst du Schritt für…
BMW Codieren Software Vergleich 2025 | ESys, BimmerCode & Co
BMW Codieren Software VergleichESys, BimmerCode & Co. Um einen BMW zu codieren gibt es mittlerweile unzählige Tools. Unterschiedliche Softwareanbieter bieten…
BMW Emergency Call System Error Battery Replacement | G-Series GUIDE
BMW Notruf Systemfehler?Lösung: Batterie wechseln! Der bekannte BMW Notruf Systemfehler (B7F341) tritt bei vielen BMW Fahrzeugen auf, egal ob E-Serie,…

